contact us

Drop us a line!

Use the form on the right or email dowdhousestudios@gmail.com


Prairie Grove, AR, 72753
USA

JDowd_SucculentPots.jpg

Journal

News from Dowd House Studios: places to find our pottery, exhibitions, classes & workshops, new forms and exciting projects.

Filtering by Category: New Ideas

Tiny Food

Jenny Dowd

Tiny Food!

What is cuter and more mouth watering?

I do not know.

When the Fayetteville Public Library Innovation Lab asked me to teach an air dry clay workshop earlier this month I could not stop thinking about making tiny foods. (If you live in or near Fayetteville, be sure to check out the events at the library - the workshops are free!)

It’s been awhile since I have used air dry clay, but I remembered that working with Fimo is fun. Plus it comes in lots of bright colors and has a long working time.

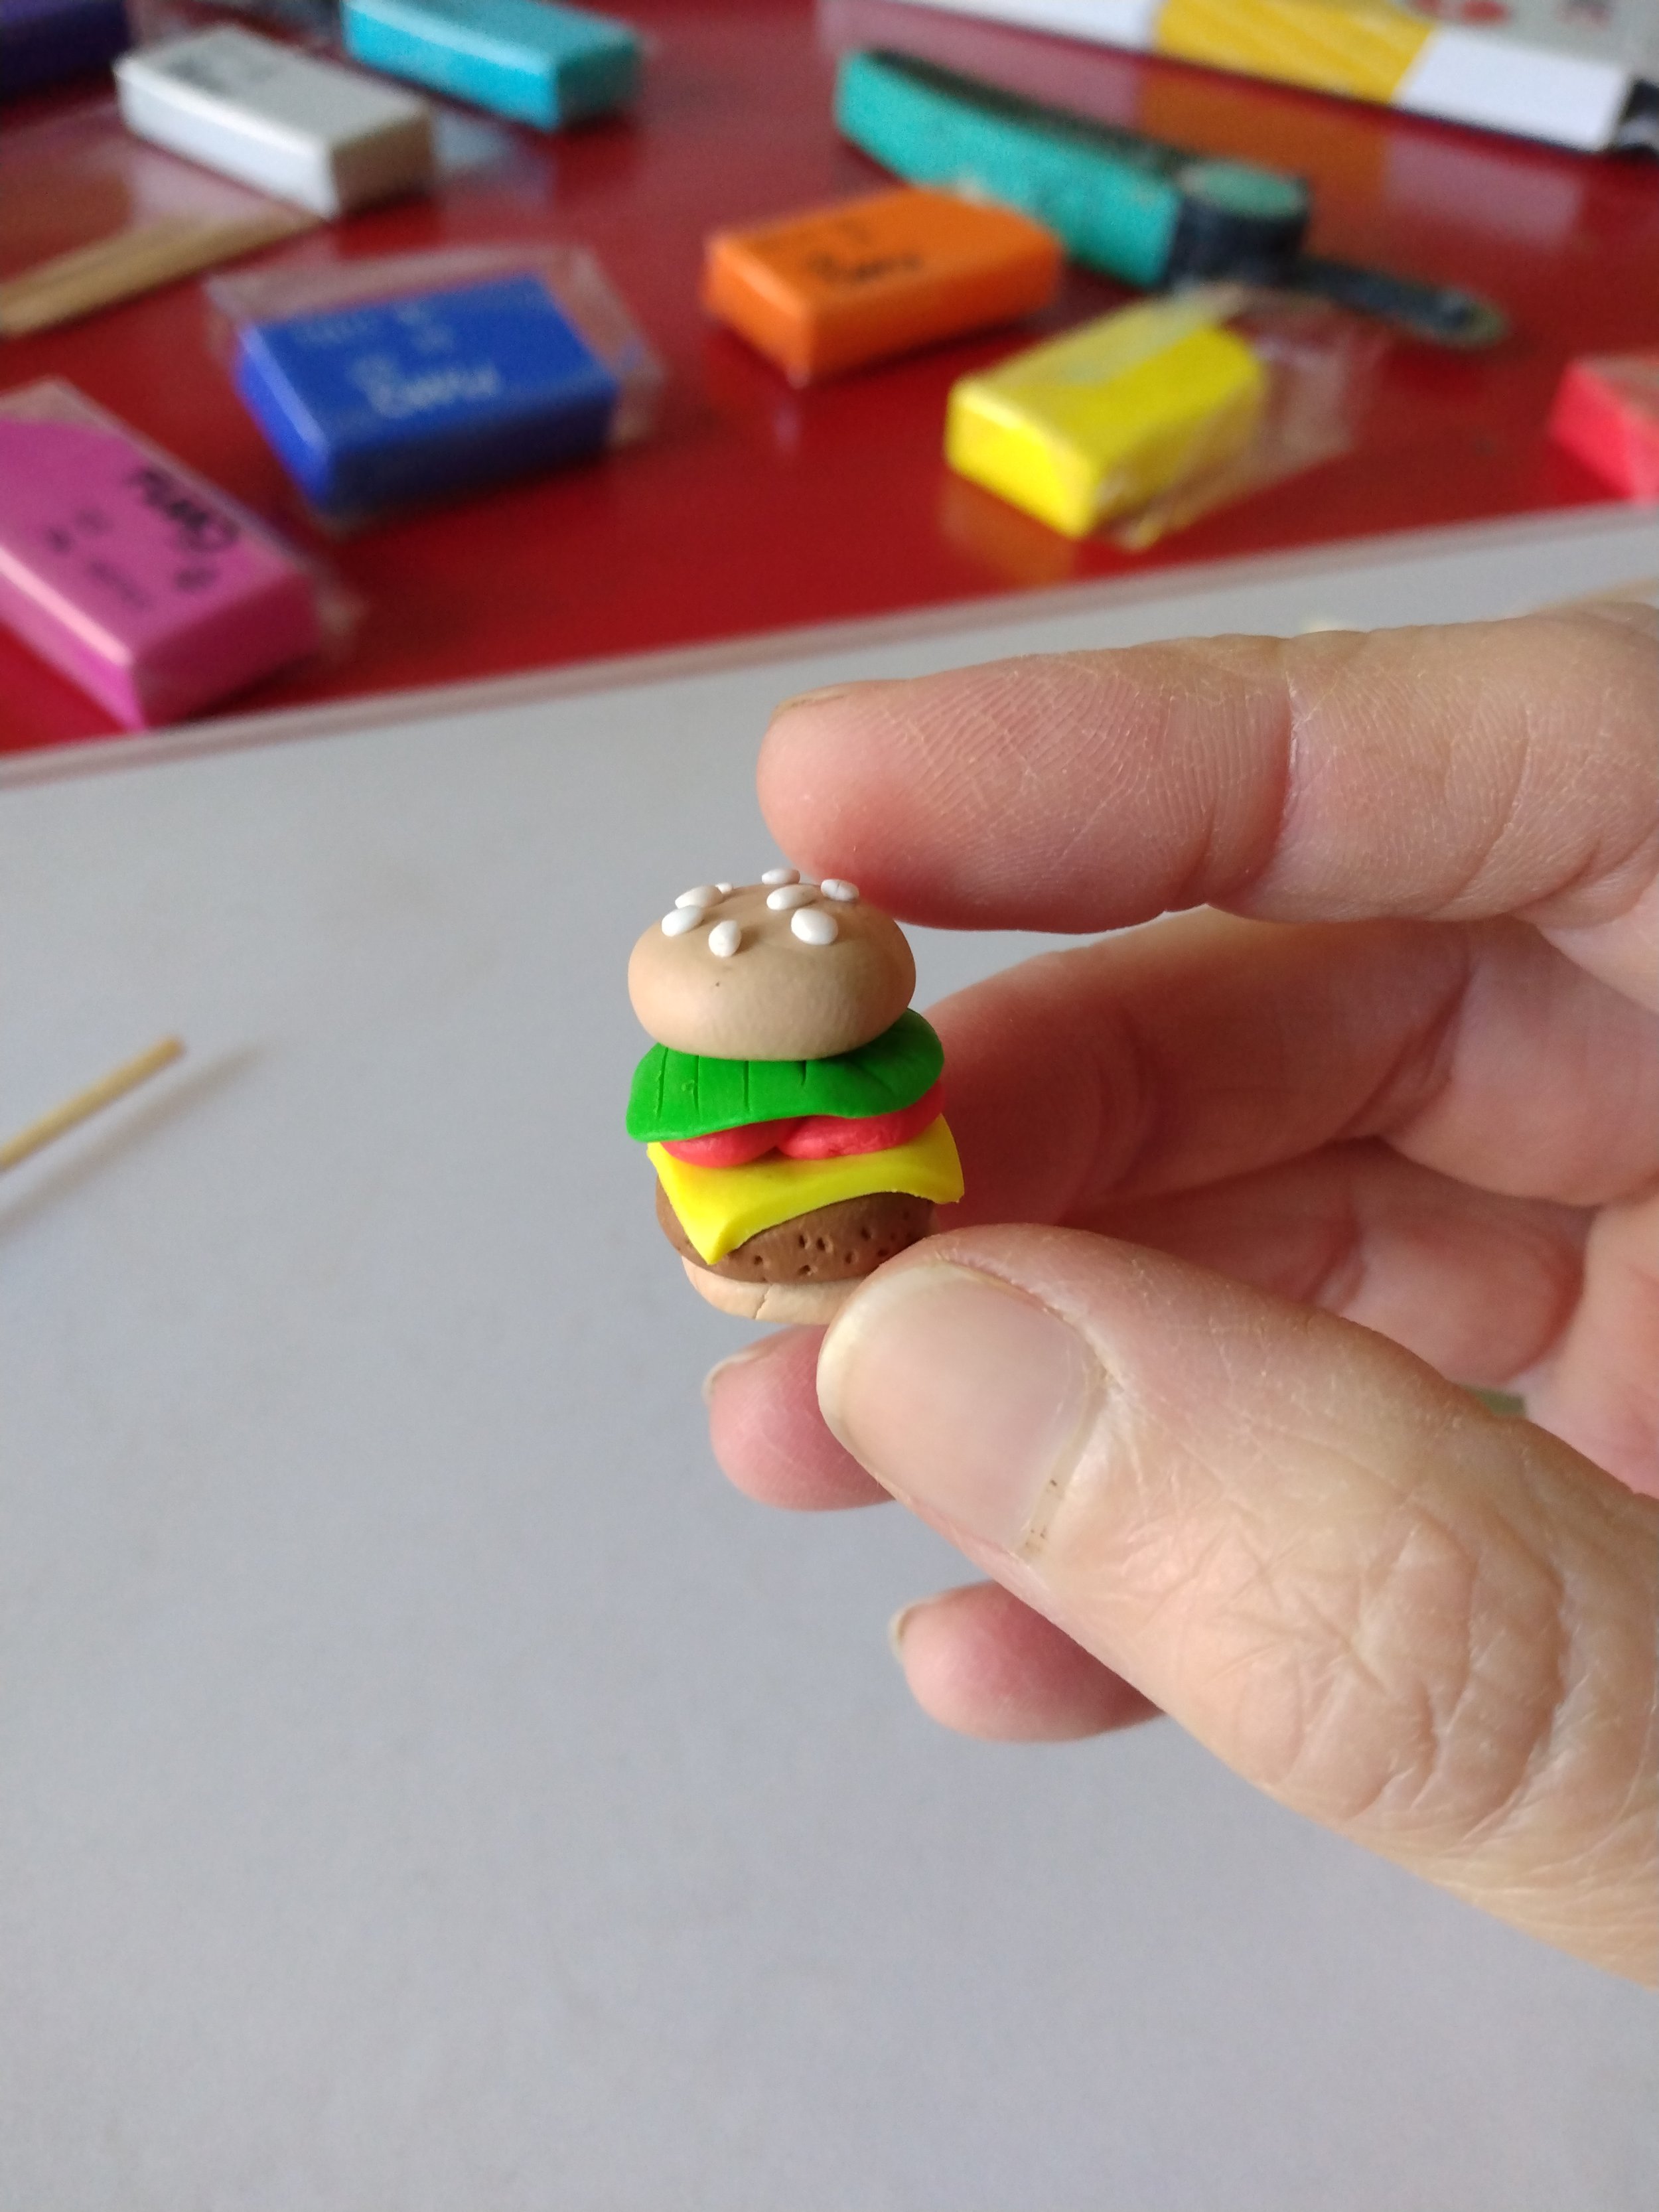
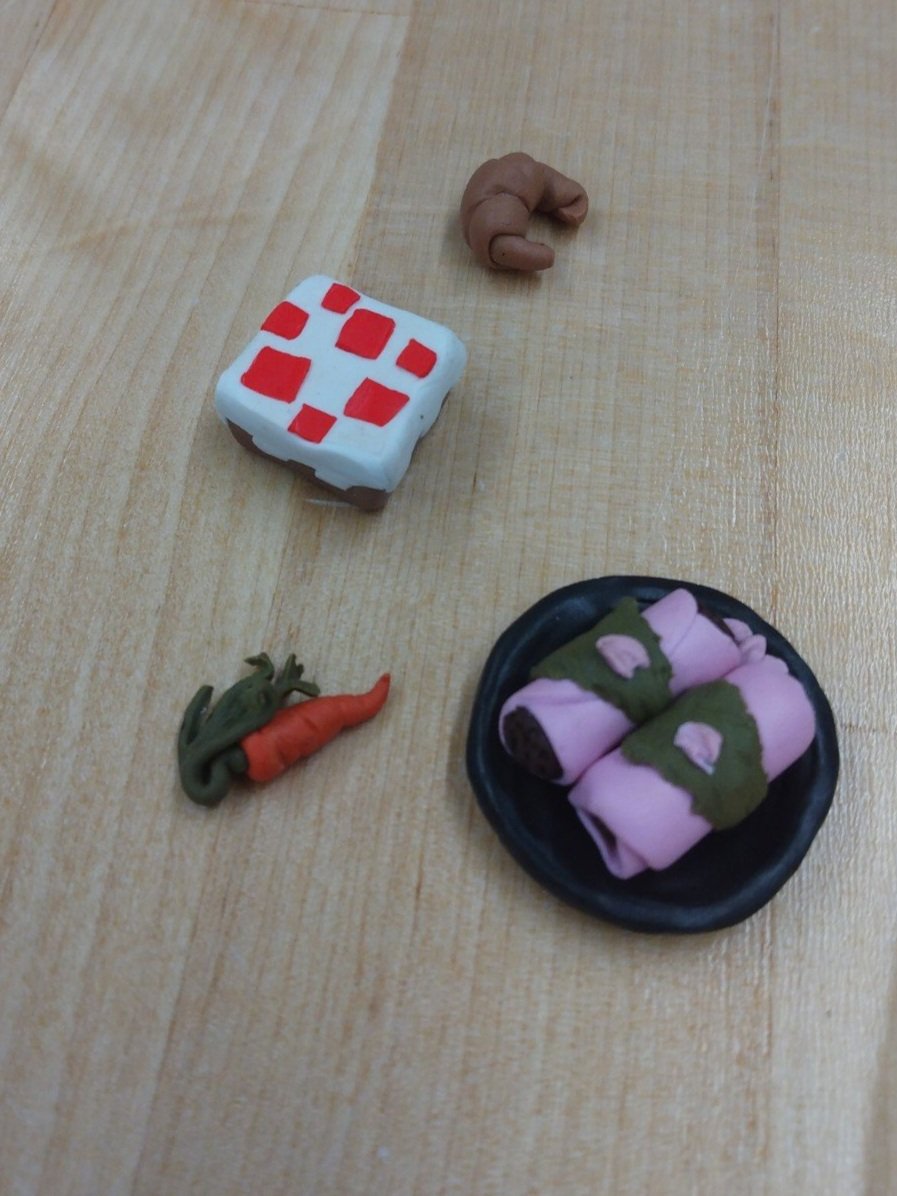
I spent a couple of afternoons at the kitchen table, giggling while I made some of my favorite foods. Making waffles might have been my favorite, I was pretty excited when I realized a match stick would be perfect for making the square waffle-spots. Unfortunately, the experience was not all giggles. I managed to burn / melt the first batch in the toaster oven (probably not the best for even and exact heat.) I was so sad that I didn’t take a photo, so you’ll just have to imagine a bunch of sad-burnt-melted tiny food.

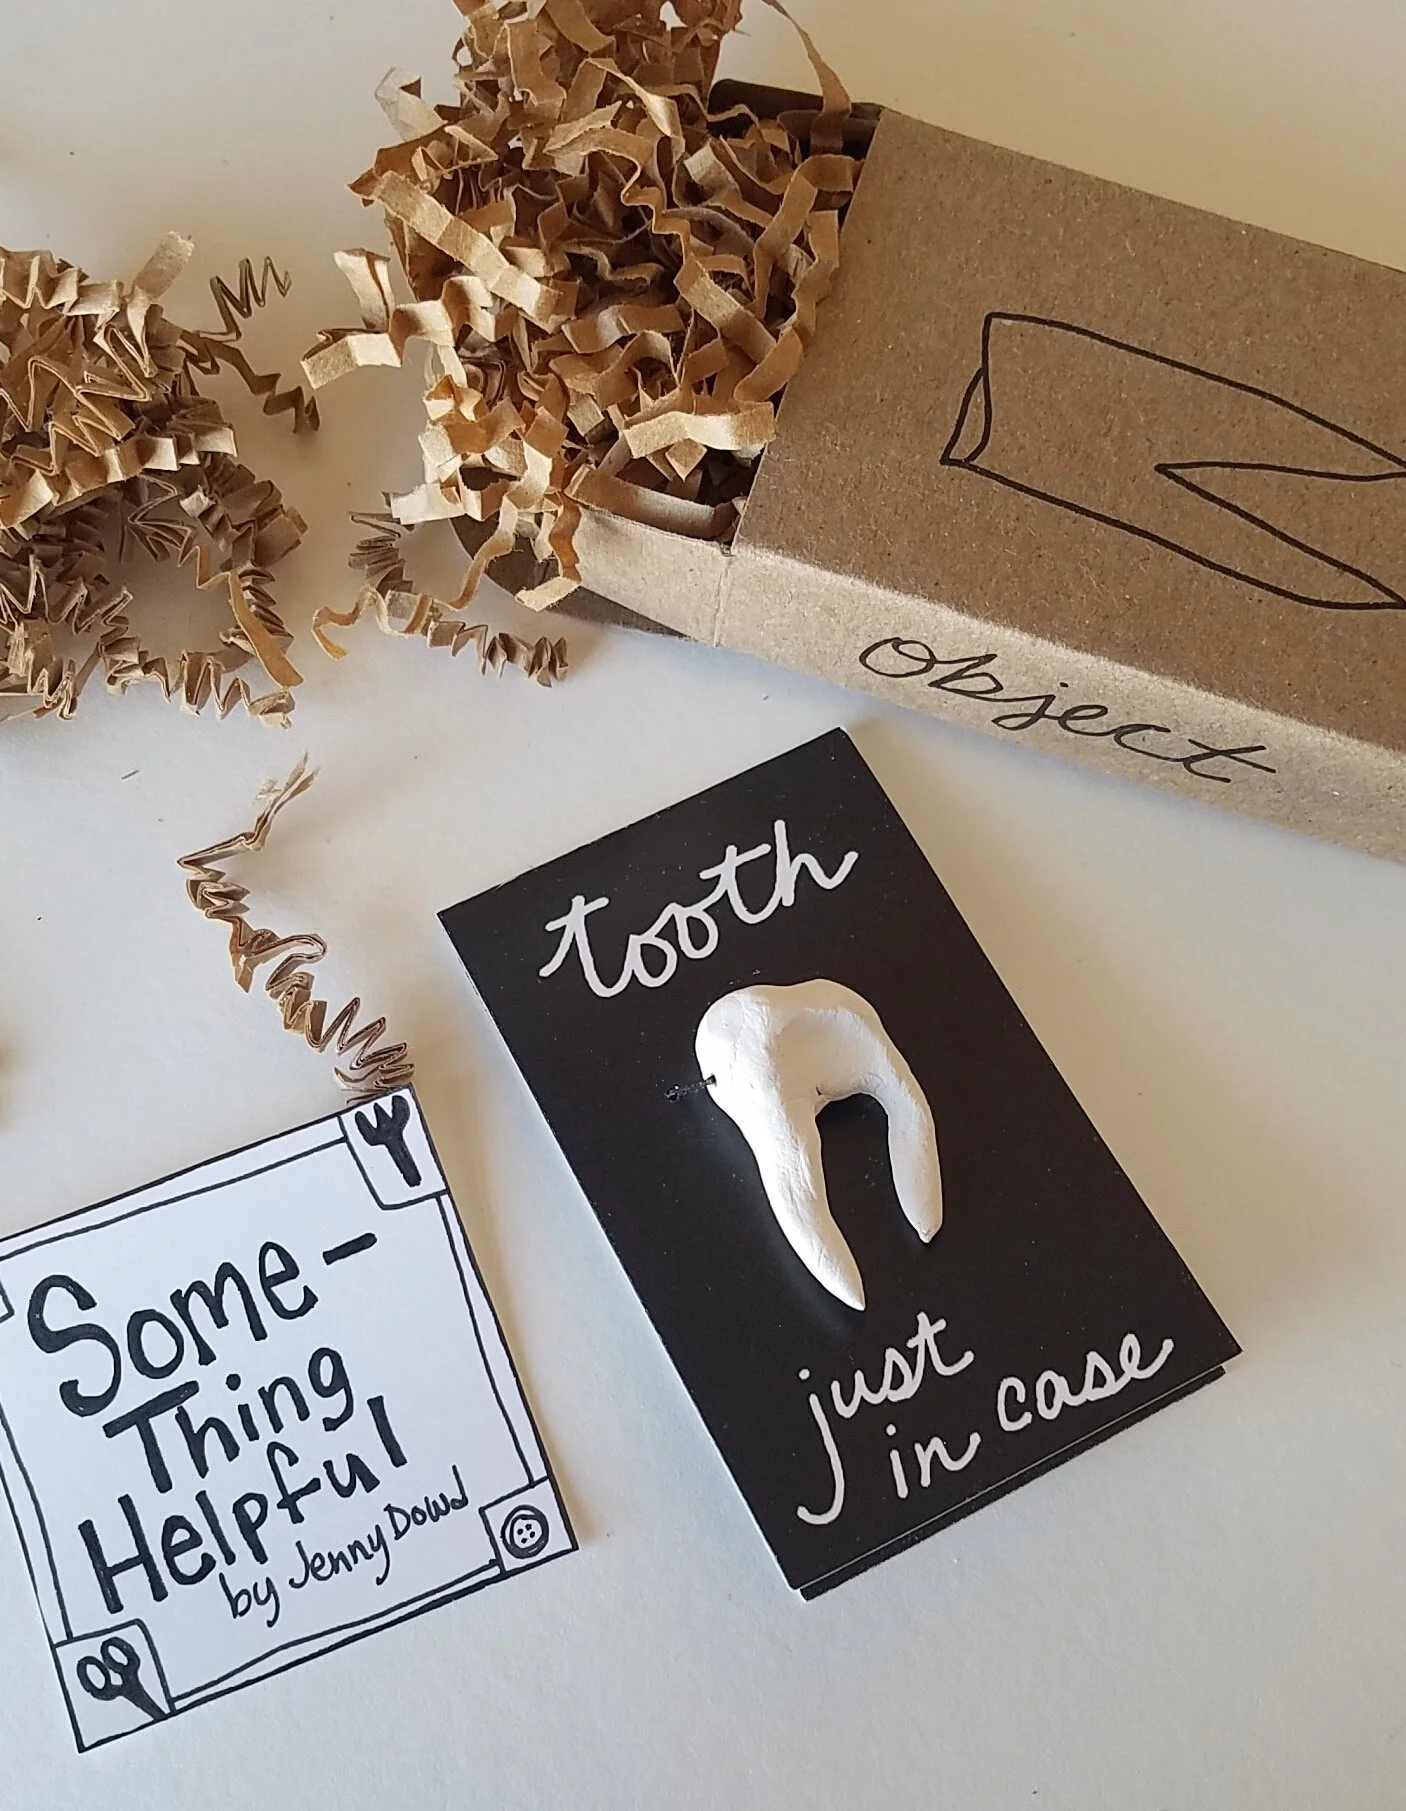
During the 2-hour workshop my students made the coolest tiny foods! I brought boxes for everyone to transport their foods home in, so those got decorated as well. S’mores, sushi, pies, cakes, popcorn, pizzas, cakes, noodles… oh we had a great time and were all rather hungry when we left!

Ghosts & Pumpkins

Jenny Dowd

OOOooooOOOOOOOOOooOOOOOOooooooohhhhhhhhhhhhhhhh

Well, here it is, Happy Halloween Weekend!

I’m always a bit late on this, but really, ghosts are for all year. I made a small series of ghost tea cups last year, after Halloween, oops, and sold all of them last month during September sales. So, I made some more… but again a little too late. Oh well, they are some of my favorites…

It was a spooky day in the studio when I was decorating the cups, Sam was working on something with the lights, so I was working with the moody natural light through the window. (Yup, our studio is still very much a work in progress, more on that in a few weeks.)

I draw on the bisque fired porcelain using an underglaze pencil, and then brush on a watered down underglaze, a lot like ink drawing. This batch turned out etherial and definitely more spooky than my last batch!

Sam, on the other hand, starts making pumpkins and jack-o-lanterns in August! This year he used the Raku kiln he built to add a spooky finish to his pumpkins.

Our porch is covered with pumpkins and of course we lit them up one night to see how they glow! Many of the pumpkins that we took to September markets found new porches to live on, and the rest will fill up our porch for Halloween and into November.

We really like the idea of a pumpkin on the porch that does not rot! Plus, it can hang out inside and add a spooky element wherever you like.

Pumpkins and ghost cups are still available on our webshop, and will stay there past Halloween… because spooky can be anytime!

Finishing Touches

Jenny Dowd

It’s been awhile since the last update, it’s been an overwhelming few months. Things seem to be smoothing out and suddenly the studio is making sense.

The electric is finished, no water yet, but it’ll happen. We added insulation to the walls and sure, we still need to finish the walls but it just feels crazy not to make pots and work in our new space. The projects (studio, house, yard, pottery orders) keep piling up, so the strategy has been to work on a little of each at a time.

And oh it feels so very good to enjoy a cup of coffee in the morning in the studio!

One thing we did a little too early was move our small kiln over to the kiln patio. It was fine, it was great to run a load of bisque and feel like we are starting to get something accomplished again. But it rained that night and without any weather proofing we knew the kiln was likely to get very wet. Right before the rain started we scrambled and put together this make-shift guard, which totally worked but wasn’t really the plan.

So here’s the real solution - a greenhouse plastic sheeting. Sam built a frame and we attached the sheets, then moved the other kiln over. I’m sure we will need to tweak things a bit after the next rain, but everything feels much more protected for now.

Notice there is a ton of room in this kiln patio / greenhouse? Well, we’ve got another electric kiln on the way and plans to build a gas kiln in this area too. Plus storage for shelves, kiln furniture, a grinding wheel… pretty soon this won’t seem like much space!

New-ish Things

Jenny Dowd

Amongst pottery orders and the making of inventory for upcoming sales I’ve been trying to make time for new ideas and tests. This time a few new ideas came from a mistake and from trying to remember how to make a form.

It’s been awhile since I have made a coffee pour over & pitcher set. Making the forms ended up being the easy part, decorating was not as intuitive. I liked the idea of simple black and white areas with a diagonal line to emphasize the triangle of shapes in the forms. But after I brushed on the white and black underglazes I had no idea what to do.

I carved vertical lines into the white underglaze thinking I’d come up with an idea, but I also realized that my usual patterns might not work this time. I sat there lost for awhile and then the person working near me asked what my plan was. I’m still not used to working in a group studio after years of solitude in my old garage studio, so what a welcome conversation! I told him I had no idea and as we discussed ideas we both agreed that perhaps a shape or pattern was needed. He drew out a little triangle inside of a triangle and that clicked.

I liked how the pitcher and pour over set looked so much that the next day I made a few mugs with the same pattern.

These cups were supposed to be mugs. I threw the cylinders on the wheel and forgot to cover them with plastic. When I came into the studio the next day it hit me, can’t attach handles to dry clay. I bisque fired the cylinders and put them in a box, where they rode around in the back of my car for a few months.

Sam and I will be participating in a craft fair on February 12th, NW Arkansas Girl Gang Winter Market, right before Valentine’s Day. After being accepted to this sale I realized I should make a few Valentine’s gift items. Since the cups were already bisque fired, the surface was perfect to draw on with underglaze pencil.

This is a drawing I’ve made before, but the first time on cups. And it’s based on a true story, but it's not totally true because I am not a lamp. (Surprise!)

Sam and I met in college, in the clay studio of course, we immediately hit it off - like non-stop talking & laughing. We'd gone on maybe one date, but mostly just arranged our time to be in the studio together. Anyway, it had been a few weeks and we were obviously smitten.

One evening Sam had a really bad cold and came over to my house but wouldn't come in. He stood on the porch and through this super bad head cold told me that he really really liked me and that he wanted to use the other L word. But mostly he needed me to know right now that he really liked me. It was actually the sweetest thing ever and I knew it was something because it was the first time my roommates didn't make fun of my dating antics.

So there it is, the stories behind two new-ish things that I’ve been working on in the studio!

Flower Stand 2.0

Jenny Dowd

The Flower Stand is back!

The first time the flower stand showed up was in 2016. The original was made for a tiny art show, every piece included was required to be less than 12x12 inches. Since the show was at a farmer’s market I decided my art should reflect the vibe. (Check out the story here)

Since then the flower stand has had a few evolutions - a concessioner’s tray in 2017 and a full size flower cart in 2019 (that story is here)

Now I need a small portable flower stand that can sit on a table or a shelf and can accompany me to street fairs.

I love working with corrugated cardboard! I just dug through my recycle bin to find the right box to tear up. This flower stand has a little stage for vases and bouquets as well as a front area with blue foam for single flowers to be stuck into.

This time I decided to make nicer tiny vases, so I threw some on the wheel. These tiny forms were tough! That’s the first time I’ve thrown that small, for scale the cylinder to the right of the vases will be an espresso mug.

After making additional white flowers - porcelain flowers with wire stems get dipped in a powdery white solution with an acrylic medium - the fun part begins!

Each bunch of flowers gets wrapped up in scraps of colorful fabric with a bit of ribbon. Looks like this flower stand will be just right!

Merlin may be a studio cat, but he doesn’t like everything made in the studio. He hates these flowers. I have to store them far out of reach or he will destroy them. But I did let him sniff a bouquet. He was not impressed.

Bouquets will be available at street fairs and are also available on my web shop! They make a fun gift to send by mail, plus these flowers will last forever!

Storytelling

Jenny Dowd

Sometimes custom orders and funny stories turn into illustrated pottery. These are a few projects from recent months:

These mugs were custom ordered from an Aunt who wanted to celebrate and surprise her twin nieces, they grew up in Idaho and had just moved to New York to attend college on a hockey scholarship. Something to remind them of home but also where they were headed!

For these porcelain mugs I used an inlay technique to create the drawing in the damp clay. Each of the tiny black lines were drawn with an x-acto blade, filled in with black underglaze, and then wiped clean. The crisp black lines look like an ink drawing on the white porcelain clay. Two mugs, similar but different, just like the sisters.

Chainsaw mugs! A friend recently became certified to assist in disaster related tree removal as well as fire mitigation. WOW! To celebrate she commissioned mugs for her instructors.

This time I drew the chainsaws on bisque-fired clay with an underglaze pencil, this makes these awkward chainsaws just a little more comical. I filled in the drawing with red glaze and grey underglaze.

This one was unsolicited… I had an idea to turn a scary story into a sweet comforting gift. And it’s a long story, so let’s just hit the main points: house sitting + bomb cyclones & closed highways, mix in some tick infested dogs during a peak in lyme disease season and suddenly a tent pitched in the middle of the living room to sleep in at night doesn’t seem so weird.

This design was also drawn on the clay with underglaze pencils and filled in with layers of watered down underglaze. This time I used a clear glaze that I had not applied to this type of surface before and didn’t realize that some of the underglaze pencil lines would run. After waves of initial disappointment, I realized that the soft lines fit in more with my vision of a dark sky around the edge of the bowl, and perhaps the bunting on the outside is just wet from all that rain.

These are a few projects currently in progress, or in the case of the little 5-legged octopus (quintopus?) just starting to percolate. The octopus was my example made during the surface design class I am teaching at the Community Creative Center. While demonstrating sgraffito I started to draw a ghost and then mid-draw thought that might be boring and started adding legs. Of course there was not enough room! But this cute little mollusc came to life and now I’m considering adding it to my cast of characters.

The porcelain cups are in preparation for that quickly approaching February day. These lamps might be some of my favorite characters, especially when one finally leans in to admit a secret to the other. (Psst. I really like you.)

Whodunnit??

Jenny Dowd

The Art Association’s annual anonymous art show kicked off a few days ago, did you guess which piece was mine? This year the pieces are all on display at the Art Association Gallery and Center for the Arts Gallery with purchasing and viewing online. Some pieces are still available and a heated silent auction is also in process, check it all out here: https://whodunnit.afrogs.org/#/index All sales benefit the art education programs at the Art Association.

I was asked to make a 12 x 12 canvas, and since I still don’t know how to deal with a canvas surface I made my own support. But first, a ladder…

For some reason I just wanted to make a small porcelain ladder and when it came out of the kiln I knew what my piece would look like. I was thinking of all the helpful but slightly awkward tools I like to draw on mugs, but what if I made them 3D? (See them here)

Ladder, hammer, scissors, staple gun, wrench, carpenters pencil, and tape measure. Each tool got its own pocket and I embroidered the pocket with clues or an outline of the object.

I also made sure to test the scissors.

So here it is, The Basics. Just enough to start any project! The piece ended up like a pillow for the wall with little pockets for the tools. It was pretty exciting to see my piece in the gallery with a red dot before it got picked up by the purchaser!

The sale & auction is open until March 4th at 6pm MST check it out here

Just in case

Jenny Dowd

Early this year I created a prototype artwork for Art-o-Mat. This is something that I have wanted to do for years, probably since I first heard about this project. Art-o-Mat machines are retired cigarette vending machines that have been refurbished and now dispense tiny artworks.

Before realizing how wild this year would be, I came up with an idea to use the billions of porcelain teeth I had carved for past projects. (See some here) I always get a kick out of reactions to these teeth, it’s either a laugh or a cringe, never anything in-between. Last fall I started making little cards, similar to a spare button card, with “just in case.” I gave these to a few friends to see how they reacted.

A few prototypes later, I was ready to test my idea for Art-o-Mat (if you are interested in submitting a prototype check out the info here) In late January I found out that my prototype was accepted, so I put together 50 boxes for my first delivery. Each tooth is numbered and packed in a cigarette sized box. I decorated the boxes and wrapped them in acetate so they will vend.

The neat thing is not knowing where my tooth-filled boxes will end up. There are Art-o-Mat machines all over the country and each host decides what artwork they would like to fill their machine with. When everything shut down this summer I lost the drive to post about my new artwork and the excitement of being part of this project.

But just a few weeks ago I got my very first Green Card! This card shows how many Helpful Objects have been sold and where the machines are.

So, when you are out traveling again, keep an eye out for an Art-o-Mat, who knows what you will find!

Flat Foods & Helpful Objects

Jenny Dowd

Some sort of crazy combination has happened in the studio over the past few months. Something like stay-at-home-covid-19 + delayed shop orders + reassessing my own cupboard needs + ideas that have been rattling around in my head for awhile = this!

What does that all that mean?

At the beginning of this year I was actively preparing myself to apply for a residency with the hope for time and space to work on new pottery designs. I love what I do, but haven’t felt that I’ve had the time to really pursue something new and just because in awhile. I’ve been slowly figuring out how to combine drawing with pottery for years, and want to link these loves.

And then bam! COVID-19. Suddenly I thought, for lots of reasons, maybe this isn’t the best time to try for a residency.

So I did the next best thing. Focused a little extra time (which suddenly I had plenty of) on some of these new ideas.

A few years ago I made a game / drawing / book arts piece for the Laramie County Library and haven’t forgotten how much I enjoyed working with ink while drawing random objects. (Check out the project here)

I wanted to draw random helpful objects onto mugs to start, and while I’ve drawn designs on my pottery in the past (pottery for Market) suddenly I was staring at a truly blank canvas. I thought about tools and how helpless we are all feeling in this pandemic.

The first mug I made was truly random and it even has a title: “Sometimes you need a hammer. Sometimes butter.” I think that just about sums up how I’ve been feeling.

The butter / hammer mug became my glaze test. I was pretty excited with how the butter stick turned out, slightly melty. This mug is now available in the 2020 NCECA Cup Auction, which is online this year. I have donated this mug because it is such a good cause. NCECA will use all the proceeds to support ceramic artists through fellowships and scholarships. Check out my mug here, it will be available until May 31st. And check out all of the other amazing cups & mugs here!

All the decoration happens after the bisque fire. I draw onto the clay with an underglaze pencil, then use a “wash” of watery underglaze to color in areas of the object. Then I carefully layer glaze / wax / glaze to get color where needed.

Next up: espresso and coffee mugs with tools. It’s hard to know what tools we’ll need to get through the day, so I figured why not just include a bunch with the morning coffee?

These mugs represent helpful objects - the top 2 mugs are ideas on how to keep it together. The mug on the bottom is “Measure twice, cut twice.”

Plus I learned how to make lemonade!

Meanwhile, Sam suggested that I make some more of the “good noodle bowls.” We only had 1 in the cupboard and it was both of our favorites for noodle dishes, nachos, and basically everything.

After making the bowls I realized I had no idea how to decorate them. So I went with “flat foods” or food that is probably usually served on plates. I love eating out of bowls, and will seriously put anything in a bowl.

We have tested all 4 of my new bowls: taco, burger, cake, pizza. Happily, they work.

I can’t remember the last time I made something specifically for myself. Usually I just keep extras from orders or seconds, if it’s something we need or I like it, so this is a pretty big deal.

I’m definitely going to keep making more of these designs. I am excited that these pots will have stories to tell and will also be extra helpful, even after these strange and scary days.

QuaraTea Party

Jenny Dowd

One of the first things I missed when we started social distancing in March, was meeting up with friends for tea. Something that I didn’t do that often, maybe only once or twice a month, suddenly turned into a massive void in my life.

While texting a friend, she mentioned the same thing, and asked how can we show togetherness while apart? We brainstormed ideas for cards, ways to send a little love by mail, and she coined the term QuaraTea. That night when I woke up full of worry, that conversation popped into my mind. The worry suddenly shifted to thinking about how to illustrate this idea of a safe distance tea party. (Because, you know, Safe-Tea First)

In the morning, I sketched it out, and sent her the photo:

This idea rattled around in my brain for the next week or so, was there some way I could offer a sweet gift for friends? I also kept thinking about people who were adjusting to working from home, were they reassessing their coffee / tea mug collection?

Meanwhile, I received a grant from Teton ArtLab designed to provide financial help to local artists. That was a big piece of the puzzle, and helped me to pursue QuaraTea Parties.

My next step was to contact Tea Hive. I felt that their line of Teton Teas would be the final piece in this puzzle. A mug is nice, but a mug with tea is an actual party! I wanted to support another small business and keep the origin of my project local while also offering handmade love from my little corner of Wyoming to people anywhere.

And so, the QuaraTea Parties came out of my dreams and onto the table.

A QuaraTea Party for 1 is a mug + 2 Teton Teas, or to really enhance the tea ritual - a teapot & cup. Perhaps a sweet self-care gift, or something to send to a friend who needs a little pick-me-up.

Also available are QuaraTea Parties for 2. This is 2 sets: 1 mug + 2 Teton Teas. I send 1 to you and 1 to your friend. Then you can meet up for a video chat / tea party!

Sam thought the bunting in my photos was extra fun and that they should be included in each set. So we spent a cloudy afternoon making colorful party buntings!

This project has been a happy one. The first connection I missed was tea with friends, and now I feel like I get to enable long-distance tea parties!

A variety of QuaraTea Parties is available at Wyoming Artists Collective and also my Etsy shop. Sets start at $48 and all include the cost of shipping - although, if you live in the Jackson, WY area, I’m happy to leave a box on your porch!

More Flowers

Jenny Dowd

Well, this year really took a turn.

I also haven’t updated my journal since December. It’s not like I haven’t been doing anything, there are actually a lot of interesting things going on in the studio, but it just didn’t seem appropriate.

It’s been tough to stay motivated in the middle of the COVID-19 Pandemic, but it’s also forced me to really focus and dig into studio work. Suddenly I’m surrounded with virtual collaborations and am connecting with friends more than ever.

So, I’m going to start regular-ish posts again. And as my last post (from December which seems so so so far away) was about my tiny flowers, I think it is only appropriate to check in on what is going on with these flowers now.

On a rather gloomy day a few weeks ago, I pulled out all the little bins of flowers in my studio and made a bunch of bouquets. That turned into such a happy afternoon! Surrounded with scraps of pretty fabric and ribbons, I trimmed stems and wrapped up bunches of flowers.

My work is now featured at Wyoming Artists Collective and it’s the only place where the flowers are available online. Each bouquet is $30, which includes shipping. It seems the perfect way to send a little love to friends and family.

Of course if it’s local I’m always happy to drop the package on the porch and run away…

And I love seeing the bouquets in their new homes. They add little bits of color and smiles to our days of quarantine!

A Gingerbread Challenge

Jenny Dowd

Sam and I accepted the challenge of making a gingerbread house for an exhibition and competition. The challenge includes 6 teams and the houses will be on display at the Old Wilson Schoolhouse during this Saturday’s Holiday Show and Sale from 10am - 3pm.

Sam immediately wanted a train station, and I just couldn’t visualize anything until we started. So, as usual, a week before the due date we started to plan. Sam had the idea to include some small businesses and that was where I got excited. And also made things more complicated.

First we drew out the plan. The rules stated that the house could not be any wider than 18” (good thing too - this could have taken over our house.) We made patterns for each building and started dreaming up what business our town should have next to the train station.

I have not worked with gingerbread in a long time, and when the recipe said “knead” I looked down and saw that I was actually wedging the dough. (That was the first and last time I compared this material to clay.) Before each tray went into the oven I photographed the shapes with their pattern so I could keep the buildings straight.

I tried to get fancy with melted candy in some windows. And found that some of the gingerbreads needed to be sanded to fit. At the point of sticking everything together with royal icing I was actually really glad not to be working with clay.

Sam made fondant animals for the small farm yard and our table filled up with sweets. I didn’t really think it was possible but I am so sick of the smell of sugar. When it came to really assembling the village things got too sticky to photograph. So here’s how it turned out:

Welcome to Flufftown (the locals pronounce it Fluf-ton)

Flufftown has a train that regularly delivers goods to the shops: The Pillows & Fluff Store is the proud founder of this town and does a brisk business alongside The Goldfish Monger, The Barber & Mustache Shop, and The 24-Hour Shoelace Store. If you head around to the back of the shops you can enjoy pizza or watermelon at the Slice Shops.

The train cars are full of fluff, pillows, shoelaces, and mustaches as these shops are stocking up for the holidays.

20191205_120811.jpg

We planned to have a farmhouse and barn, but ran out of room. So if you need a barn we’ve got one.

In case you wondered, this is what happens when artists design a town. There were other things we ran out of room for - the Pillows & Fluff Store was supposed to have a conveyer belt taking fluff from the train to the stack on top. And a fence to keep the animals from getting too close to the train, but since they are all calmly laying down we figured they weren’t too daring.

We found a lot of fun candy at Mursell’s Sweet Shop, including cotton candy!

So if you are in the area, stop by the Old Wilson Schoolhouse on December 7th from 10am - 3pm to check these houses out in person!

Clouds & Cupcakes: Part 1

Jenny Dowd

Clouds & Cupcakes has been in the works for over a year - and as usual, most of the physical work has happened in the past few months. I’m always happy to have a show deadline on the calendar, it seems so far off with endless possibilities. Even though the final few months is always a scramble - it’s actually a carefully controlled chaos of a scramble because there has been so much time to think, and plan, and test, and dream.

Clouds & Cupcakes will open at Mystery Print Gallery & Frame in Pinedale on September 5 and will be on display until November 1. If you are in the area stop by for the opening reception from 5 - 7, with an artist talk at 6.

This is a show I’ve been turning over in the back of my head for close to 2 years and initially invited painter Shannon Troxler to tackle the space with me. The title didn’t emerge until this past very snowy cold January, and came from a specific feeling that I’ve found difficult to put into a few words. We started talking about this dreamy idea of clouds & cakes and that led to inviting poets Matt Daly and Connie Wieneke to join.

Today we are installing the show and I can’t wait to see all the work come together. I’ll publish the second half of this entry next Saturday with all the work in the gallery space. For now here is more on my process and how the show idea evolved…

I had an idea for prints, but something happened before I could even start them. While teaching a monotype class in the early spring I accidentally got a drop of white ink on my brayer that was already rolled up with blue ink. I proceeded with my demo - thinking this would be a good example of why you should keep a clean station - and ended up so excited and completely drawn down a tunnel of mark making. The small prints ended up with a lot of depth and wispy cloud-like forms. They were interesting on their own but also called for something more sculptural.

I like the idea of adding an element that can cast a shadow or move in a breeze, so after making a bunch of little porcelain clouds, I pinned them to the prints or hung them in the shadowbox frames.

While everything else was swirling around in my head, the prints anchored my thoughts for the show. Shannon and I met at Persephone Bakery one morning for sweet treats and brainstorming - which led to a desire to make the gallery window into a sweet shop.

Very flexible and thin porcelain paperclay was ideal for making fortune cookies. The paper here was just to help hold a side open during the firing. They fired an icy white and make a satisfying crunch when broken. Which, yes, you might just have to break the cookie to get to the fortune inside - each unique fortune written by Matt Daly.

My studio turned into a bakery as I made layer cakes that I could only dream of in a real kitchen. Each decorated with cloudy patterns and and perched atop handmade cardboard stands.

Another element came into place slowly over the summer while out walking. I started really noticing cloud shapes and tried to remember them.

You didn’t see that?

Oh. Well, since you missed it

I drew a photo

Stay tuned next week to see how the show comes together, I can’t wait to share the work created by the other artists!

What follows is my inspiration for this show and how the title came about…

Each year in the deepest moment of winter the same thing happens. Looking around, I think that I can’t stand one more day of the winter landscape. Too much white, too much snow, too much work and planning to get around. Within a few days this feverish feeling breaks. Suddenly the landscape is surreal; the clouds have combined forces with the snowy ground and I’m no longer sure where one begins and the other ends.

Indescribable shapes plus impossible shadows swirled with soft colors leave me unsure of what is concealed… and I’m reminded of frosty icing and the delicate sweetness of cake. Is the ground a cake and the sky frosting? Is it actually the other way around?

Conversely, in the middle of summer, the memory of winter is entirely out of place. The lush green plants growing as fast as possible in the short summer months, the river near my house that I ski over in the winter and paddleboard on in the summer - it’s just too much for me to comprehend. It’s odd, but somehow every summer I forget how high the snow piles and every winter I forget how green the land becomes.

Cupcakes & Clouds is an attempt to wrangle all those nebulous cloudy and wintery thoughts and memories into one space. Shannon Troxler, Matt Daly, and Connie Wieneke have joined me in describing the sweet cloudy mood of our skyscapes.

Making a Puppet: Part 2

Jenny Dowd

More from behind the scenes of making a giant pole puppet, plus the puppet in action!

(Check out my past journal entry Making a puppet to see how this all started)

Trying to reduce added weight, we decided to make the scales for the armadillo-ish beast out of cardboard. Strategically painting the scales with silver, black, and white helped mimic metal. I also made some special scales that were covered in shiny, scaly looking fabrics.

The scales were stitched on with wire, directly onto the fabric covering the armature. After connecting the neck, head, and tail to the body, the shiny scales went on as a transition. I ran out of time while attaching the big sequins, or more accurately, underestimated how long everything would take. However, in this case I think less is more. It was good to constantly remind myself that this very large creature would be seen from a distance, a little sparkle was better than none.

I had a little help… my parents arrived for a visit and were promptly put to work on the final details of the beast. (Thanks!)

And finally! The beast all put together. We designed it to be operated by 3 people: 1 person at the head, 1 at the body, 1 at the tail. In the end only 2 people were needed, the tail was stuffed so it would flop around with the movement of the body.

The performance happened on the lawn at the Center for the Arts where dancers from Dancers’ Workshop were joined by visiting artists from David Dorfman Dance.

There were 5 beasts featuring the Chinese elements: Water, Wood, Fire, Earth, and Metal. I regret that I did not get great photos of them in action.

In a beautiful and touching performance, the beasts were compelled to work together in order to solve a problem.

20190816_183119.jpg

What a process and what a performance! I’m honored to have been part of this, I learned a lot and hope this is not my first & last puppet. But next time I might go a tad smaller…

20190816_184313.jpg

Chalky Characters & Helpful Objects

Jenny Dowd

Last week I tackled my largest canvas yet… the Town Enclosure Pavilion on the lawn of the Center for the Arts in Jackson. This temporary structure was installed last year by Carney Logan Burke Architects with the intention to be a space for performances, gatherings, and also to offer creative space for visual artists.

Jackson Hole Public Art asked me to consider drawing on the panels using chalk. The pavilion can be walked around and through, with the panels changing with movement almost like an optical illusion, so this became an inspiration. I made a rough plan and then just decided to go for it.

Before starting the drawings I could not comprehend the size of the panels. Once a ladder was in place and I could only reach as far as my arms would stretch - I just had to go for it and make the shape fit the space. Suddenly I found it easy to run out of room and wishing the panels were larger!

It was an equally freeing and terrifying feeling to freehand draw these characters and objects. I used both hands to draw and went up and down the ladder and walked back and forth to the street to get a better view.

Some characters feature furniture acting out human scenarios (Bad lamp) and others are embracing their helpful nature - Super chair! (This chair swoops in just when you really need to sit down but there are no chairs nearby.) And the lamp saying “I really like you” to the other lamp. So careful and hesitant, ready to go out on that limb, just not quite ready for the other L-word.

Other helpful and awkward objects include the giant watering can and umbrella. The placement of the panels inspired the watering can and flowers, while walking past the water drops line up so the flowers are getting a good drink.

I’m inspired by the awkward feeling of ladders and nets, as if they are stretching and helping to reach that far-away object.

This was such a fun project! The chalk drawings will remain for a week or so - depends on rain. So if you are in the area be sure to walk by.

A Kiln Full of New

Jenny Dowd

In between orders and catching up on inventory for local shops, I’ve been dreaming up some new designs. It seems I’ve been a fan of black and white for a long time, and while I’m still a fan, it’s time for a little color.

This kiln load is just the start, I’ll be adding new forms soon. For now I’m continuing with a star catching theme with little cups. The prototype plates and bowls have potential. The kiln shelf cracked during this firing and I was lucky it didn’t cause any damage. It’s a bummer to lose a shelf, but I don’t feel the loss quite as much right now since this was such a happy load!

Most of this work features drawings with underglaze pencil, I like how the line fuzzes in the firing. The plate and bowl have more crisp lines- from an inlay technique. I’m excited to play with these processes and combine them.

Also some new extra-cute tooth fairy bowls! I asked my dentist about this once, after a thoughtful look she said that they would “reduce bedside fumbling.”

I’m looking forward to the next batch, it’s nice to have something new and to finally see it happening!

Market Update

Jenny Dowd

Last week I showed a bit of the process behind the pottery I’m making exclusively for Market. I opened the kiln on Monday to find that for once, everything in the kiln looked great! (See last week’s post here)

Garden themed pots: Swiss chard cups, cherry tomato salad bowls, plus a salt cellar and garlic keeper.

Before this load could be fired, I had to solve another problem. The shelves were in serious need of care, the bottoms of the pots had been sticking - leaving behind tiny shards of fired clay. Not only is it annoying to constantly clean the kiln shelves, but it meant that a lot of my pots had bits of clay missing from the feet and it just looked bad.

Fixing this means another step, but one that is worth it. I’m now coating the foot of each pot with a mixture of brushable wax and alumina. This ensures that nothing will stick to the kiln shelf and the foot of each pot will look how it should! I also scraped each shelf, and coated it with fresh kiln wash - which dried out in front of the space heater with a little help from Merlin’s studio water dish.

I’m also making ornaments specifically for Market, with the Vertical Harvest logo on one side, and a ripe juicy tomato on the other. The logo is hand drawn onto the porcelain disk using an underglaze pencil. I found that I can go over the lines with a little water on a brush to make it look more painterly.

It’s a few months away, but now I can’t wait until I can grow Swiss Chard and cherry tomatoes in my own garden, right outside of my studio!

Special, Special Orders

Jenny Dowd

Just about every time I think that I’ve got too much to do and shouldn’t take on any more special orders - I get the most amazing requests. These are the things that, although they take me off my path, they make me realize that my path can (and should be) be wider than originally thought.

Just this past week I finished and delivered two of the most special orders. Each were commissioned by someone as a gift for another person or family, each very personal.

The pitcher and cups are for someone who has just moved into a new home that she has named “The Sunny Spot.” This inspired me to made a few little wall tiles with whimsical little hills, and a path to the sun and stars. Luckily, Sam and I had planned a soda firing and I was able to make these pieces and get them into the kiln in time. (This is a laborious process that we love but only do a few times each year. For the whole story on how these pieces happen check out my past journal entry here.)

This teapot and cup set is also extremely whimsical, full of special meaning, and commissioned as a gift. While working on these pieces I fell in love with the clouds - I’ve put these on succulent planters in the past, but this time it was if I saw them differently…. and they will be showing up in the future.

Every order, every piece of pottery that finds a new home, each one is a gift. When I stop to think about my work out there in the wild making people happy, it floors me and energizes me at the same time.

Display Ideas

Jenny Dowd

One thing I love about making things out of clay, besides ease of use and overall helpfulness, is the challenge of finding solutions for display. I'm always rethinking how to make objects that are helpful and highly functional, plus looking for good ways to display them- I like it when a story can simply be told through the juxtaposition of a few objects. 

A few weeks ago at the August Art Fair Jackson Hole I was across the isle from Sita Sabina. She saw a helpful potential in my "stuff holders." By using these little dishes to display her rings for people to choose from, she also created a beautiful and simple display that offers good ideas for storage (or home display) of precious objects.

Recently metal artist, Jen McNaughton, asked me to make necklace display stands and I got pretty excited about this project. I'd never thought of making ceramic display stands!

I started out by making a cardboard pattern. This template helped me think through the angle which it would sit at as well as size. It also gave me a good visual before cutting into the clay- the necklace needs to stay put on the top and hook somehow into the back, so I came up with a few ideas before getting too far into clay work.

After lots of smoothing and assembling I added a little decoration- like a frame around Jen's pendants. This needed to be simple and not distracting, underglaze inlay seemed to be a good fit. I drew a design into the clay with an xacto, coated it with underglaze, then wiped the excess away.

And the results! The notches at the top hold the necklace in place, while holes in the back supports give options for chain length, plus a little anti-theft. 

JDowd_CeramicStands_JenMcNaughtonNecklace.jpg

Come to the Takin it to the Streets fair on September 9th on the Jackson Town Square to see these in person. Well, come to see Jen's jewelry, really- you won't even notice the stands! And I'll be a few booth away with my pottery still thinking about new ways to display things.

FoundSpace 2018: Part 2

Jenny Dowd

This week FoundSpace 2018 was unveiled at Emily Steven's Park! This art will be on display until August 8, and there is plenty to explore. I'm one of 5 artists invited by the JH Land Trust and JH Public art to create a temporary installation that will bring awareness to our public wild spaces. At FoundSpace, the challenge is to create something that will help visitors see the space in a different way- and hopefully discover something new every time they visit.

33336032_1446214065524377_8680470050173353984_n.jpg

This awesome map, designed by Cal Brackin, was screen printed onto bandanas by Walt Gerald

FoundPrints by the Sun

Brittany Hill took inspiration from the organic material found in this location to create naturally dyed flags. Each represent a species that has been transferred to the fabric through printmaking processes that rely on the sun.

Looksees

Bronwyn Minton invites viewers to come over and take a looksee. Her large sculptures are hard to resist and each offer spyglass holes- look through and you might just see something.

The Small Village of Treepoli

Bland Hoke enticed the small occupants of Treeopoli to construct a tiny village of hanging houses and rope ladders. Look closely, many details are hidden within the village.

Chronicles of the Introverted Minifauna

Matt Daly and I have created thaumatropes (check out last week's blog post for details) that tell stories about the little critters that are easily overlooked. So far we have installed 4... but keep an eye out, we will be installing more around the park over the next month!

20180607_183042.jpg