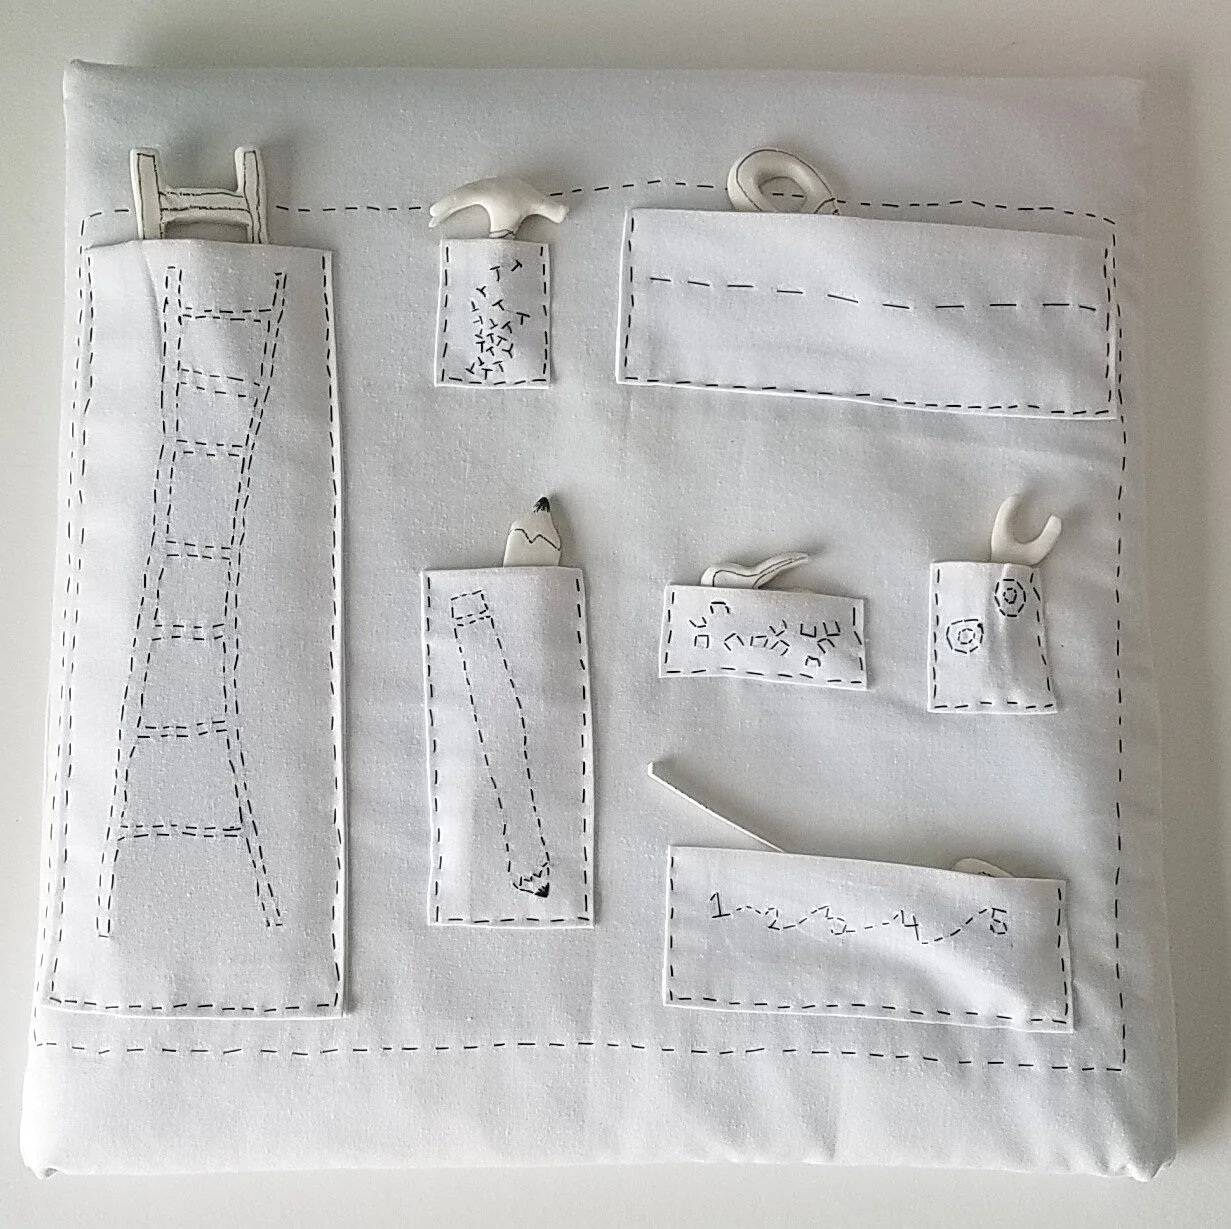
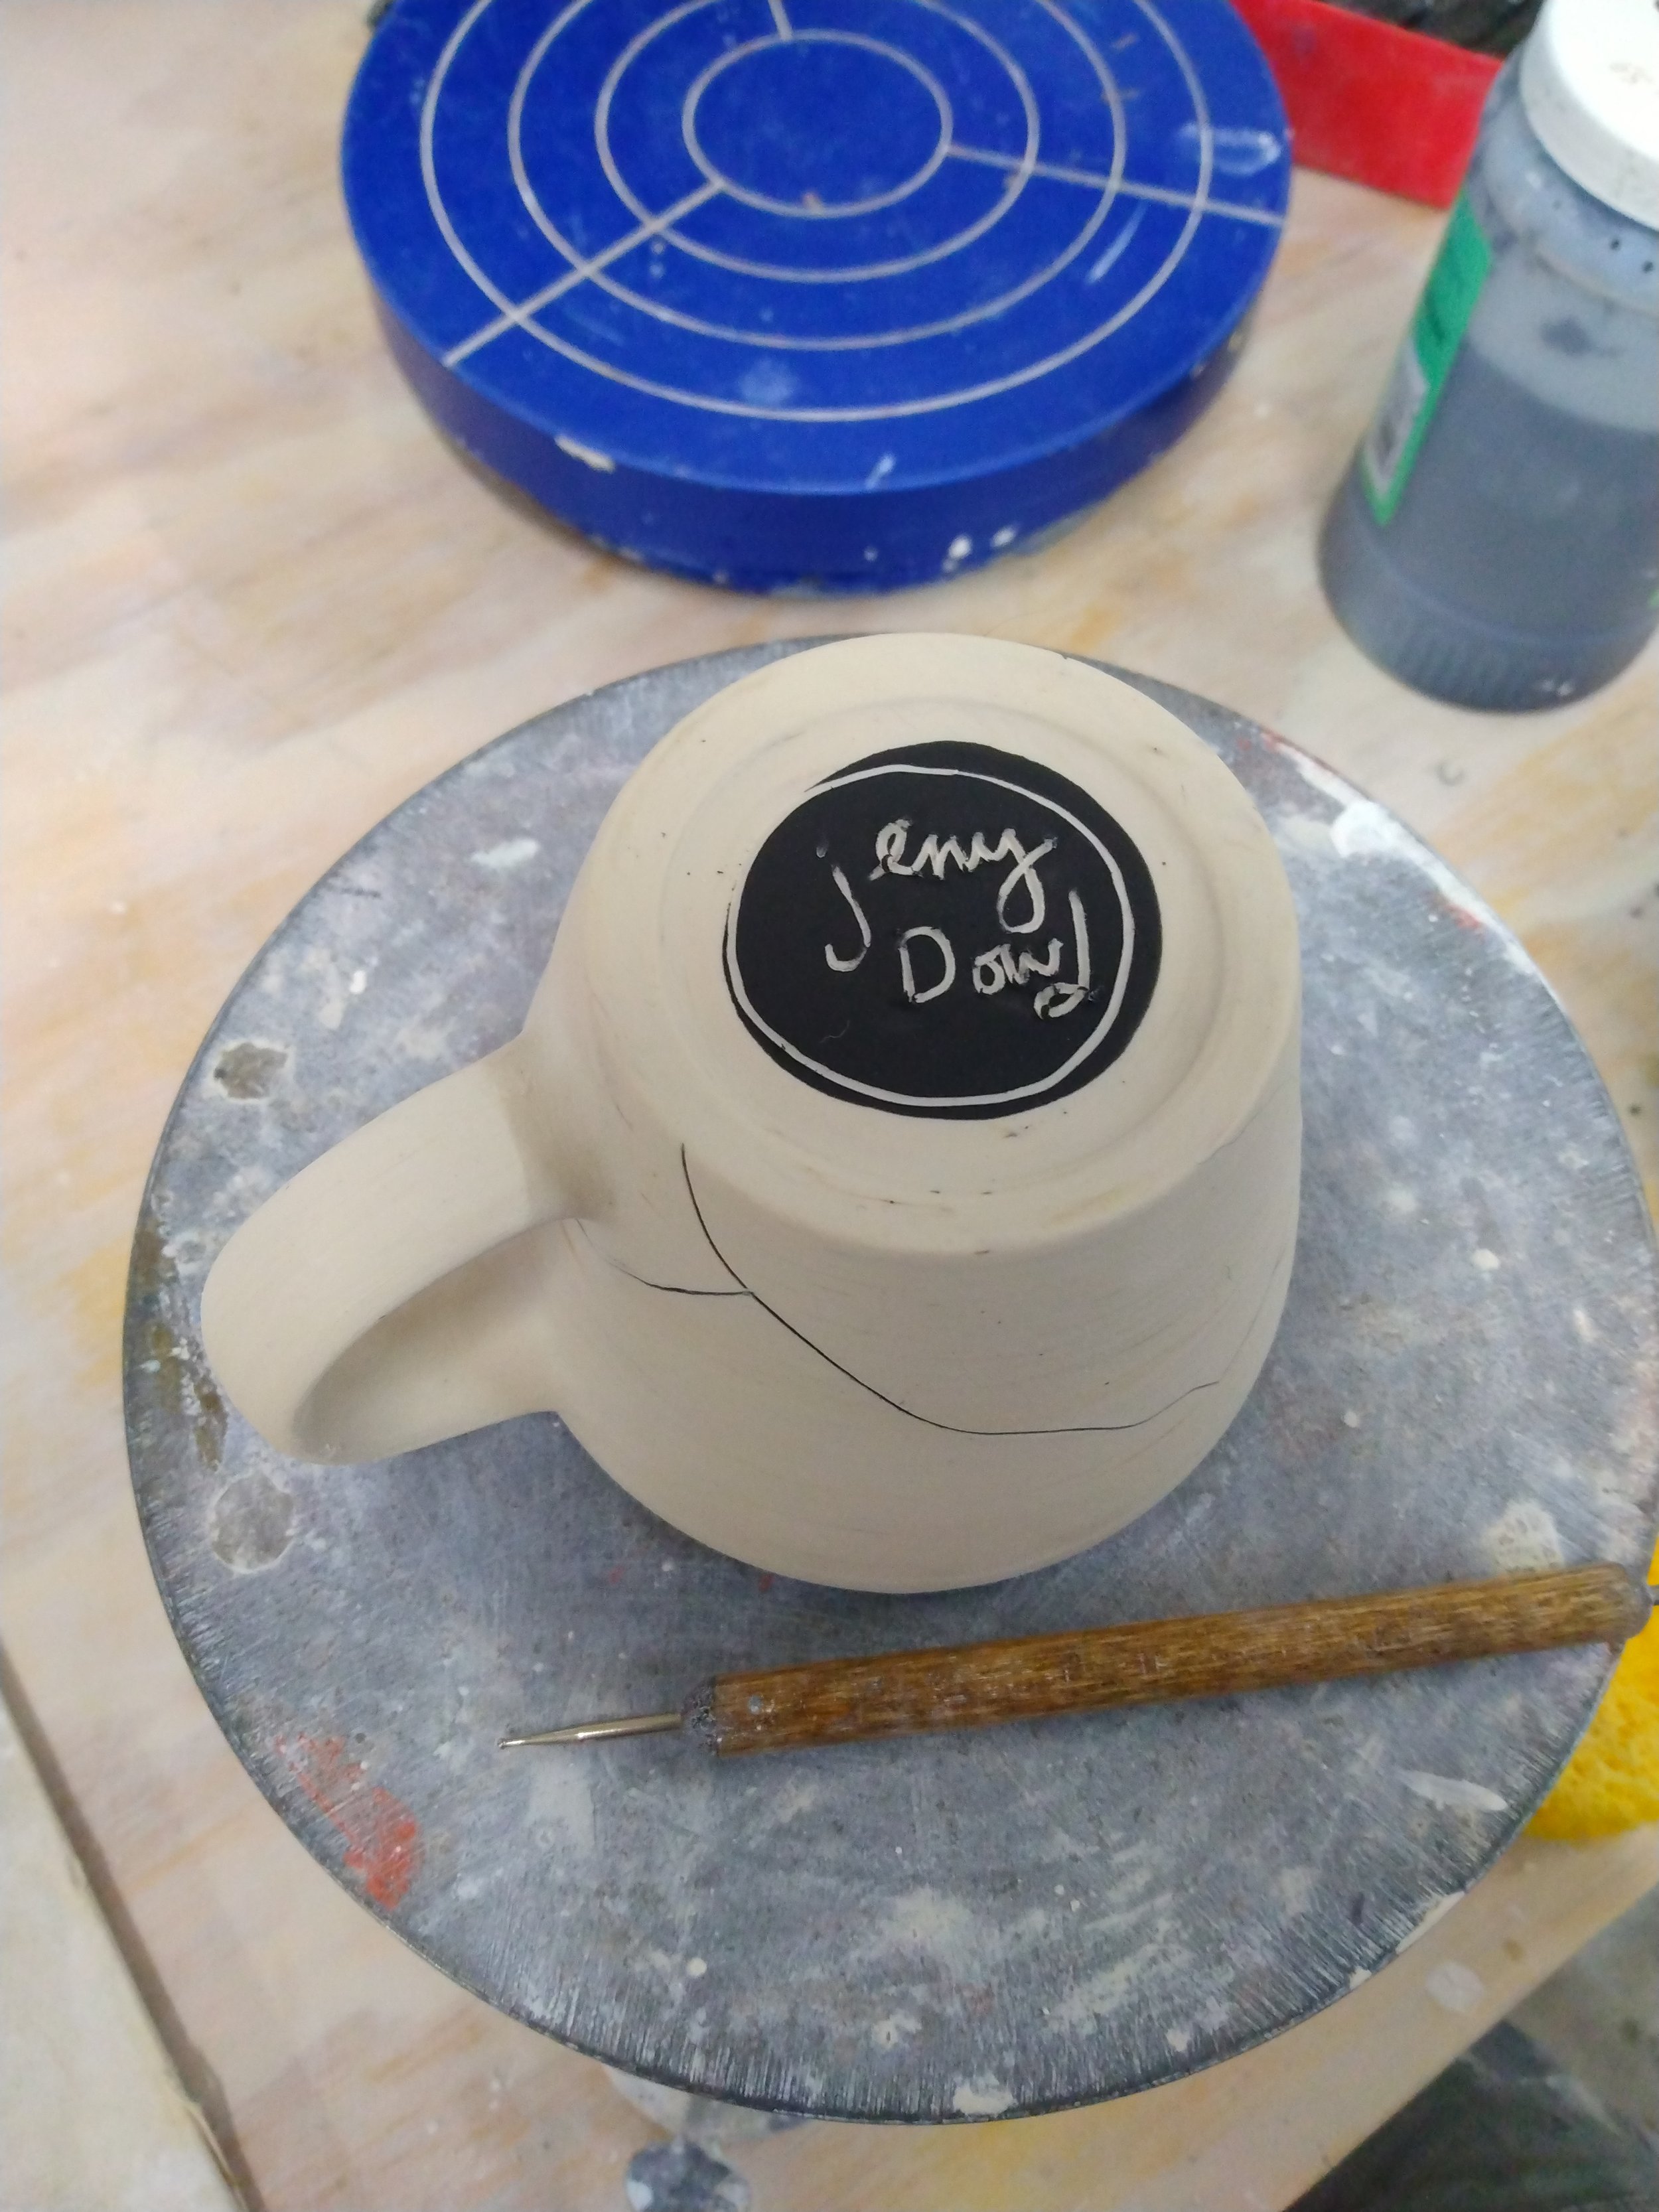
contact us

Drop us a line!

Use the form on the right or email dowdhousestudios@gmail.com


Prairie Grove, AR, 72753
USA

JDowd_SucculentPots.jpg

Journal

News from Dowd House Studios: places to find our pottery, exhibitions, classes & workshops, new forms and exciting projects.

Tiny Desk Adventure

Jenny Dowd

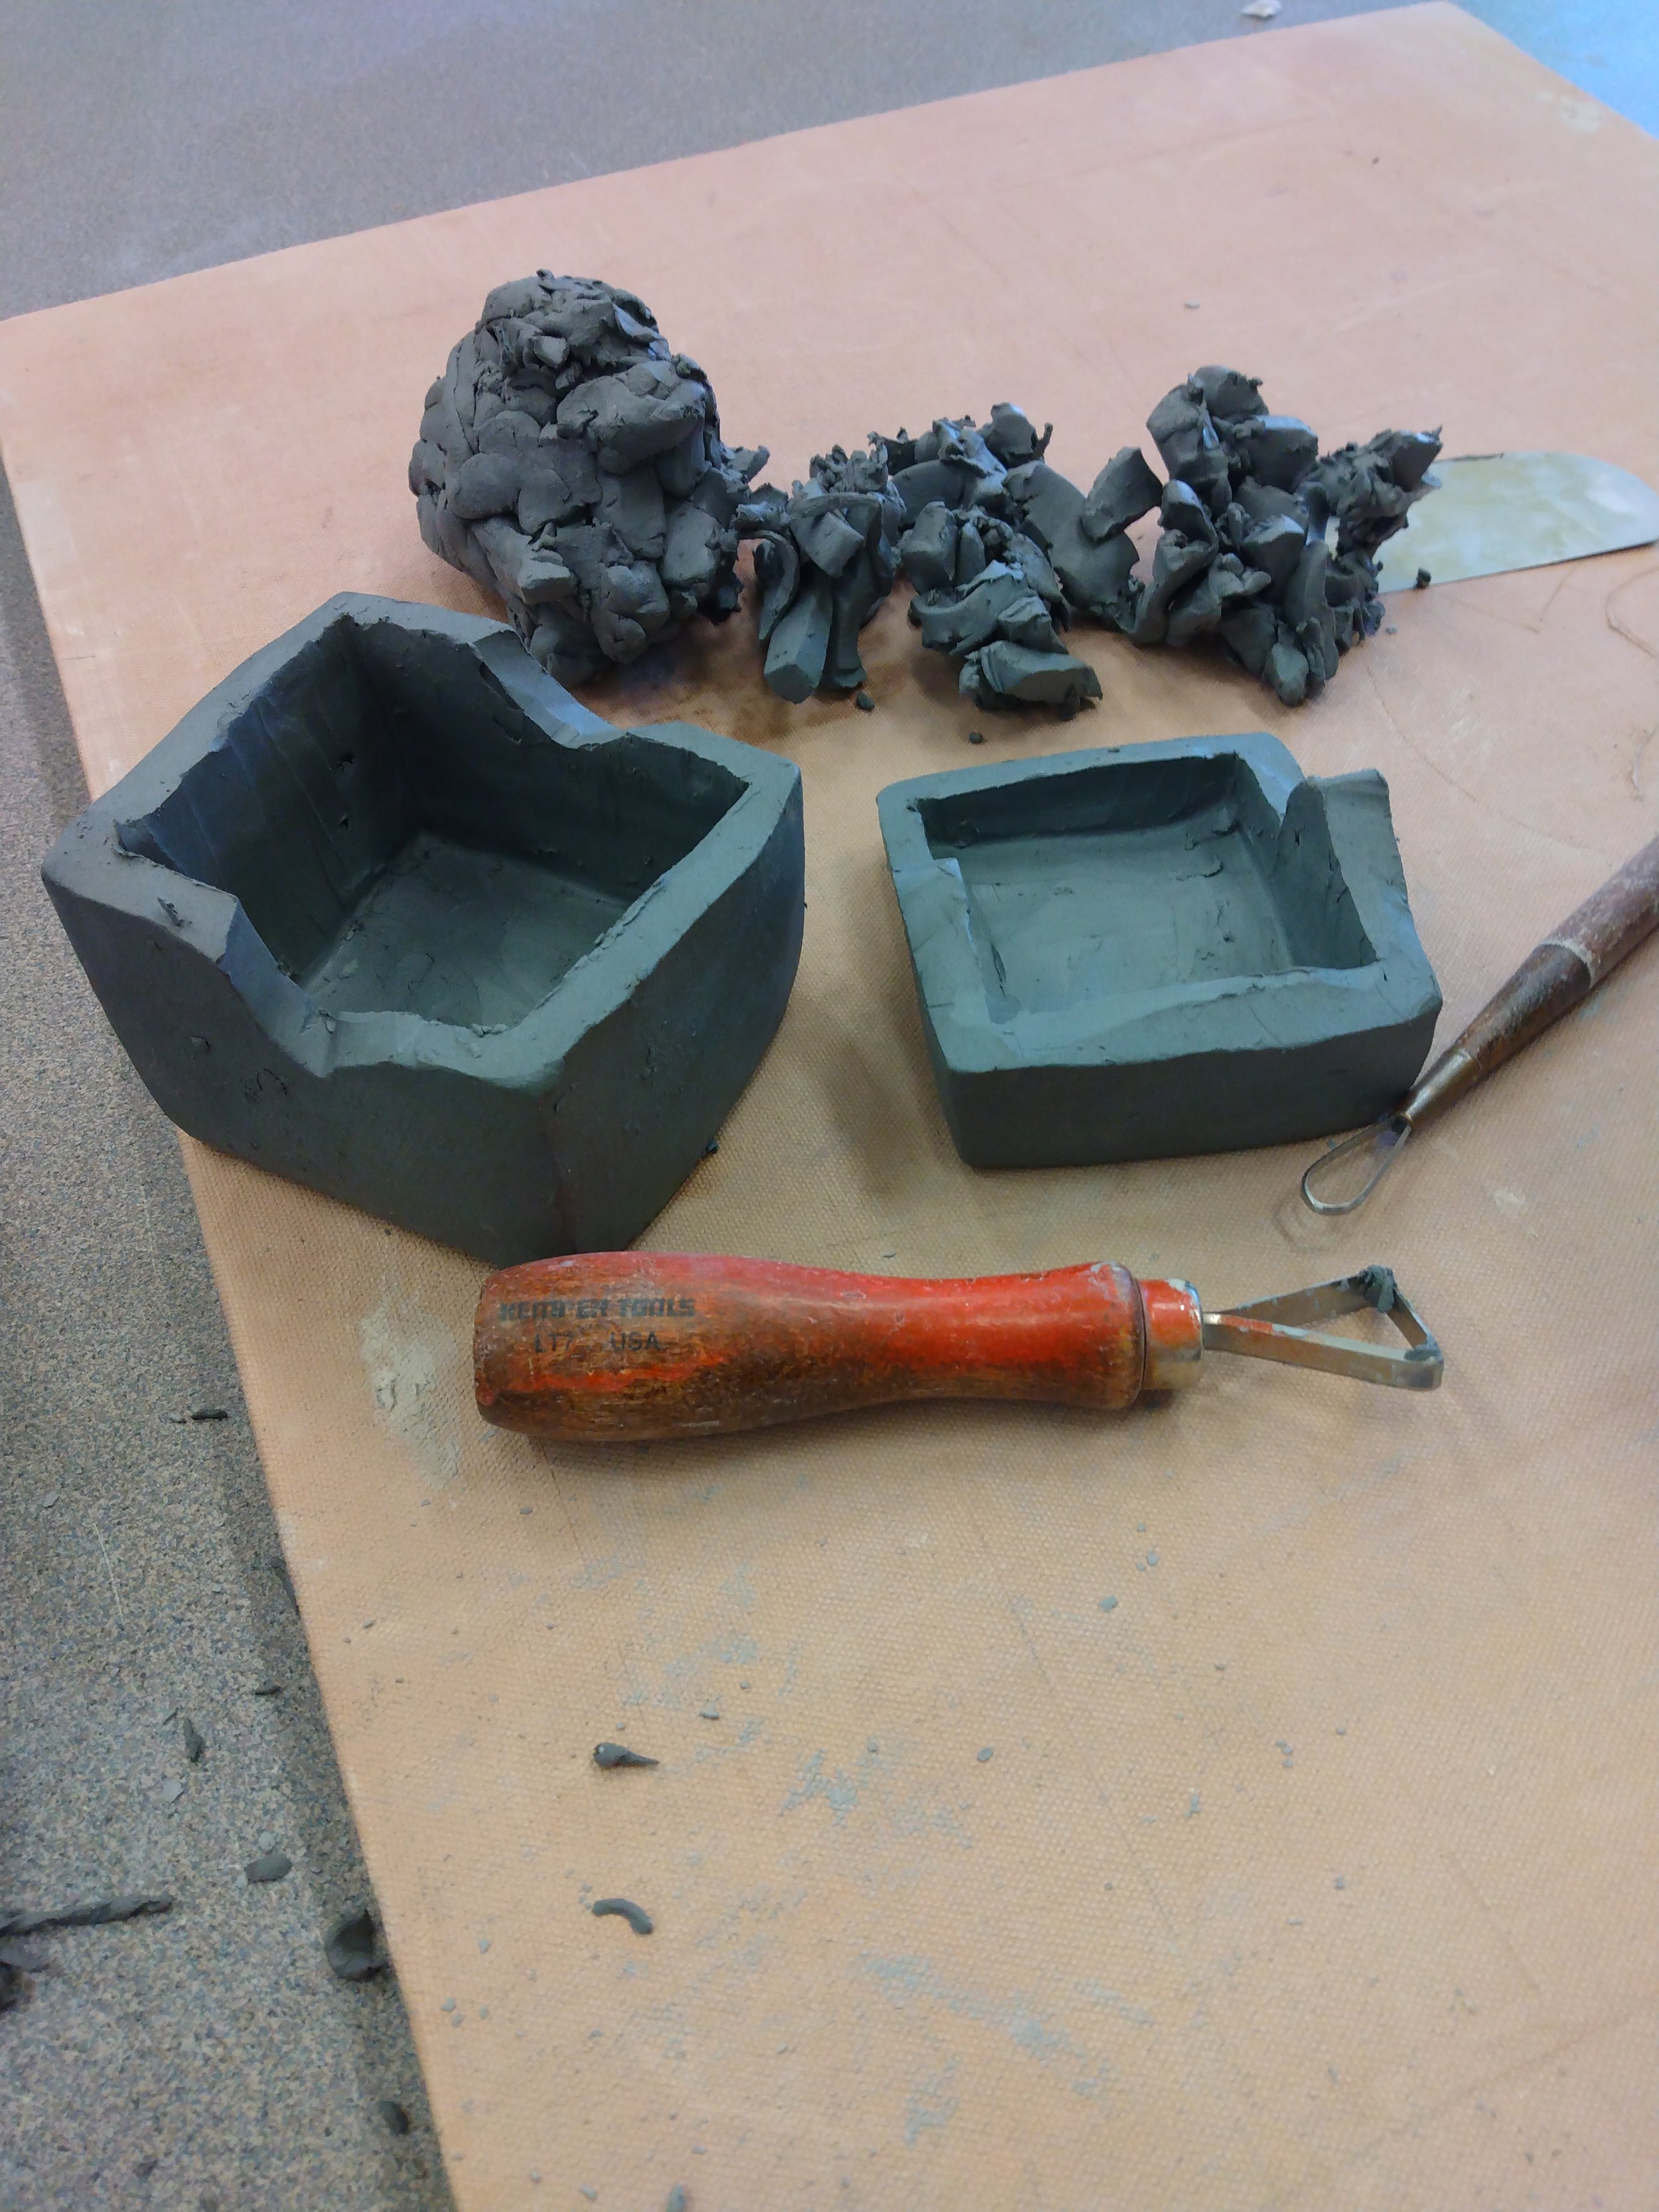
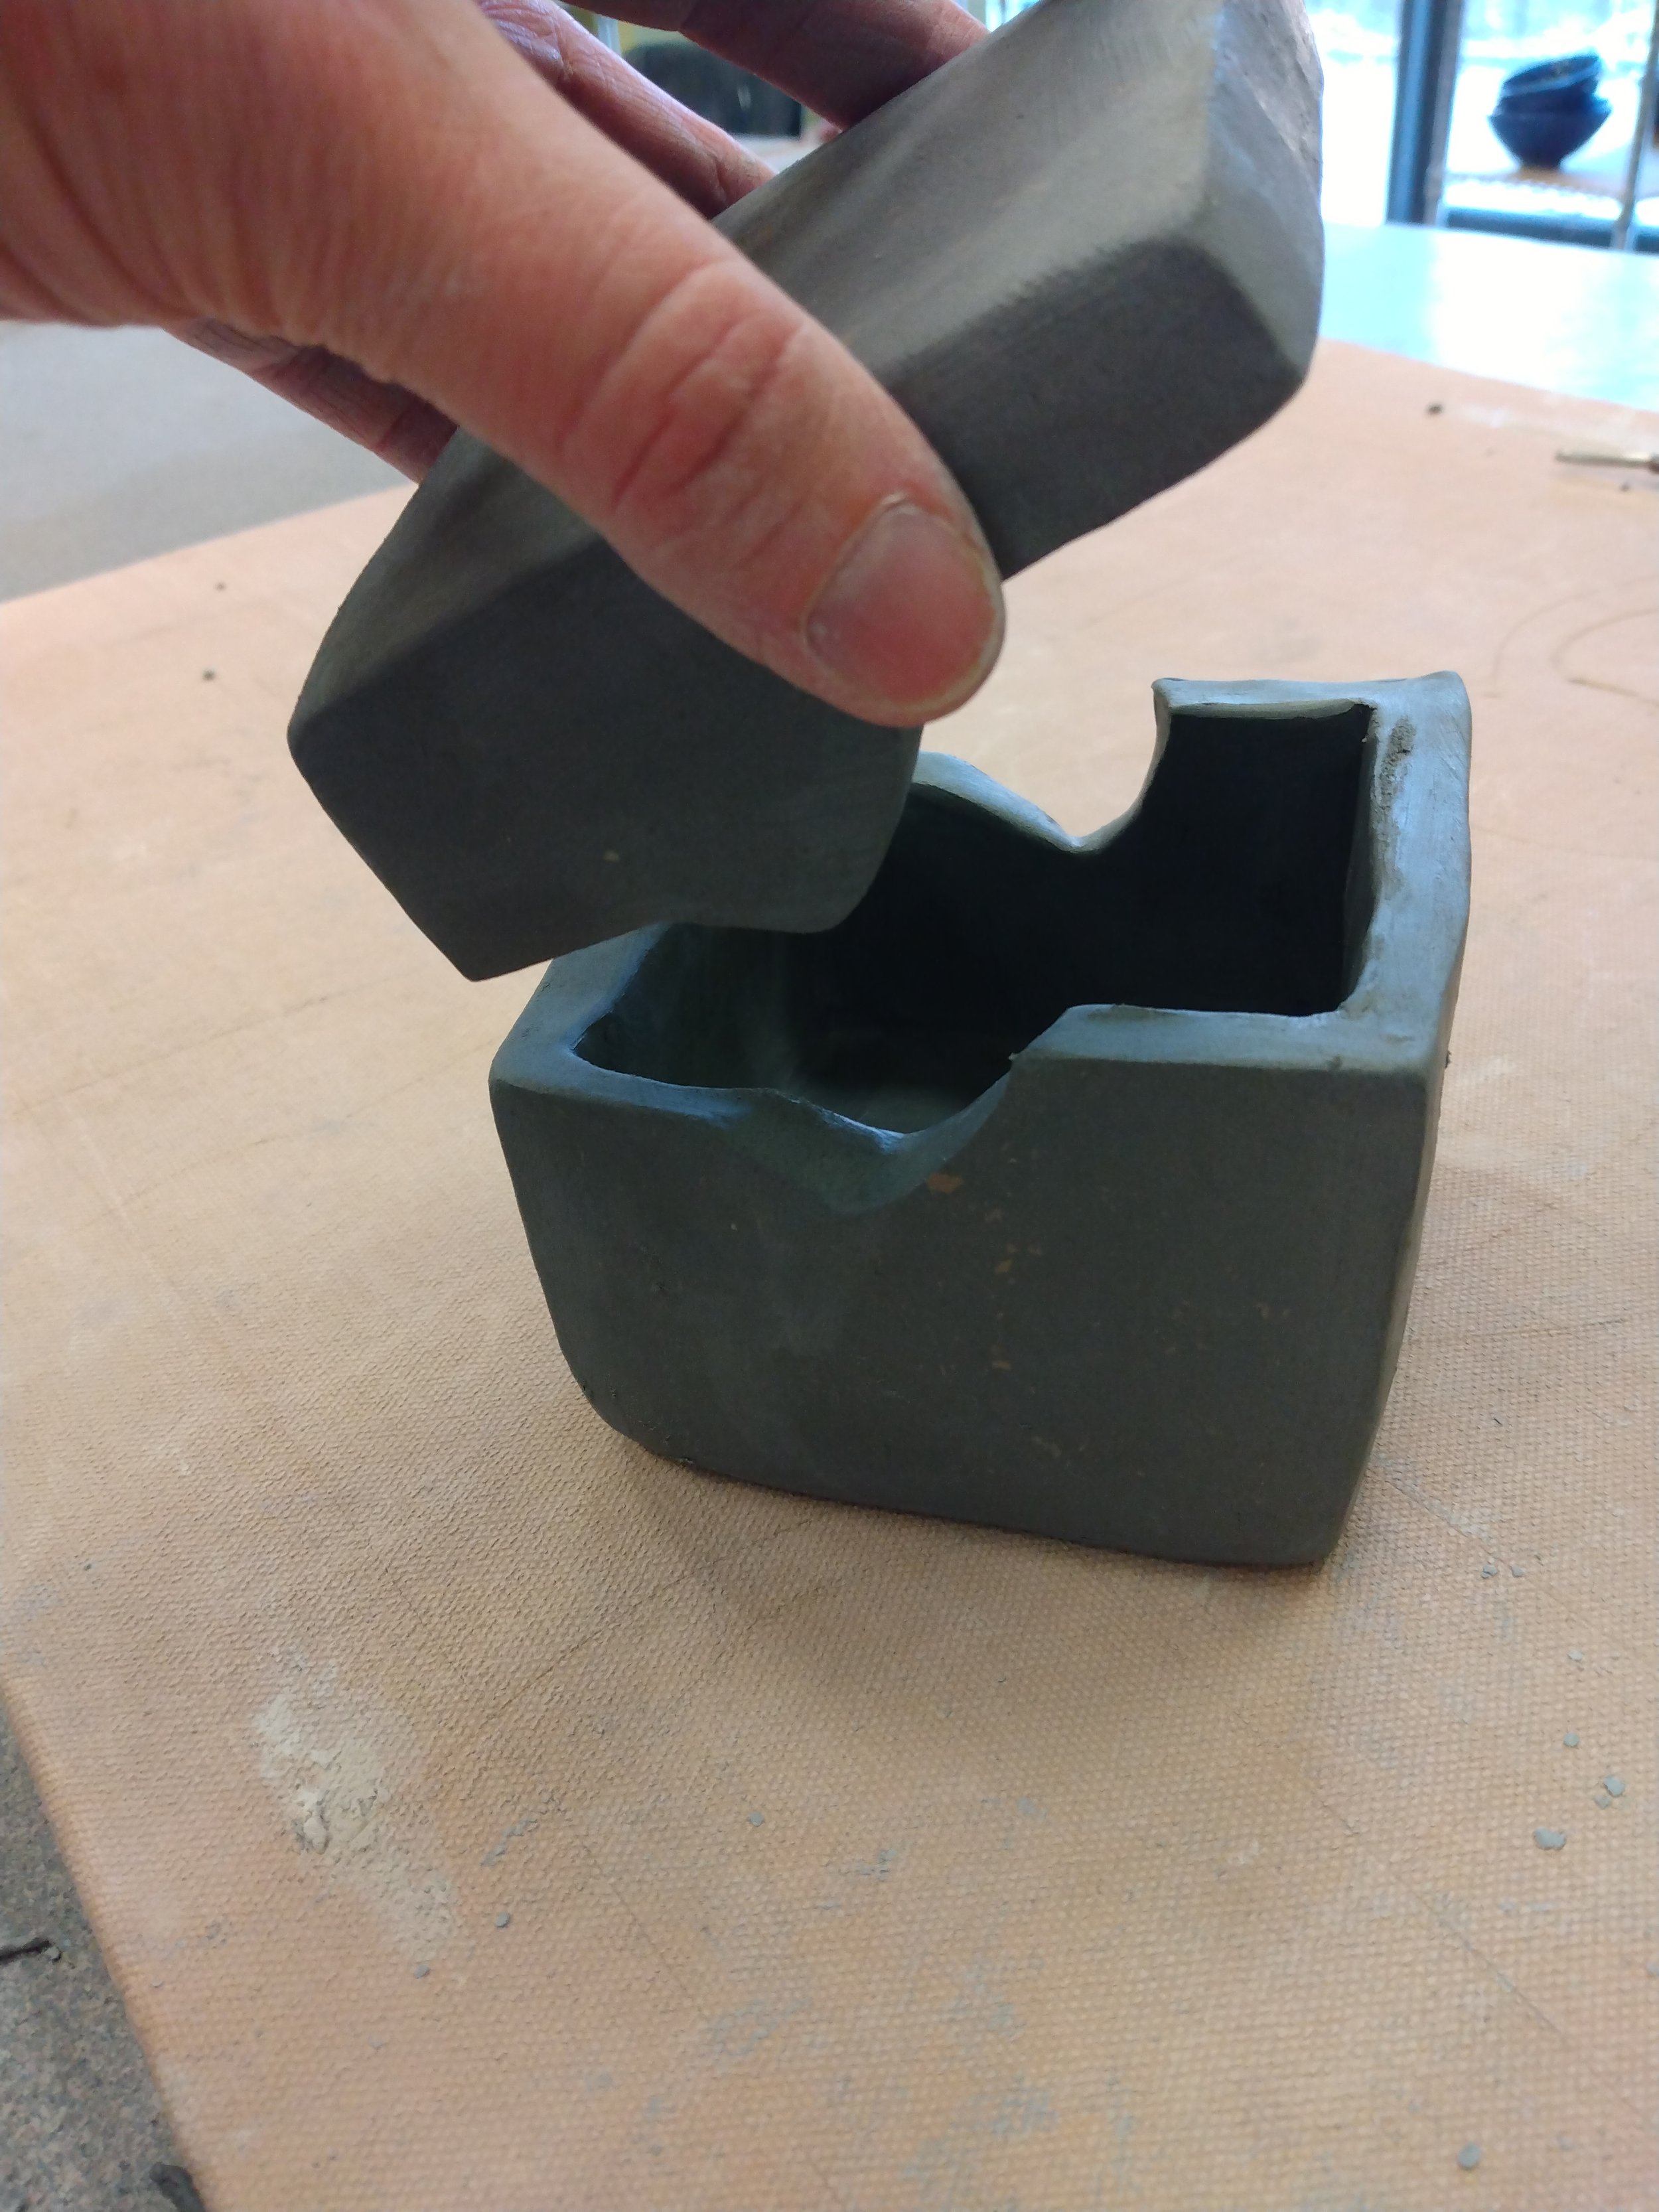
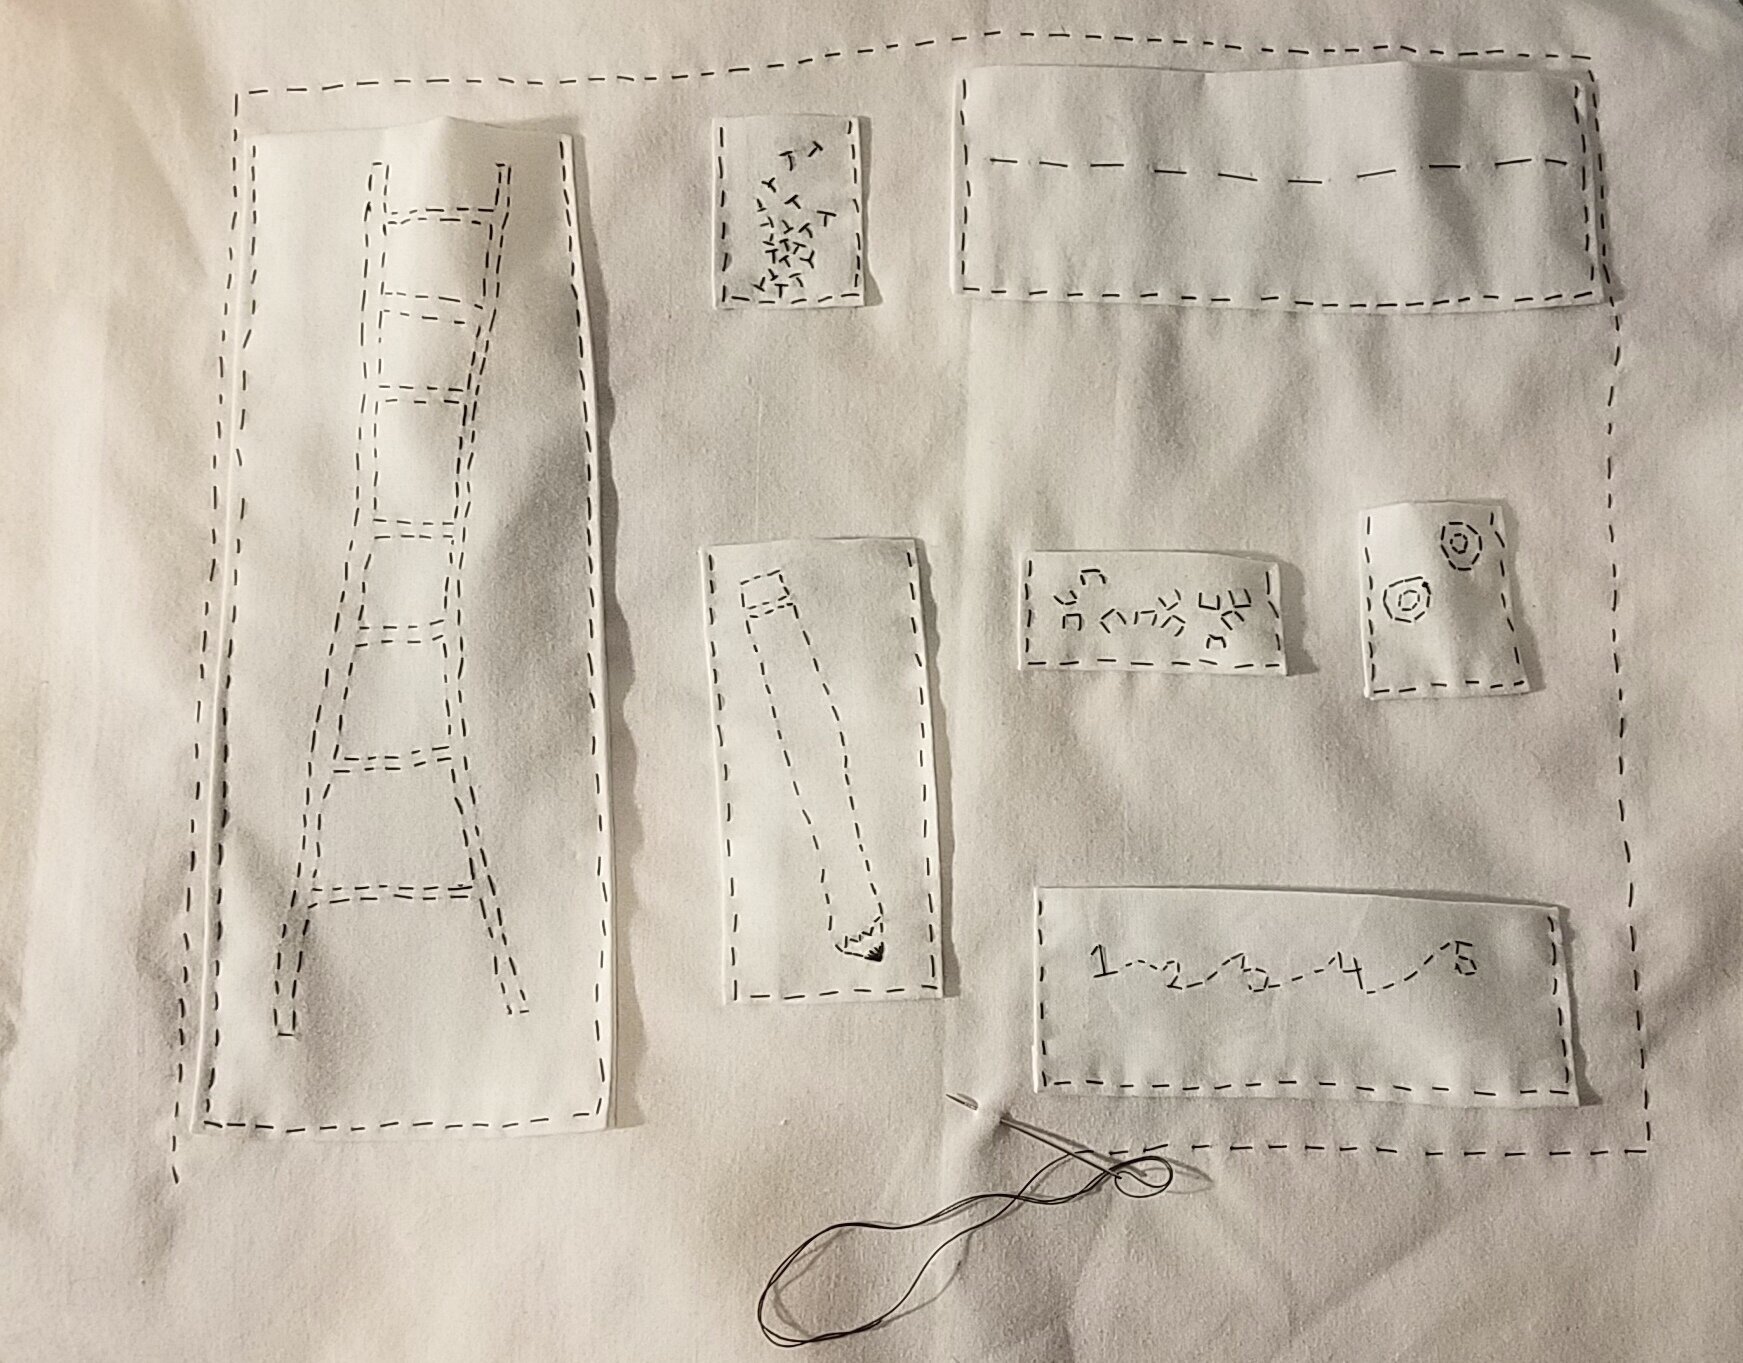
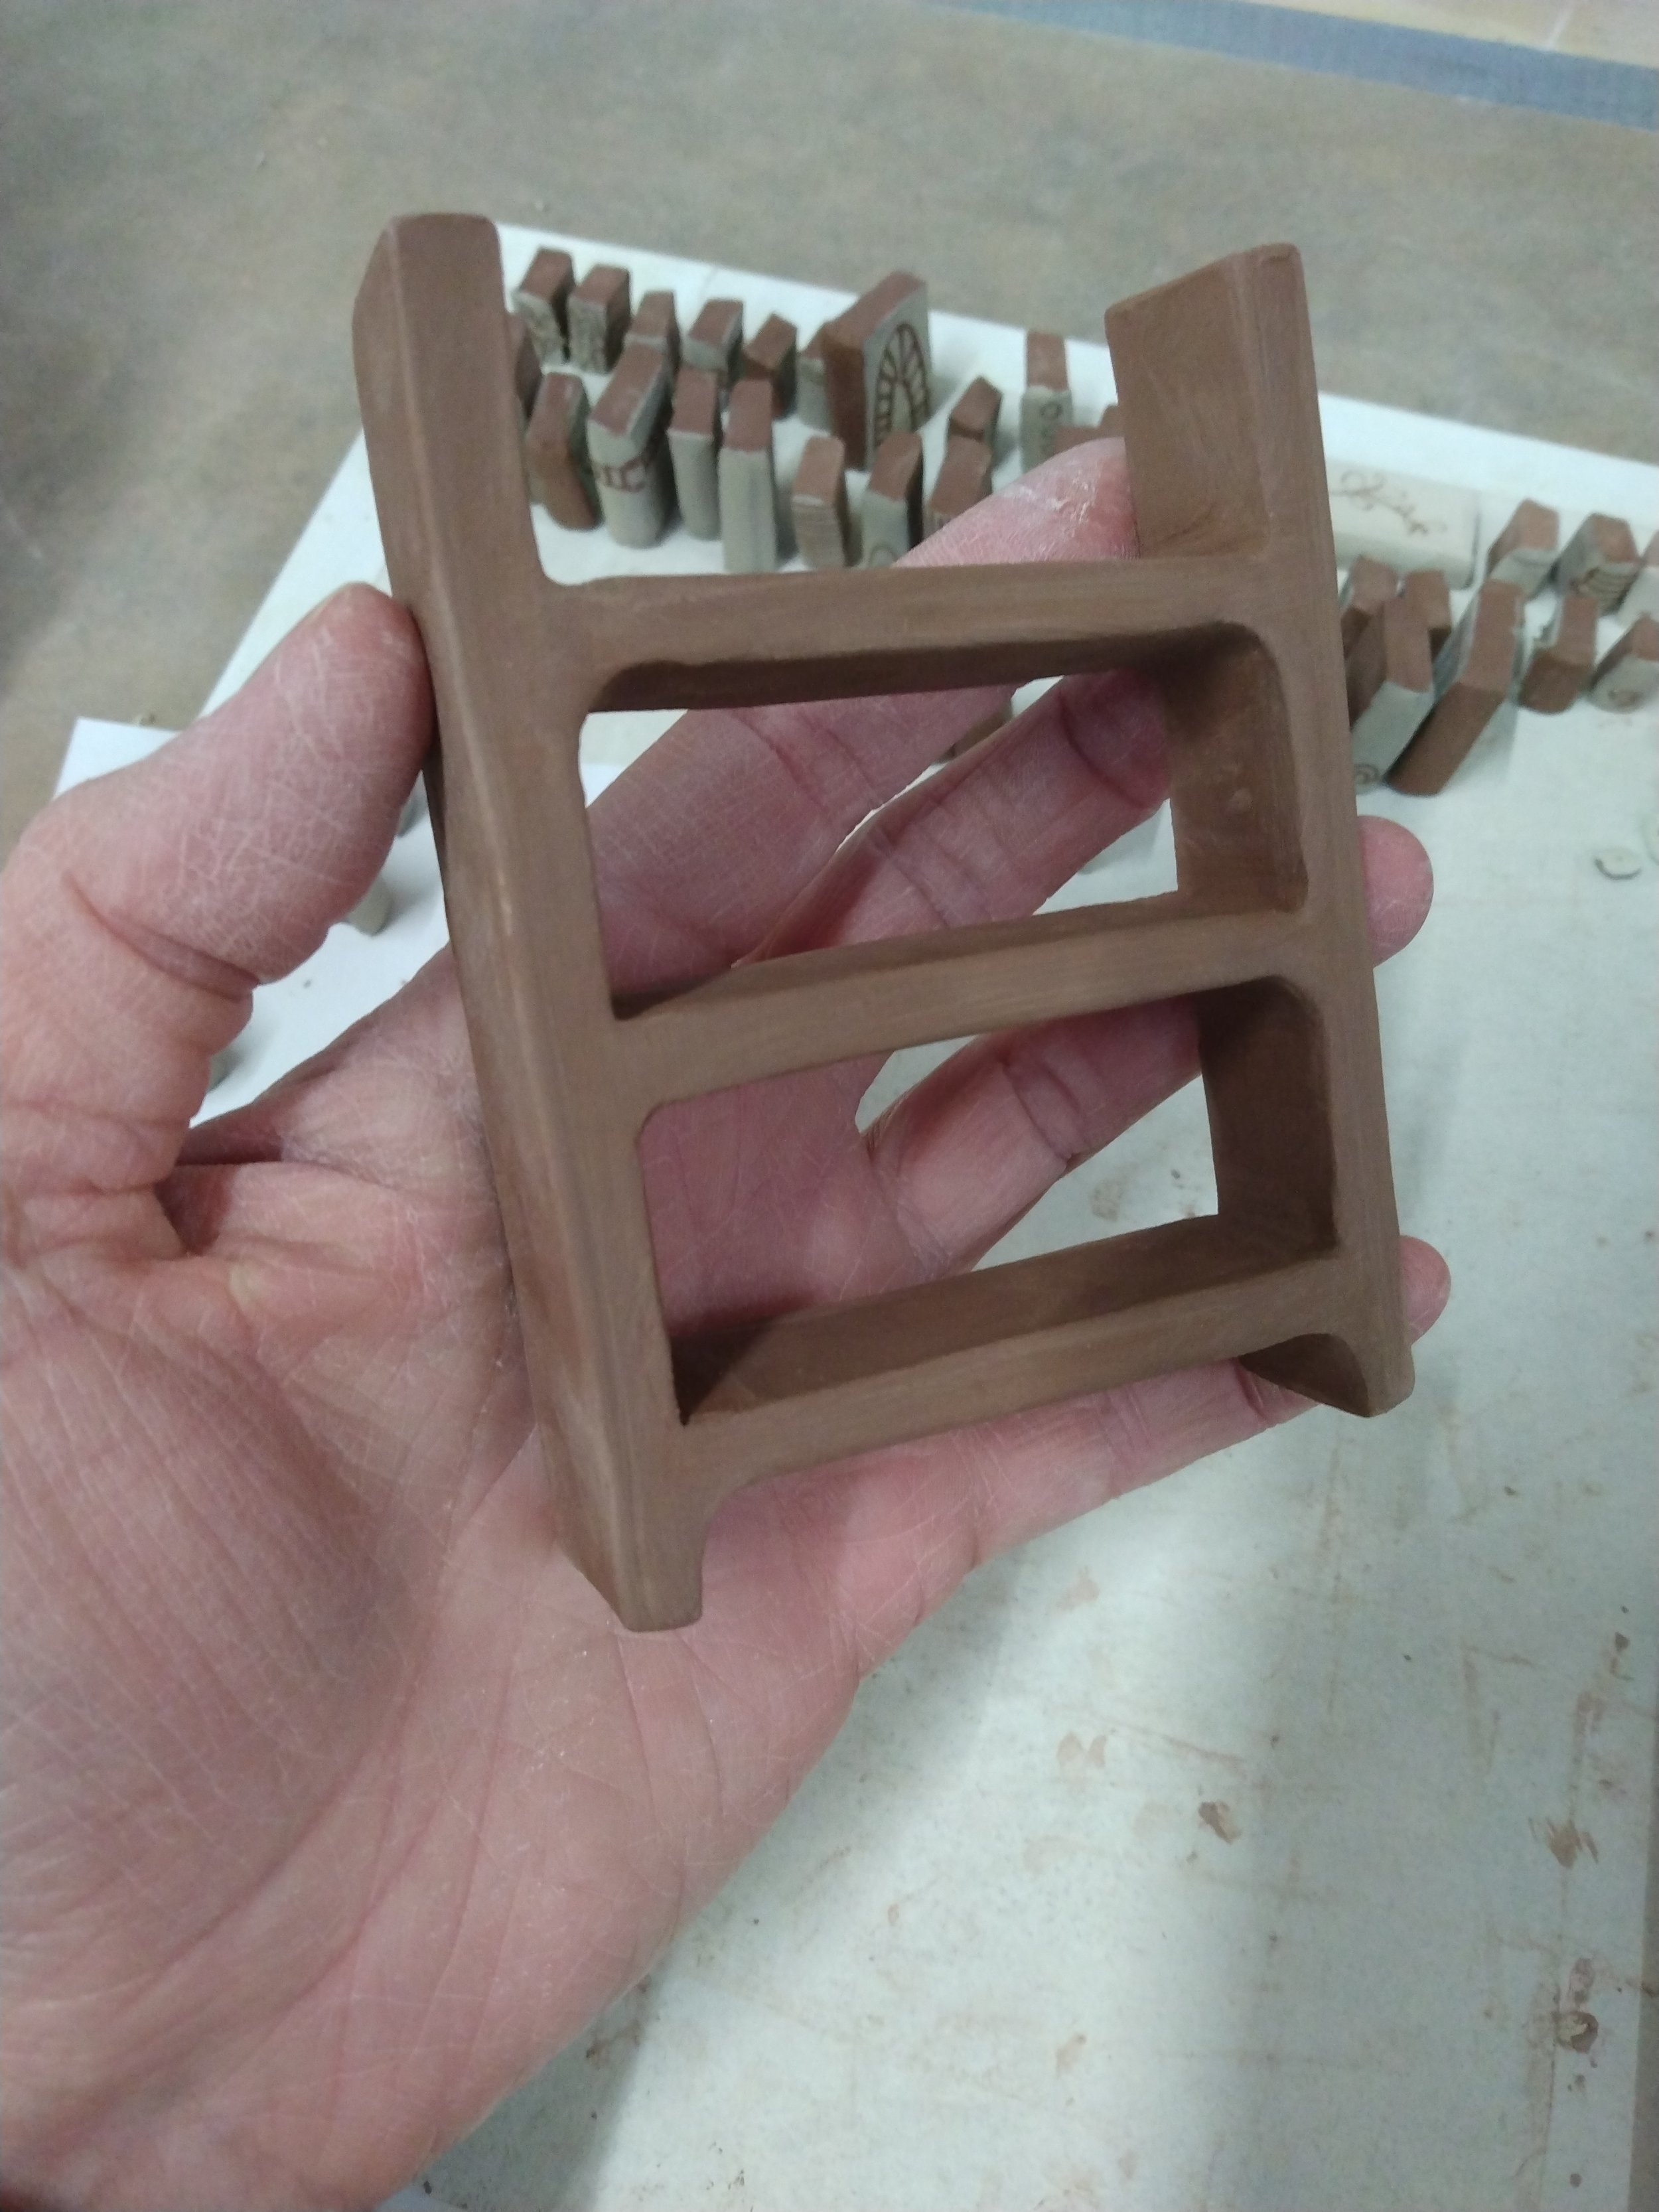
Earlier this year I saw an interesting call for entries at The Clay Studio in Philadelphia. The exhibition Small Favors called for objects that fit within a 4 x 4 x 4 inch plexi cube. I love making tiny things and brainstormed for a few days with my dad about a subject, we had some funny ideas but both liked the idea of making teeny tiny bookshelves.

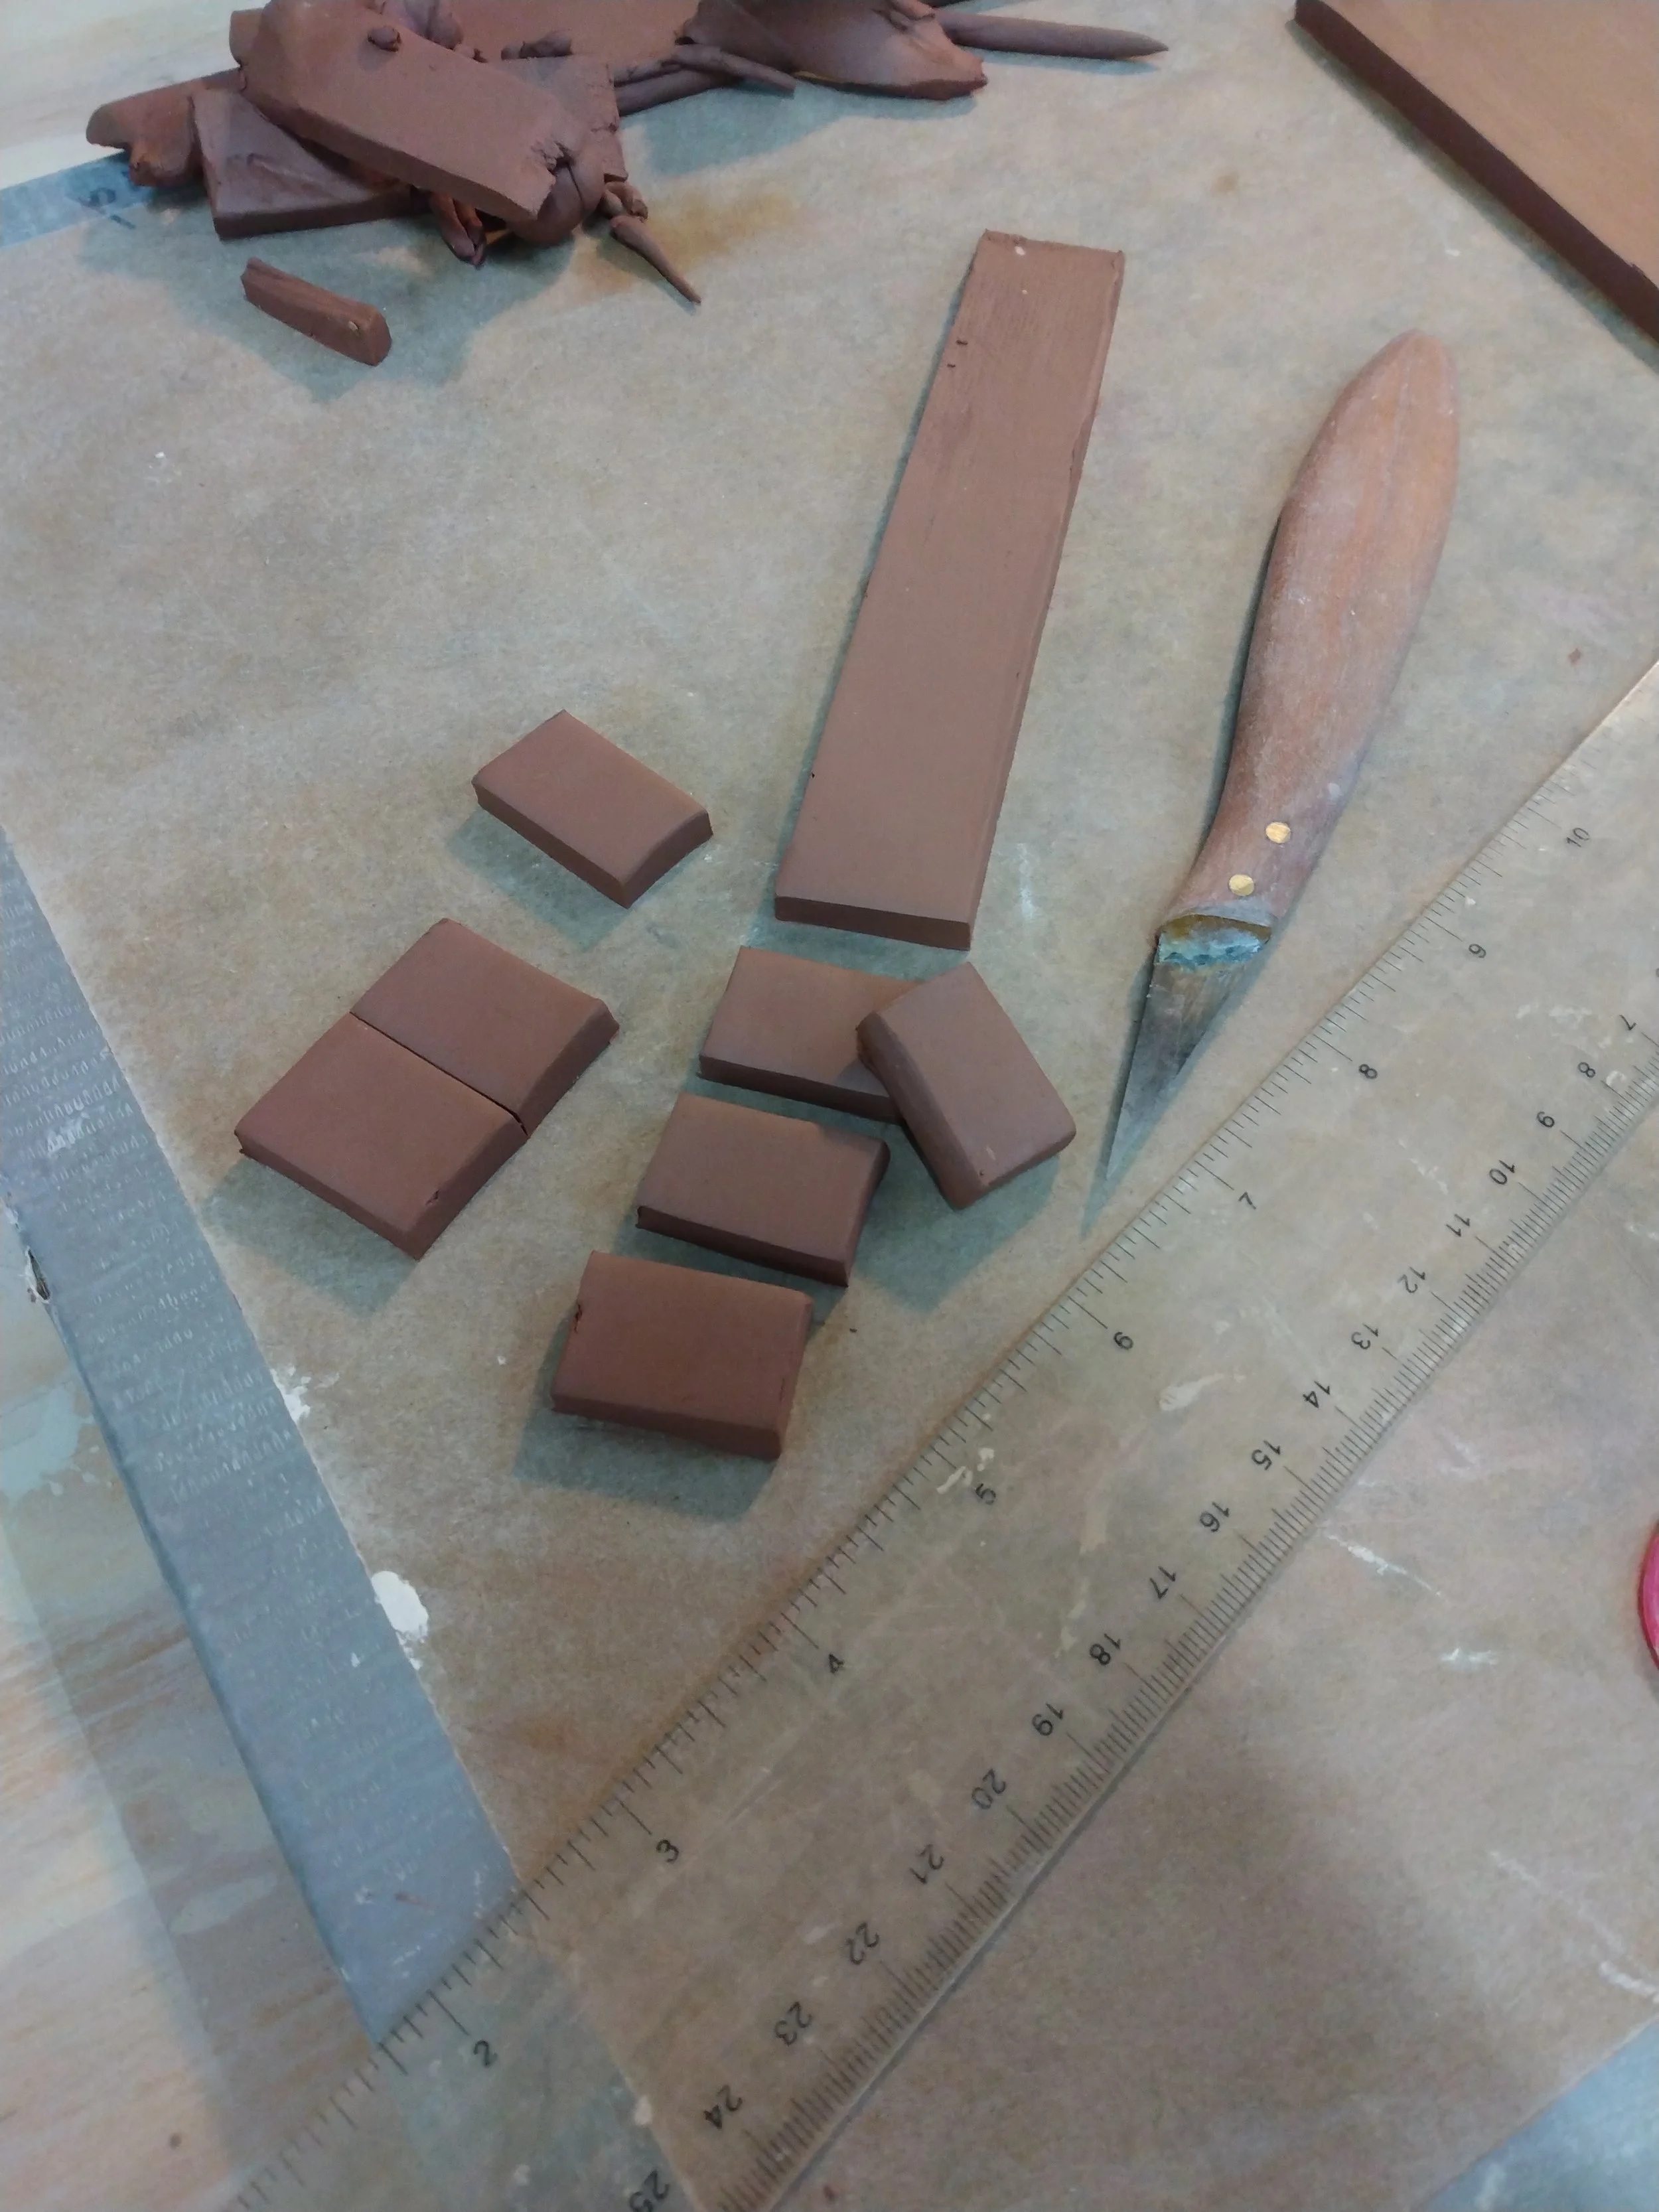
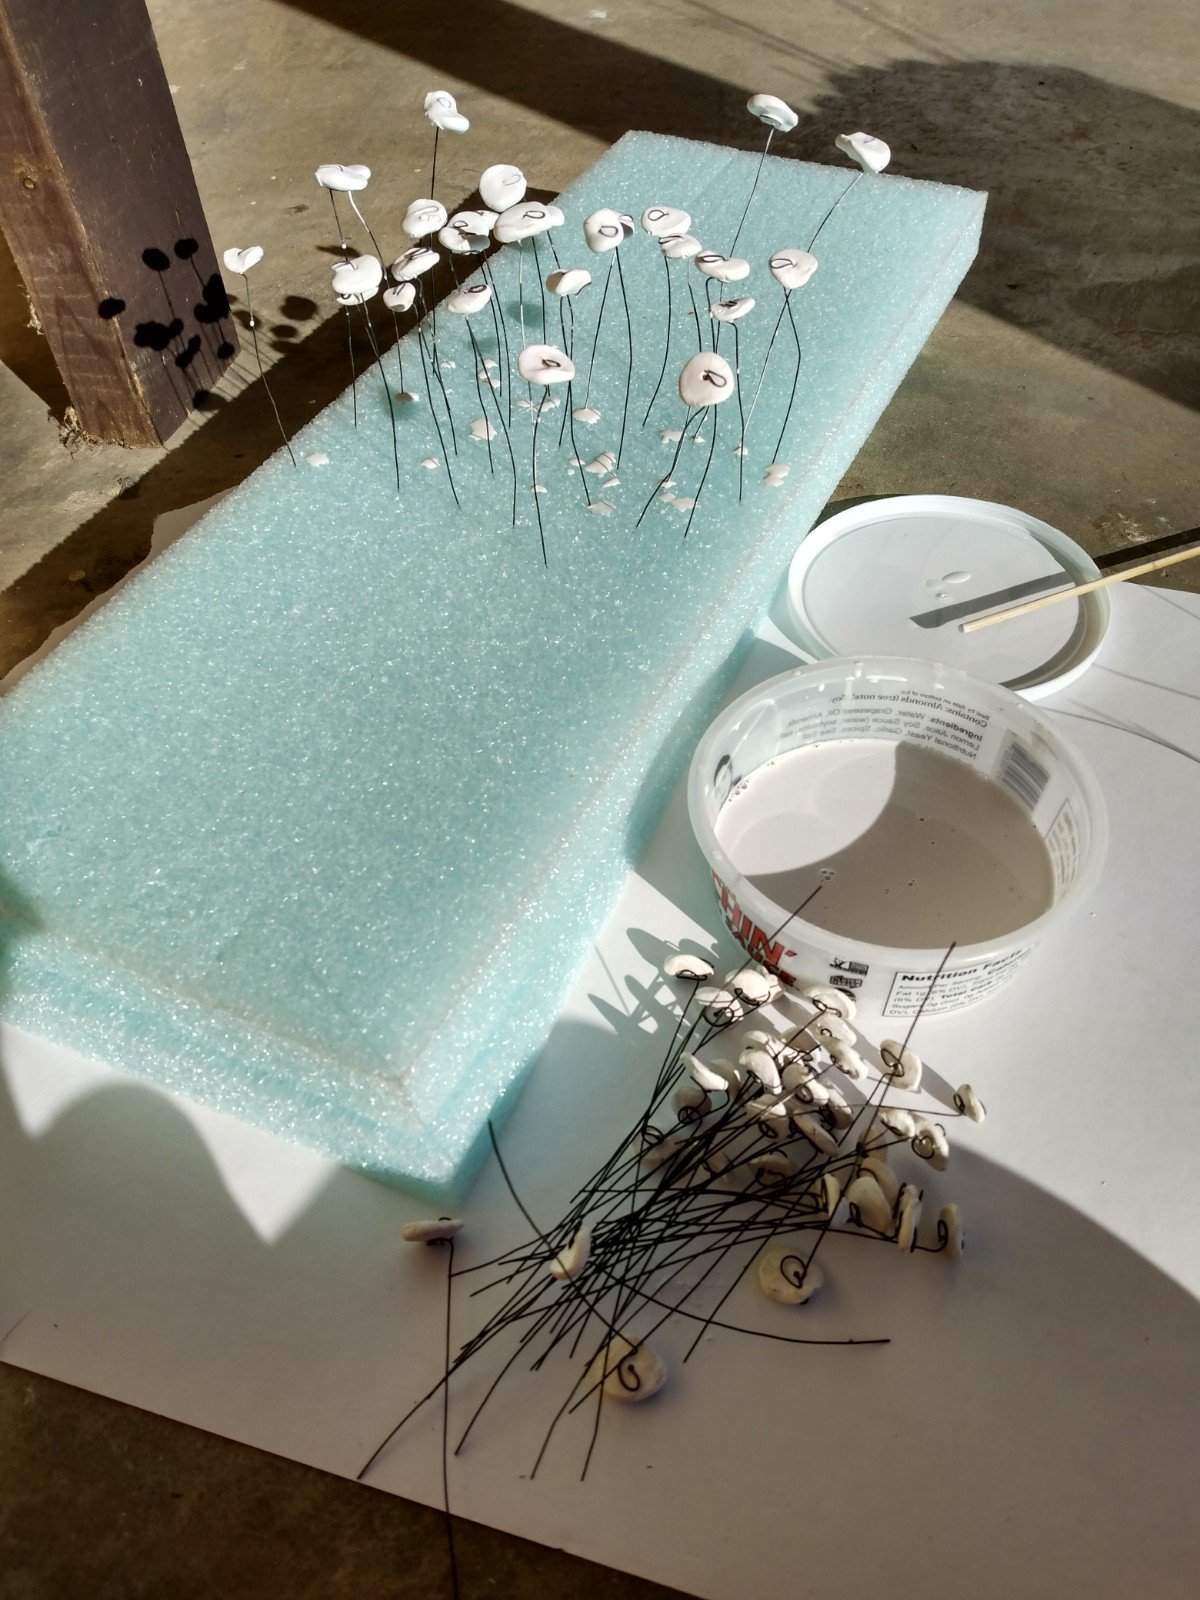
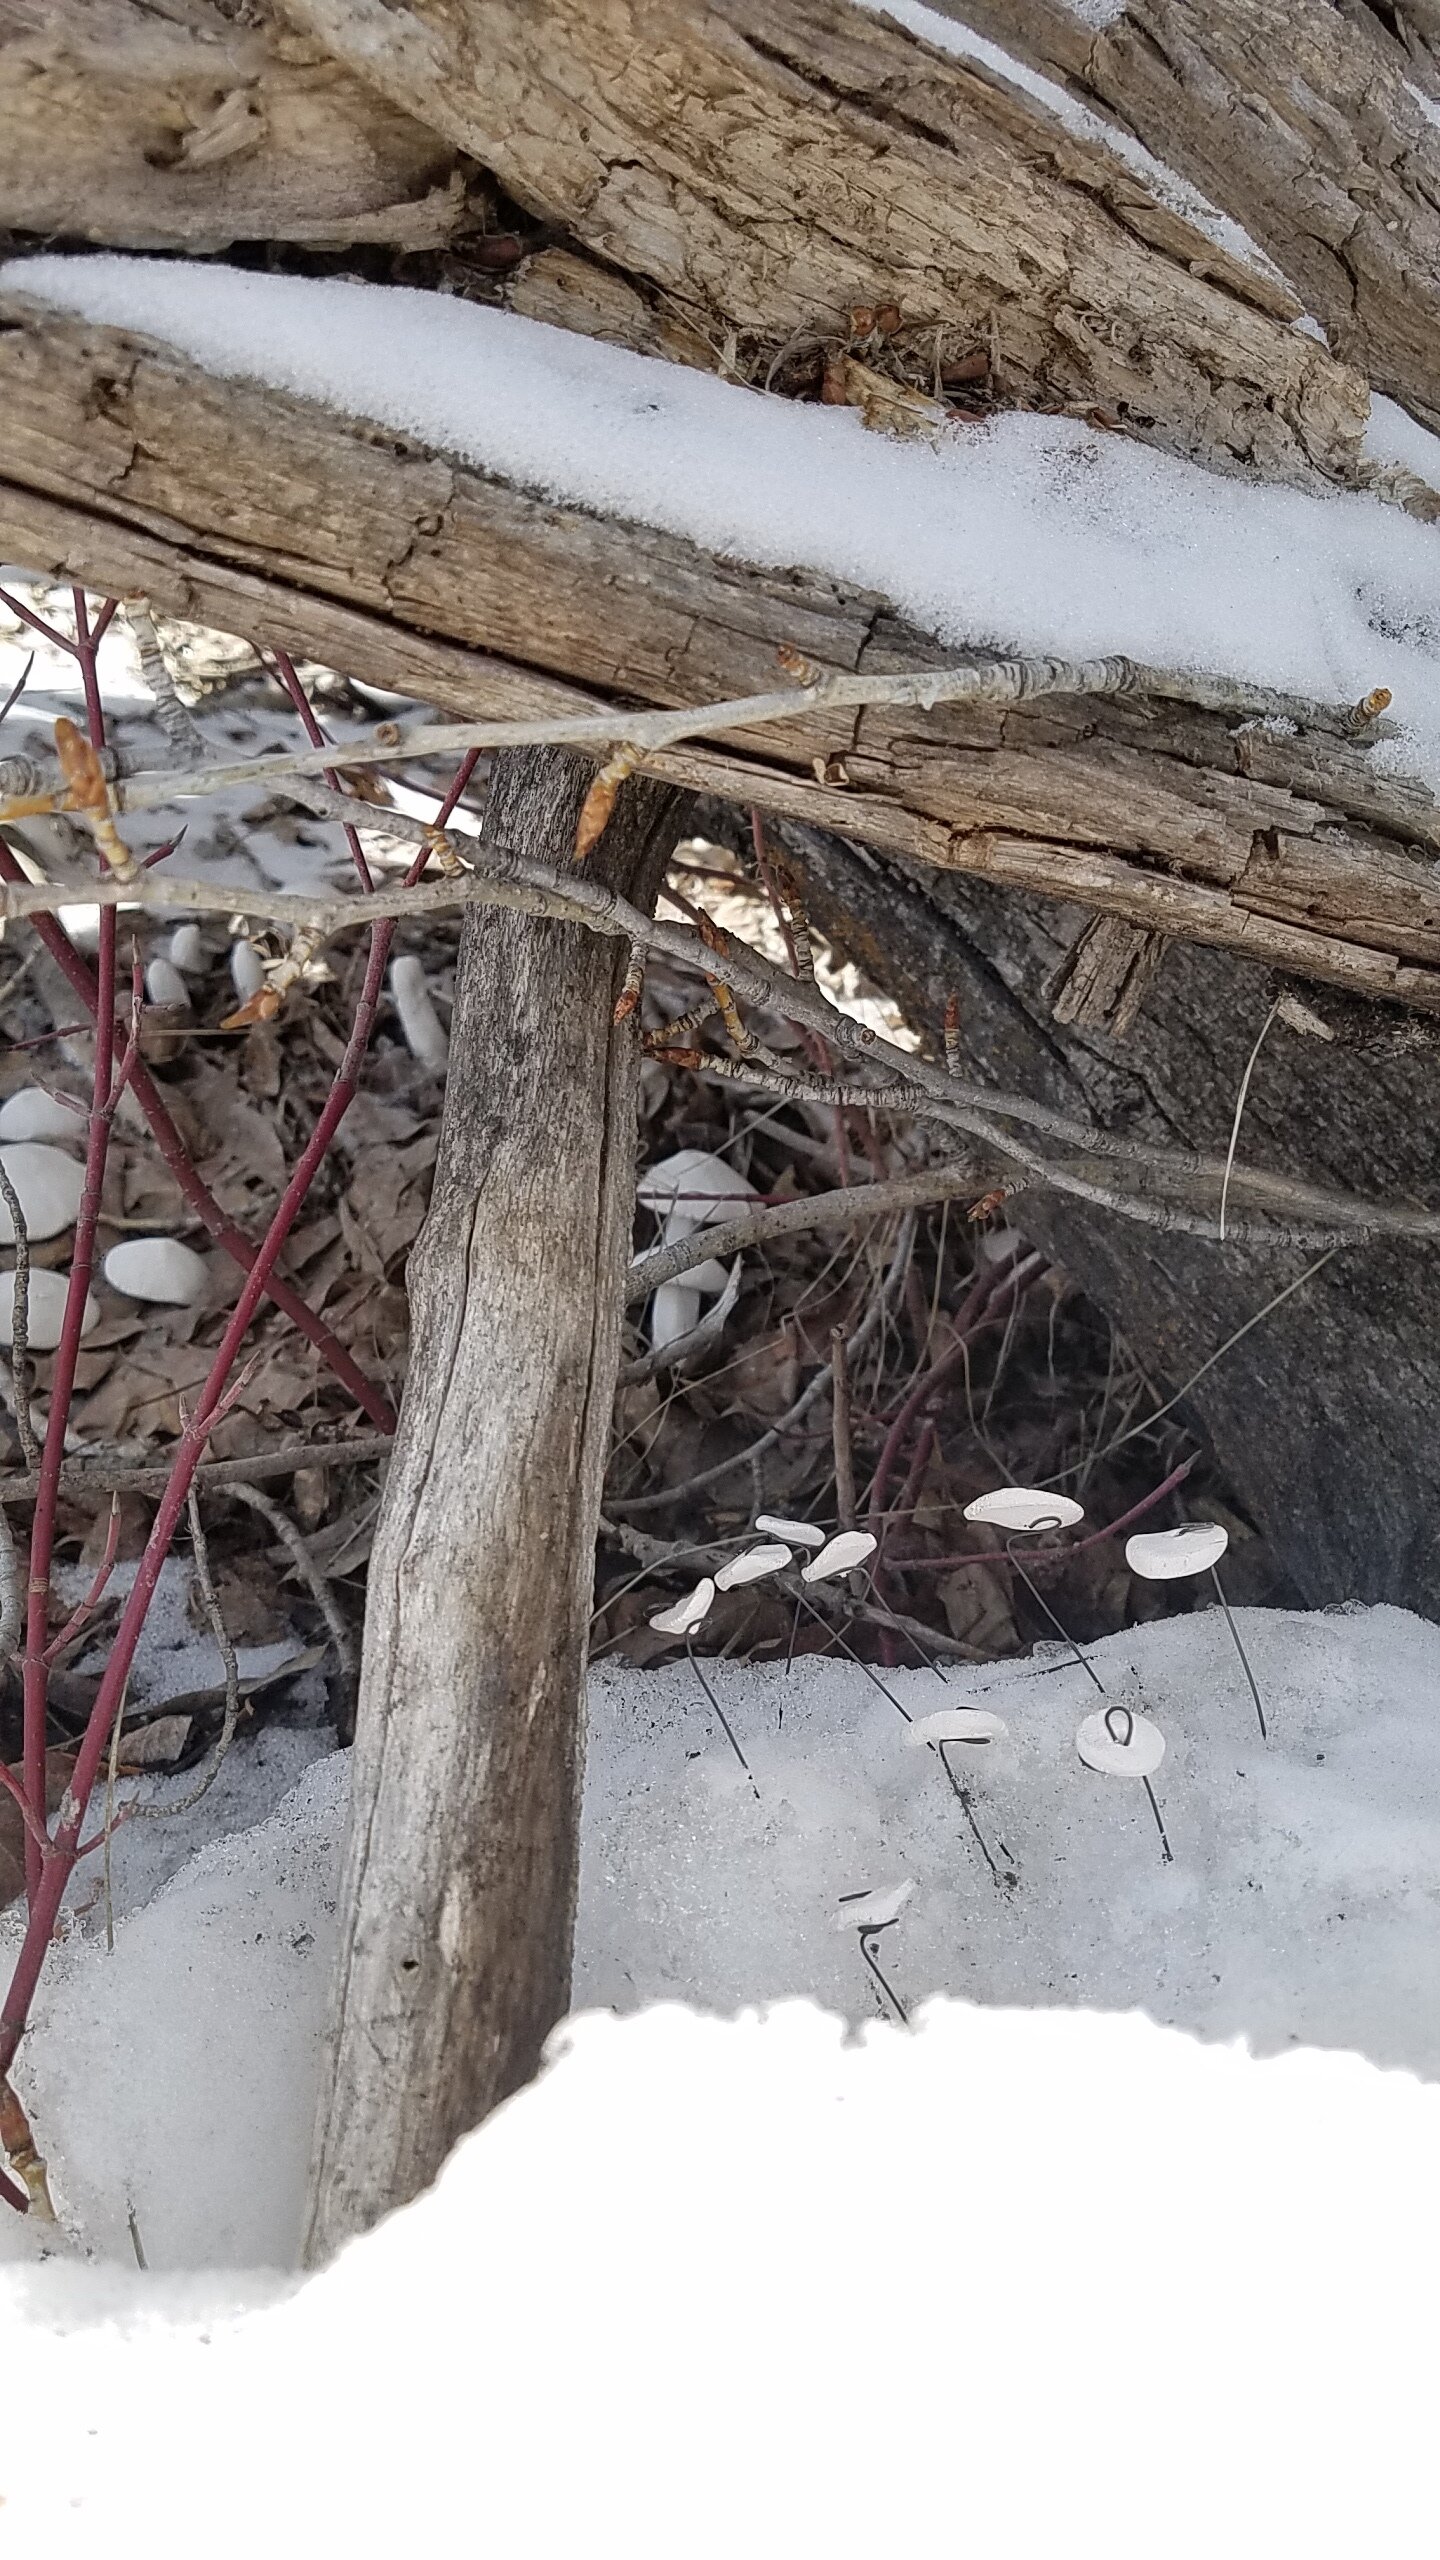
I used a red stoneware for the shelves and books, and white slip with simple sgraffito designs on the books. One idea my dad and I had was to balance a little cup of tea on one of the shelves. I made the tiniest little cup with a handle and a saucer, but after dropping it a few times decided on a little vase with flowers.

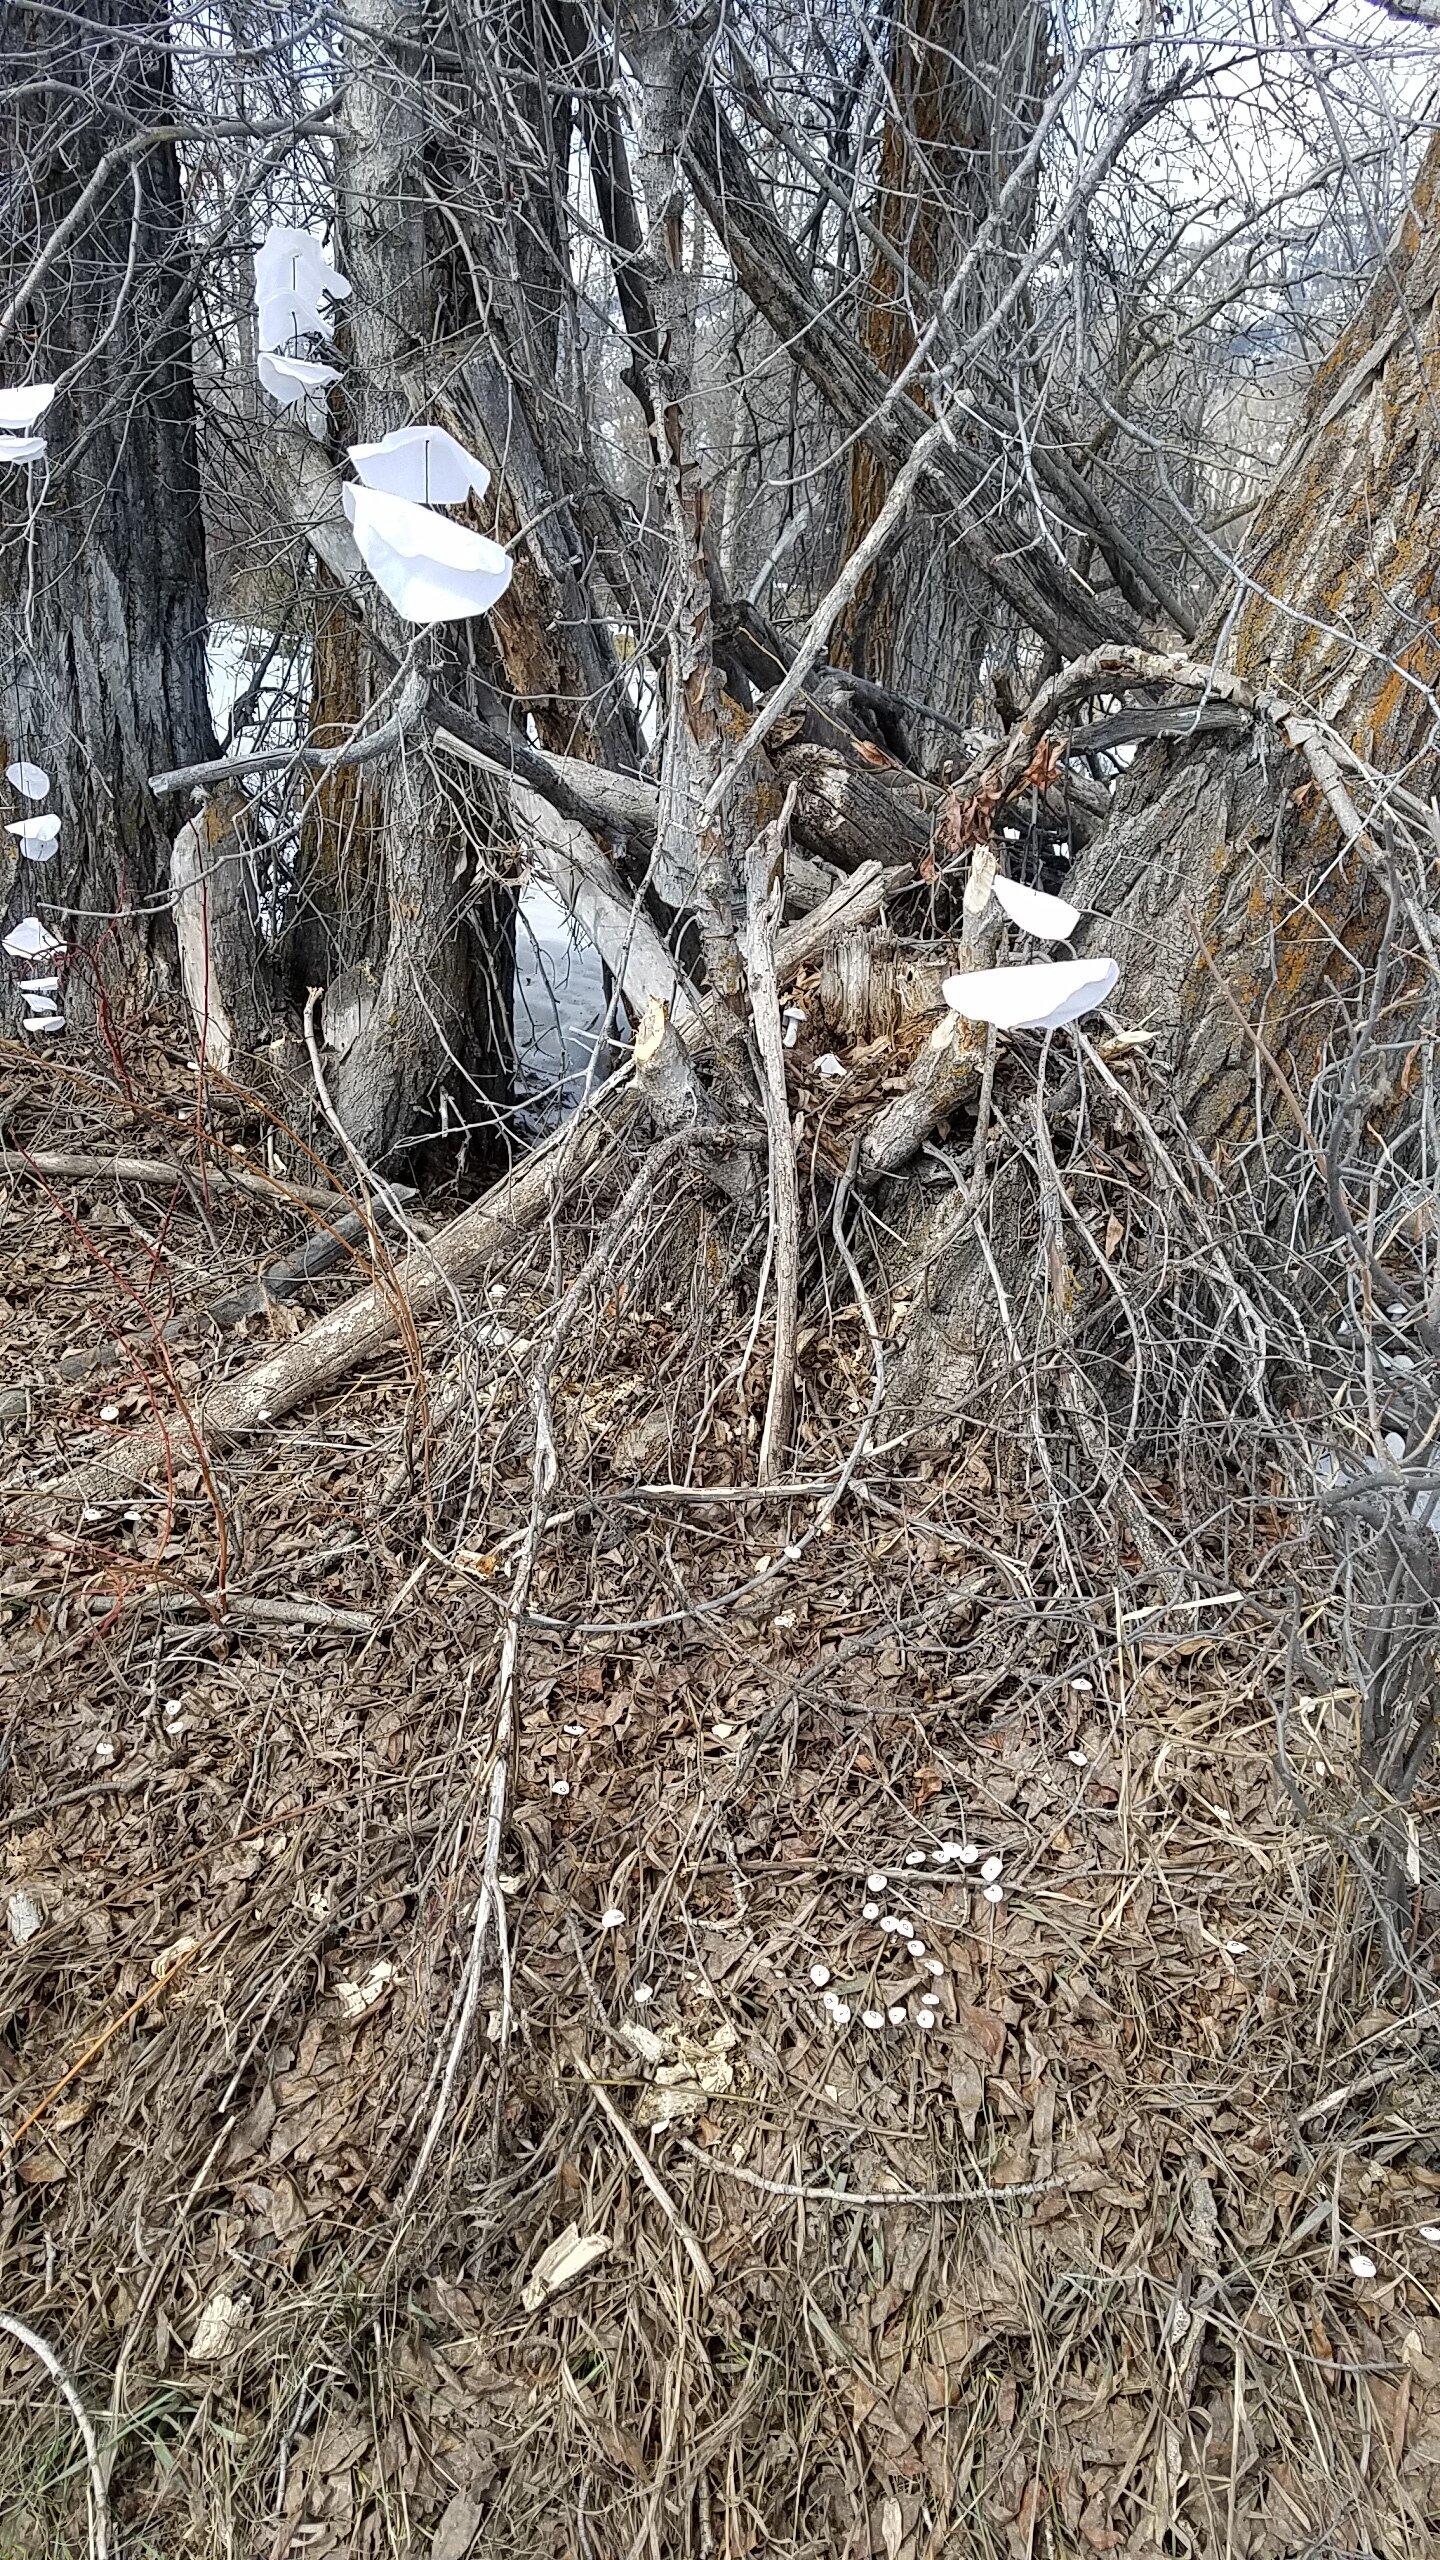
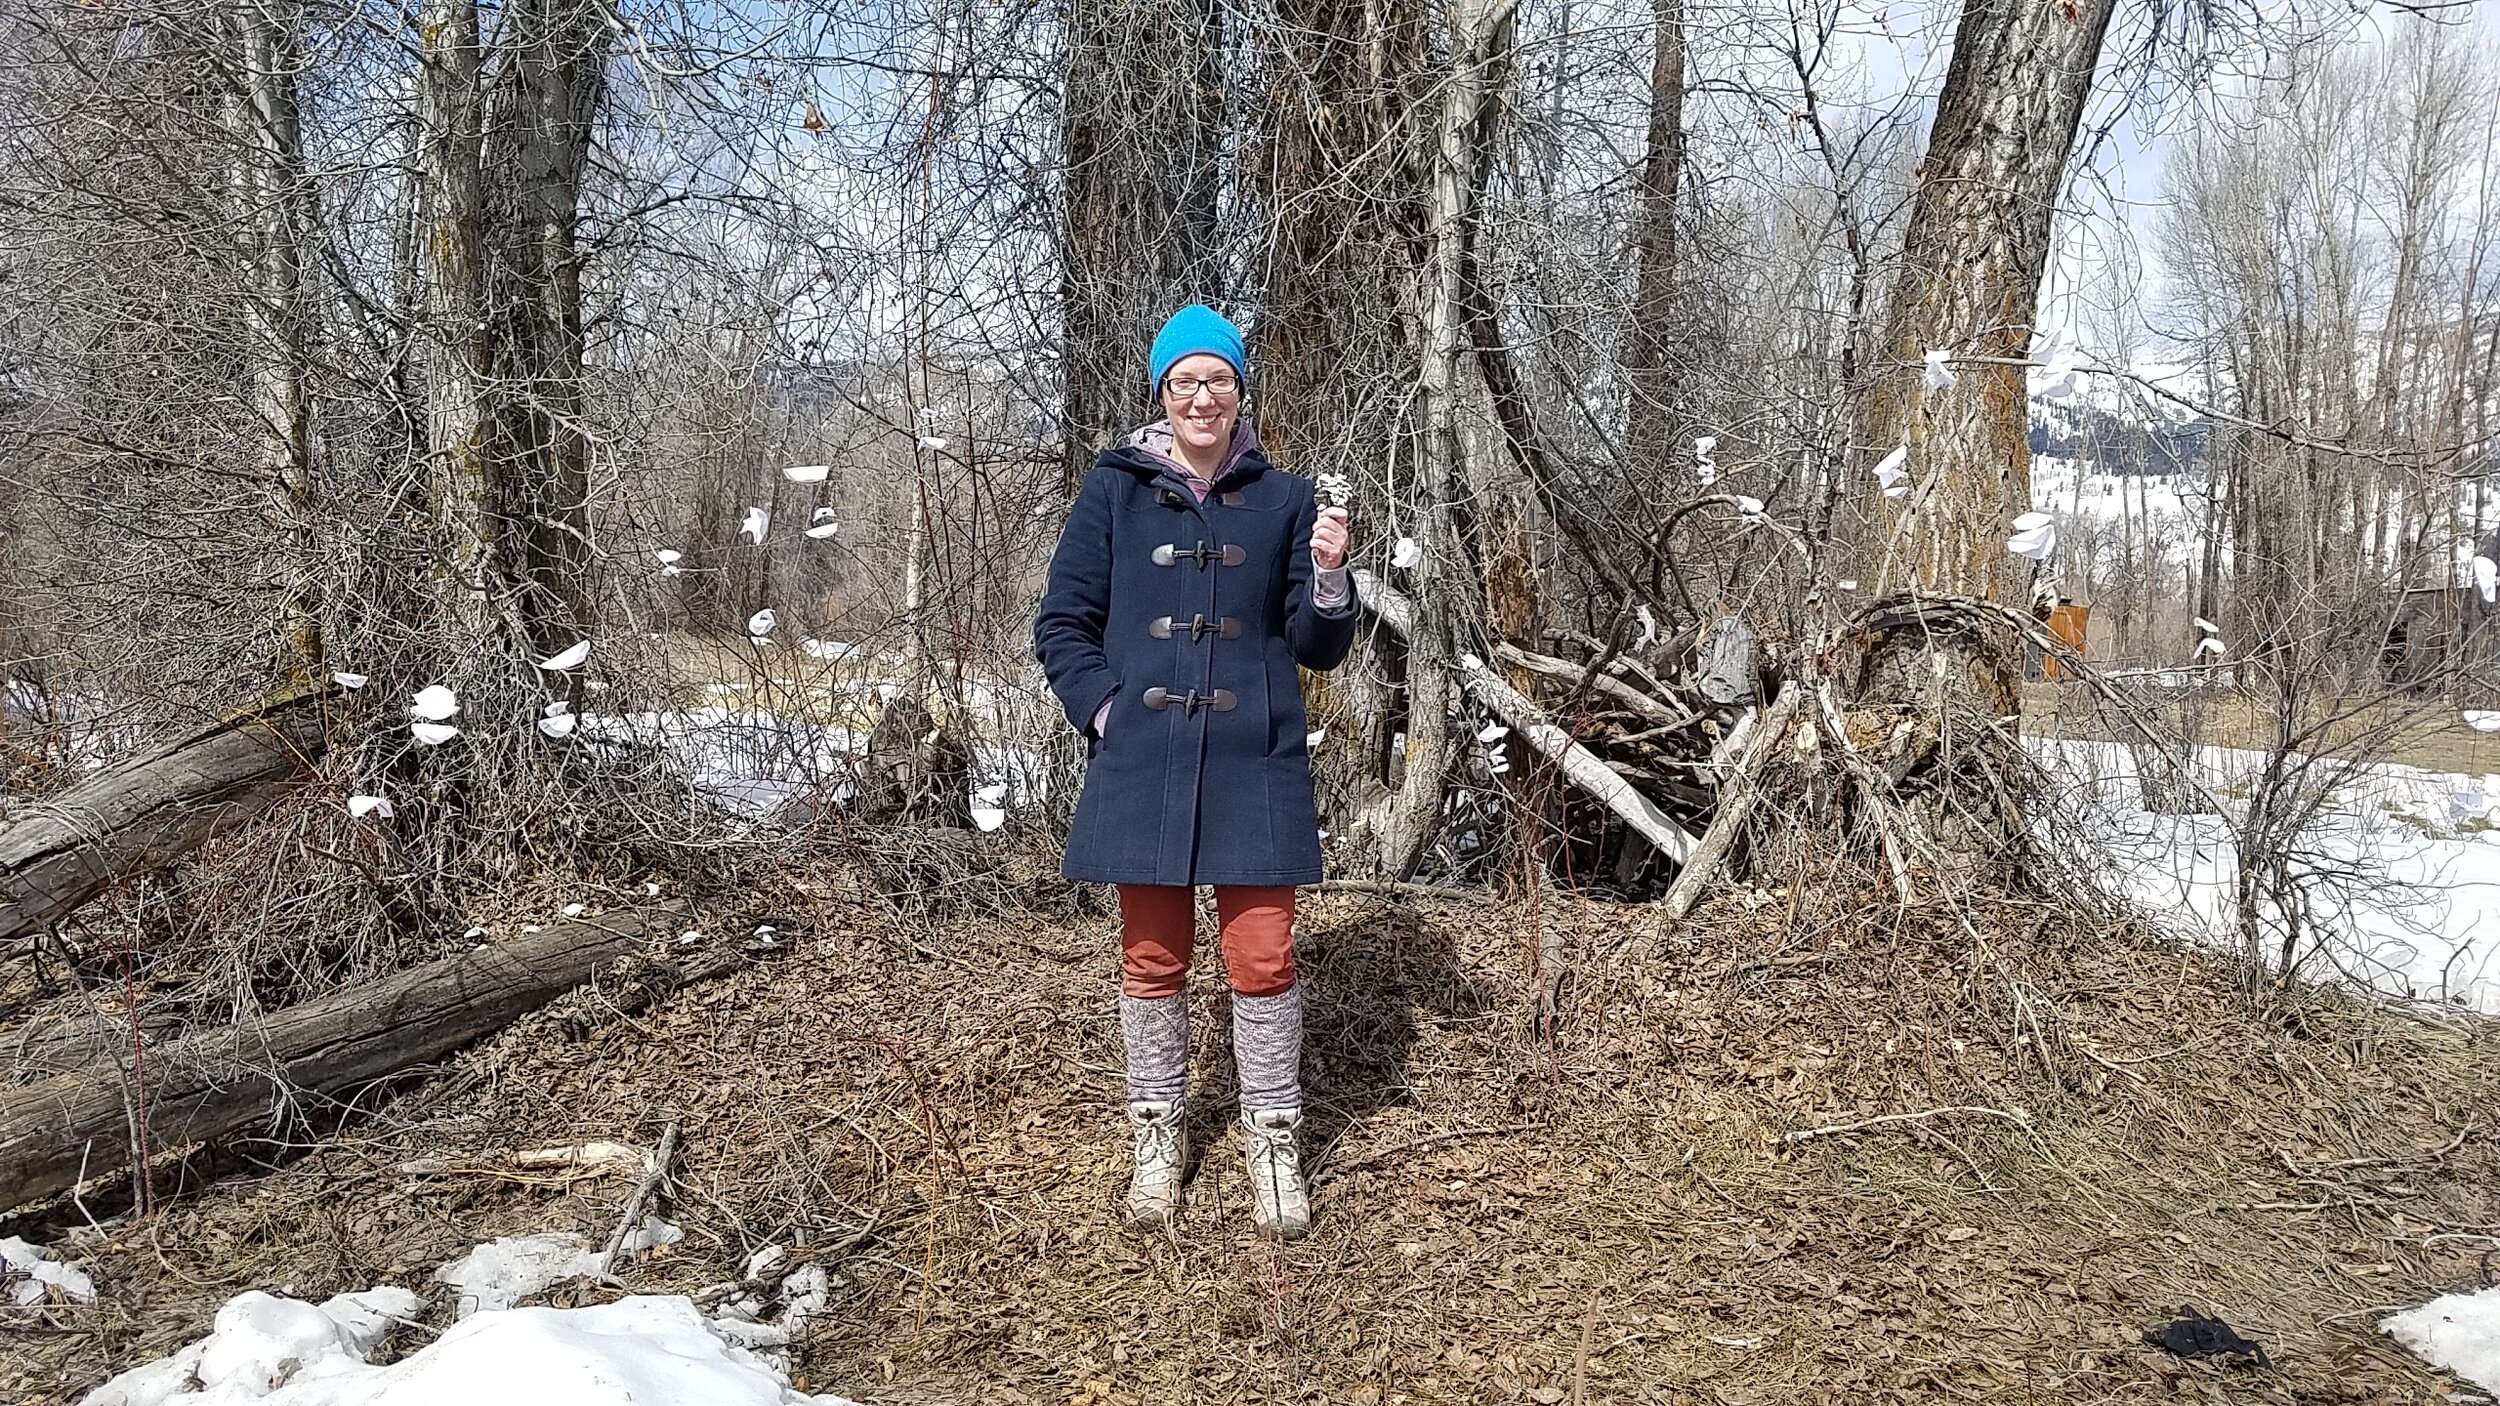
Looks huge laid out like this, but the shelf this is resting on is from a little test kiln and measures only 9 inches wide. After firing and assembly, I had some fun posing the shelves for a photo… light switch for scale!

Titles are usually the hardest, I gave this one the name: Tiny Desk Adventure after sharing the photo with a friend who said it reminded her of the Tiny Desk Concerts on NPR. Books are such adventures and with a tiny bookshelf on your desk who knows where you will go!

I was pretty excited when this little piece was accepted into the exhibition, it’s on display until June 2nd but will be visible online for much longer. This is the 50th anniversary of this themed exhibition and almost 500 tiny sculptures are included. See all the work here: (although some images are still being added, so mine might not be at this link yet) https://www.theclaystudio.org/exhibitions/small-favors-2024

All the pieces are online for viewing and purchasing, the link to the whole shop is here: https://public.theclaystudio.org/public/shop/collections/232/Small%20Favors%202024

And the link to my piece is here: https://public.theclaystudio.org/public/shop/item/47767/Jenny%20Dowd/Tiny%20Desk%20Adventure

Ways to Sign

Jenny Dowd

I make a variety of work, part of that variety is reflected in the details of my signature. This might seem an odd thing to highlight, but I had an exchange once that I still wonder about.

Several years ago, during an art fair, a person came into my booth which was filled with pottery made by me and Sam. Each piece that was picked up and turned over brought a shake of the head. Eventually they told me that I should be using a stamp to sign my name and informed me that they never purchased pottery unless the potter used a stamp as this was a sign of a true professional. After mentioning that they wanted to purchase my work but just couldn’t because I chose to sign my name, they huffed away and I stammered out a strangely cheery “Thanks for coming by!”

Since that exchange I have considered my signature a little more. I did actually try to make a stamp, but just couldn’t settle on what it should be.

Many years ago Sam pointed out that I was misspelling my name on my pots. Sometimes the 2 n’s would run into each other and turn into a long m… so without my eyes noticing, I suppose my hand just adapted and Jenny turned into Jeny. (I just tell the n’s to work it out, as long as one is there to hold down the name the other is free to make mischief, take a nap, run errands…)

In the end I’ve dug in to signing my name, no mater the material. This is in line with what I teach to my students - a clear marking. Name, initials, drawing, whatever, just make it clear and consistent.

The signature that I have landed on is something that reflects the decoration on the form. I use several decoration techniques: sgraffito, inlay, carving, underglaze pencil, sometimes I add an extra little design or decal (the watermelon.) In the end I’m trying not to spend too much time on the bottom of the pot but also trying to give it a special feel.

The frustration from my potential customer did not shake me. It made me think but has added confidence to my style. (Obviously they didn’t like my work that much!)

Little Pocket

Jenny Dowd

Several months ago I was invited to make a piece for a show at Mystery Print Gallery in Pinedale, WY and I think the prompt was one of my all-time favorites: Tiny Vacant Spaces.

I had so many ideas right from the start, but also completely discounted each one of them as they didn’t fully fit the theme.

I thought about the pocket my mom made for me that I would put under my pillow at night with a tooth for the tooth fairy.

I thought about my school desk in 2nd, 3rd, and 4th grade when I was convinced a mouse lived in there at night. Before leaving every afternoon I would arrange my books and school supplies to create little stairs, hallways, and nooks for the mouse. In the morning I would wonder at what antics it got up to while the school was quiet.

I thought about envelopes and hollow mushrooms and clouds and ladders and how the moon appears so tiny.

At the absolute last minute, the day before the final shipping deadline I came back to the pocket.

I found a tiny 4x4 inch frame and created a stack of fabric to fill the space, and then made a teeny tiny pocket for the top of the stack. The thick frame means the piece can hang on the wall or stand up in a nook.

These are my thoughts on pockets, and specifically - Little Pocket:

Too often there are no pockets where there should be pockets. All the possibilities of the myriad of things that could go in those pockets are lost. Little Pocket is a shadowy ghost of the pocket that should be.

As much as I enjoy coming up with ideas, I also like a good challenge in packing and shipping my art - so here was my solution -

After placing a protective front over the open frame the whole thing was wrapped in foam, and held in place with not only strawberry tape but also a rubber band. Then I popped it into a little box. Pretty easy compared to some!

The exhibition will be on display at Mystery Print Gallery until December 30, 2023 - if you are in the area stop by and see how all the artists interpreted this theme. And keep an eye on the Mystery Print FaceBook page for photos of the show!

The Cloud Factory - On the Road

Jenny Dowd

This summer, thanks to a program with Jackson Hole Public Art, The Cloud Factory made a return to Wyoming. (Click here to catch up on the history of The Cloud Factory)

In late July Sam and I made the long trek from NW Arkansas to NW Wyoming.

As soon as we arrived in Jackson we met up with friends and got to work making clouds in a park. I brought some clouds along with me, and we were well stocked with clouds made by the summer interns at JH Public Art, but we didn’t know how many would be needed. We used paper and fabric, embellishing with drawings and stitching, and either made them hang on a string or soar from a stick!

(To see how to make clouds visit the Get Involved page on the Cloud Factory website)

JH Public Art found a refrigerator box and I spent an afternoon making it into a Portable Dispensing Unit. After cutting the openings for the coin and the clouds to be dispensed from, I added instructions (insert coin, get cloud) and decorated the box with clouds.

How does the Portable Dispensing Unit work? The unit is too small to produce clouds, so we stock it with clouds that have been made offsite. The Unit only works with official Cloud Factory coins which we hand out freely. With the coin, the option is Cloud on a Stick or Cloud on a String… insert coin, get cloud! (See this previous post for more behind the scenes info)

With the help of JH Public Art Interns (Cloud Engineers) we popped up and dispensed clouds at 2 locations on August 2nd. In the morning we were on the Glenwood boardwalk between D.O.G and Penny Lane. Our audience was pretty skeptical, it was a dreary rainy day and most people just wanted some coffee. Even so, we convinced several people to take our free coins and choose a cloud on a stick or cloud on a string. Many a mood was brightened and the smiles and laughs made it all worth it.

After a few hours we folded up the Portable Dispensing Unit and moved it to the Center for the Arts for the Wednesday evening People’s Market. Some people remembered the Portable Dispensing Unit from the summer of 2021 when it briefly popped up on the boardwalk and some remembered the giant Cloud Factory from the lawn of the Center for the Arts in 2020. It was a long day of dispensing clouds but it was full of laughter and cloud factory sound effects.

With the help of my fearless Cloud Engineers, we dispensed over 300 clouds to the surprised people who encountered us!

Visit The Cloud Factory website to view the dreamy video that captured the magic of the day, made by cinematographer Blake Ciulla

Until next time!

The Cloud Factory - Portable Dispensing Unit

Jenny Dowd

The Cloud Factory is back! It’s been a few years, but in that time I’ve been scheming and dreaming about how to put clouds in the hands of the people in NW Arkansas.

Are you totally confused? The short version of the story is… in 2019, during a Moon Shot event hosted by Jackson Hole Public Art, I presented a wacky idea of a vending machine that would dispense clouds. The idea was so well received that a giant community version of The Cloud Factory came to life in March of 2020 on the grounds of the Center for the Arts in Jackson. Later in the summer of 2021 the vending machine (Portable Dispensing Unit) version popped up on the boardwalk in Jackson and dispensed a few hundred clouds to confused and delighted patrons. Check out the website for photos, videos, and more descriptions: cloudfactoryclouds.com

Recently I’ve had the opportunity to build a new Portable Dispensing Unit to be part of an exhibition in Springdale, AR. The exhibition, Valued, is on display for the month of June at the Perrodin Supply Company, as part of Interform’s Art and Fashion Biennale, Assembly.

This time, the unit needed to be designed for gallery visitors to run the dispensing unit. I didn’t have enough time to find a refrigerator box, but I found that that hiccup resulted in a better idea…

After clearing out some space in my pottery studio, and finding some giant sheets of cardboard that had been squirreled away in the attic, I set about making a vending machine that could collapse and easily be assembled. A lot of glue was used, and when I needed weights I found that there are plenty of heavy things hanging around in the pottery studio.

The walls velcro together and the boxes that catch coins as well as the black fabric that cover the windows also velcro into place. It was an interesting problem to think about how the dispensing unit would function, and how to invite and direct people to use the machine.

The machine dispenses 2 types of cloud, cloud on a string and cloud on a stick. I wrote dispensing instructions on the inside as well as ideas for sounds that a cloud factory makes… because sound effects make things more real. The clouds are all made from recycled materials, more on that in a future post.

The final Portable Dispensing Unit also has instructions on the outside, so people know that they are invited to be Cloud Factory staff and enter through the back curtain to make the machine work.

And most importantly, the Cloud Factory only accepts Cloud Factory coins. They are free and are found in a box on the side of the machine.

The Portable Dispensing Unit made it’s debut during a gallery crawl on Friday June 2nd, over 350 people walked from gallery to gallery in Springdale during the opening of Assembly. I missed most of the action at The Cloud Factory as I walked to the other galleries, but the machine worked and many many people went home with clouds.

The exhibition is on display until June 30th and the gallery hours are:

Perrodin Supply Co. | 126 N Shiloh St | Springdale, AR

Wednesday & Thursday 4-8pm | Friday & Saturday 12-8pm | Sunday 2-6pm

If you visit The Cloud Factory, be sure to tag us on Instagram @cloudfactoryclouds

Tiny Food

Jenny Dowd

Tiny Food!

What is cuter and more mouth watering?

I do not know.

When the Fayetteville Public Library Innovation Lab asked me to teach an air dry clay workshop earlier this month I could not stop thinking about making tiny foods. (If you live in or near Fayetteville, be sure to check out the events at the library - the workshops are free!)

It’s been awhile since I have used air dry clay, but I remembered that working with Fimo is fun. Plus it comes in lots of bright colors and has a long working time.

I spent a couple of afternoons at the kitchen table, giggling while I made some of my favorite foods. Making waffles might have been my favorite, I was pretty excited when I realized a match stick would be perfect for making the square waffle-spots. Unfortunately, the experience was not all giggles. I managed to burn / melt the first batch in the toaster oven (probably not the best for even and exact heat.) I was so sad that I didn’t take a photo, so you’ll just have to imagine a bunch of sad-burnt-melted tiny food.

During the 2-hour workshop my students made the coolest tiny foods! I brought boxes for everyone to transport their foods home in, so those got decorated as well. S’mores, sushi, pies, cakes, popcorn, pizzas, cakes, noodles… oh we had a great time and were all rather hungry when we left!

Studio Update

Jenny Dowd

A lot has happened in the past few months! Here are the highlights…

We got a new electric kiln! It’s big, heavy, and awkward, so getting it off of Sam’s truck was an undertaking. We moved it into the studio using Ancient Egyptian engineering - rolling the kiln and pallet on scrap metal rollers. This was actually pretty fun and of course we took a few minutes to Walk Like an Egyptian and to sing that song too…

Still need to hook it up, but the kiln is now in its new home with the other kilns (they all need names.) The space is a bit unsettled for the moment, but everything will find a place soon.

Speaking of finding a place, we’ve been in need of shelving to keep our drying or ready to be fired pottery. Sam welded us a cart…

Up next, this is probably the most important (or at this point, luxurious) item… a studio sink! Complete with clay trap and on-demand water heater. I promise it will never be this clean again. Ever.

Or maybe this is the most important? A tiny bathroom, complete with a sliding barn door (with a handle Sam made once in a blacksmithing class) and a vintage porcelain towel rack (scavenged by my dad)

We had our first ever open studio and pottery sale this weekend, it was a good start for events to come! Plus we got help with the final lift of the new kiln and a few suggestions on future bathroom colors…

Not to be left out, Studio Cat Merlin is hard at work overseeing the Shipping Department (located in the house.) We will be introducing Merlin back to his job in the studio very soon, we just need to finish building things and make sure he has some comfy perches he can observe from. He’s resting up in preparation.

Lucy goes North

Jenny Dowd

A few months ago I was invited to participate in an art exhibition with the intriguing theme: Lucy goes North. It was good that I had a few months to mull this over…

Curator, David Klaren, of Mystery Print Gallery in Pinedale, WY said this of the theme:

“A few years ago I had Wyoming Public Radio playing in the background as I moved between the shop and gallery preparing for a new exhibit. I wasn’t paying attention to the Friday afternoon magazine segments, but as I walked into the shop, the narrator stated, “and after the break, Lucy goes north.” I caught myself wondering, who is Lucy? And why was she going north? I had no idea, but I thought it would be interesting to throw the idea out to a group of artists to build an exhibit around.”

I kept thinking about old maps and mysterious journeys and finally decided that Lucy was considering an adventure to catch some of those big stars that she heard hang low in the Northern sky.

I decided to make this more of an illustration than a ceramic piece, so I rustled up a pad of watercolor paper, thin black pens, India Ink, and my favorite entomology pins. Oh, and I found a little wire net that had been made years ago for another project - looks like it could catch some stars!

Each morning while working on this project, I grabbed my favorite starry mug, a 2nd from a soda firing a few years ago.

The final piece, hastily photographed before packing up for shipping, is a shadow box. The compass rose sits out a bit in front, and the stars are all pinned in place.

North is where the stars hang low

Lucy had heard stories of the North.

That the sky was vast. 

That the stars hung low in a big big sky. 

She wondered if they could be caught.

She picked up her star-catching net.

Lucy went North.

The exhibit will be on display at Mystery Print Gallery & Frame from Nov 3 - December 30th. The opening reception is November 3 from 5-8pm. Check out the Facebook page for photos of the exhibition (coming soon), I can’t wait to see everyone’s interpretations!

Ghosts & Pumpkins

Jenny Dowd

OOOooooOOOOOOOOOooOOOOOOooooooohhhhhhhhhhhhhhhh

Well, here it is, Happy Halloween Weekend!

I’m always a bit late on this, but really, ghosts are for all year. I made a small series of ghost tea cups last year, after Halloween, oops, and sold all of them last month during September sales. So, I made some more… but again a little too late. Oh well, they are some of my favorites…

It was a spooky day in the studio when I was decorating the cups, Sam was working on something with the lights, so I was working with the moody natural light through the window. (Yup, our studio is still very much a work in progress, more on that in a few weeks.)

I draw on the bisque fired porcelain using an underglaze pencil, and then brush on a watered down underglaze, a lot like ink drawing. This batch turned out etherial and definitely more spooky than my last batch!

Sam, on the other hand, starts making pumpkins and jack-o-lanterns in August! This year he used the Raku kiln he built to add a spooky finish to his pumpkins.

Our porch is covered with pumpkins and of course we lit them up one night to see how they glow! Many of the pumpkins that we took to September markets found new porches to live on, and the rest will fill up our porch for Halloween and into November.

We really like the idea of a pumpkin on the porch that does not rot! Plus, it can hang out inside and add a spooky element wherever you like.

Pumpkins and ghost cups are still available on our webshop, and will stay there past Halloween… because spooky can be anytime!

Finishing Touches

Jenny Dowd

It’s been awhile since the last update, it’s been an overwhelming few months. Things seem to be smoothing out and suddenly the studio is making sense.

The electric is finished, no water yet, but it’ll happen. We added insulation to the walls and sure, we still need to finish the walls but it just feels crazy not to make pots and work in our new space. The projects (studio, house, yard, pottery orders) keep piling up, so the strategy has been to work on a little of each at a time.

And oh it feels so very good to enjoy a cup of coffee in the morning in the studio!

One thing we did a little too early was move our small kiln over to the kiln patio. It was fine, it was great to run a load of bisque and feel like we are starting to get something accomplished again. But it rained that night and without any weather proofing we knew the kiln was likely to get very wet. Right before the rain started we scrambled and put together this make-shift guard, which totally worked but wasn’t really the plan.

So here’s the real solution - a greenhouse plastic sheeting. Sam built a frame and we attached the sheets, then moved the other kiln over. I’m sure we will need to tweak things a bit after the next rain, but everything feels much more protected for now.

Notice there is a ton of room in this kiln patio / greenhouse? Well, we’ve got another electric kiln on the way and plans to build a gas kiln in this area too. Plus storage for shelves, kiln furniture, a grinding wheel… pretty soon this won’t seem like much space!

Studio Build

Jenny Dowd

It happened! This open side-lot was the feature that made our house that much more appealing, we could easily imagine our very own pottery studio in this spot. The short commute from home to studio is a dream come true.

This is the before and after photo, scroll down for a full slideshow of the build, and more of the story…

If you’ve followed us for awhile you know we began building our pottery business in Alpine, WY. Dowd House Studios became an official LLC in 2011 and I left my day job in 2012 to work as a full-time potter. After 15 years at the Art Association of Jackson Hole Sam was ready to join me in the studio.

We’d always talked about “someday when we have our own studio” (technically we had a little studio in our 1-car garage in Alpine, but I outgrew it pretty quick.) We realized that “someday” needed to be now and made the tough decision to relocate ourselves and our business.

After moving into our new home in NW Arkansas last summer we started the process of building the studio (this is actually a long and winding story, so I’ll cut to the good stuff.) We worked with Ozark Metal Buildings, a local business that specializes in custom metal buildings. It was November before we arrived at the point of figuring out what we wanted and putting everything on paper, I’m pretty sure we were telling ourselves it would be at least a year before we had a building.

Having lived in the mountains for so many years with very short summers and building seasons we were amazed to see things start as early as the end of January. With supply shortages in mind, Ozark Metal Buildings waited until they had all the materials before they started, so once it started the build went quick!

In this case, photos are much better than words, so check it all out…

Now an even more exciting part starts…. figuring out where everything will go in the studio. The electric and plumbing work will happen soon and we will start moving everything in (we’ve been living with our studio materials and equipment in the house.) Plus building shelves and tables… so much work, but so very exciting.

Follow us on Facebook to see more as we progress with these next steps!

The Cake Stand Biennale

Jenny Dowd

My cake and cupcake stands made their NW Arkansas debut in the sweetest, coolest event ever - The Cake Stand Biennale! (Check out an article here from the Fayetteville Flyer)

This Fayetteville exhibition put out a call for entries - for artwork to be displayed on cake stands - I missed the call and deadline, but contacted them anyway because I thought it was such a neat idea. They were looking for a few more cake stands to display artwork on, and it just happened that I had several small stands just sitting around cake-less.

I love making cake stands because they are specific, interesting, intricate objects with plenty of decorating options (plus a little silly). And of course, cake stands mean there might be cake or a sweet treat around, but I also love the idea that these stands can elevate any object and make it just that much more special. I really love the idea of cake stands as tiny galleries, what a perfect use when not being used for cake!

This event and exhibition is super short, it started with a ceremonial cake cutting (with my cupcake stand proudly holding up a teeny cupcake!) on the Fayetteville town square Friday late morning. We walked to a few locations with cake stand art before heading back to the studio to work…

Experience Fayetteville on the town square is a host location that had two of my small cake stands - each displayed prints by Jordian Molloy Gillen from Northern Ireland

(Left to right)

We found a piece by Jennifer Diaz at Cheap Thrills Vintage and another by Amberly Schaffer at Block Street Records. A beautiful paper cake by Megan Smith is in the bakery section at Ozark Natural Foods, and Swoon Juice Bar featured a slice-o-pie by Olivia Gallenberger.

(Left to Right)

Several pieces were at the Fayetteville Public Library, three little embroidered hoops by Cooper & Co Goods were at Xuma Kitchens and Likewise Community features a photograph by Kweku Kranpah on my little cupcake stand.

And that’s just a tiny crumb of the cake! I can’t wait for the next one…

Curator’s statement:

The Cake Stand Biennale is a city-wide art exhibition in Fayetteville, AR that celebrates the idea that art can be anything and art can live anywhere! The Biennale will take place over two days (April 1-2, 2022), with 32 local businesses and Fayetteville landmarks as cake stand host locations. The cake stand galleries will feature the work of over 50 artists from around the world. From paper snack sculptures, to traditional functional ceramics, to literal cakes, we’ve got work representing just about every art medium anyone could imagine outside of our cake stand galleries!

For more images and information, follow The Cake Stand Biennale on Instagram: @The_Cake_Stand_Biennale

Class Examples

Jenny Dowd

The spring class schedule is out at the Community Creative Center and I’m pretty excited about some new classes I’ll be teaching! To get ready for each class I made an example piece:

First up, on Tuesday February 22nd, I’ll be teaching a short 2 hour handbuilding with clay session for Seniors. In this workshop we will be making hollow boxes. I like this technique because it is so different from all other forms of handbuilding. It’s also a very satisfying process.

This project can be made in a variety of shapes, for this example I went with a box. After cutting a solid clay chunk out of the bag, I paddled and patted the clay into a cube.

Next, I cut the top or lid off of the cube using a wire tool. When cutting I made a “key” or notch in the middle, this will help the lid to stay in place once the pieces are finished.

Now for the fun part - hollowing out the base and lid. I scooped out the clay using a loop trimming tool and was careful to not make the walls too thin.

Finally, I smoothed out the insides and went over the rim of the lid and base to make sure they had a good fit.

In class we will add texture by carving into the outside of the box and add color with underglaze.

Starting at the end of March, I’ll be teaching a 6-week slab building class. We will work with wet slabs to create cylinders and use stiff slabs to create boxes, or in this case - a flower pot. Slab building can be quick, so we will also use a bold quick decorating process.

To make my example flower pot, I first made a cardboard template and then rolled out several slabs of clay. I used the template to cut 4 sides and then let them dry until they were stiff enough to support themselves but not actually dry.

I attached each side to the base, smoothed the sides and top, added feet, and drilled some holes in the bottom for drainage.

To decorate the red stoneware, I placed torn ribbons of newsprint around the sides of the pot, then brushed over the whole thing with yellow slip. The fun part was peeling off the newsprint and revealing the clay below!

Just to play around I added some green, black, and red stamps using slip. I started thinking about how I didn’t really have a plan, which made me realize that I should spend a little time with my class sketching on paper with pencils to develop pattern and design.

And finally, I’m teaching a 6-week class specifically about applying glaze.

We will cover application processes, troubleshoot glaze flaws, explore ways to find your voice and style through decoration, and also answer the question - is glaze affected by the type of clay it is applied to? (Spoiler - Yes!)

Pictured here along with the studio glaze test tiles, are 4 cups made from 4 different types of clay (porcelain, buff stoneware, red stoneware, black stoneware) They have each been glazed with the same glaze, but not yet fired.

Find out the results in my glaze class, or on the Dowd House Studios Facebook page (I’ll post once they are out of the kiln)

Check out the whole schedule here!

New-ish Things

Jenny Dowd

Amongst pottery orders and the making of inventory for upcoming sales I’ve been trying to make time for new ideas and tests. This time a few new ideas came from a mistake and from trying to remember how to make a form.

It’s been awhile since I have made a coffee pour over & pitcher set. Making the forms ended up being the easy part, decorating was not as intuitive. I liked the idea of simple black and white areas with a diagonal line to emphasize the triangle of shapes in the forms. But after I brushed on the white and black underglazes I had no idea what to do.

I carved vertical lines into the white underglaze thinking I’d come up with an idea, but I also realized that my usual patterns might not work this time. I sat there lost for awhile and then the person working near me asked what my plan was. I’m still not used to working in a group studio after years of solitude in my old garage studio, so what a welcome conversation! I told him I had no idea and as we discussed ideas we both agreed that perhaps a shape or pattern was needed. He drew out a little triangle inside of a triangle and that clicked.

I liked how the pitcher and pour over set looked so much that the next day I made a few mugs with the same pattern.

These cups were supposed to be mugs. I threw the cylinders on the wheel and forgot to cover them with plastic. When I came into the studio the next day it hit me, can’t attach handles to dry clay. I bisque fired the cylinders and put them in a box, where they rode around in the back of my car for a few months.

Sam and I will be participating in a craft fair on February 12th, NW Arkansas Girl Gang Winter Market, right before Valentine’s Day. After being accepted to this sale I realized I should make a few Valentine’s gift items. Since the cups were already bisque fired, the surface was perfect to draw on with underglaze pencil.

This is a drawing I’ve made before, but the first time on cups. And it’s based on a true story, but it's not totally true because I am not a lamp. (Surprise!)

Sam and I met in college, in the clay studio of course, we immediately hit it off - like non-stop talking & laughing. We'd gone on maybe one date, but mostly just arranged our time to be in the studio together. Anyway, it had been a few weeks and we were obviously smitten.

One evening Sam had a really bad cold and came over to my house but wouldn't come in. He stood on the porch and through this super bad head cold told me that he really really liked me and that he wanted to use the other L word. But mostly he needed me to know right now that he really liked me. It was actually the sweetest thing ever and I knew it was something because it was the first time my roommates didn't make fun of my dating antics.

So there it is, the stories behind two new-ish things that I’ve been working on in the studio!

Flower Stand 2.0

Jenny Dowd

The Flower Stand is back!

The first time the flower stand showed up was in 2016. The original was made for a tiny art show, every piece included was required to be less than 12x12 inches. Since the show was at a farmer’s market I decided my art should reflect the vibe. (Check out the story here)

Since then the flower stand has had a few evolutions - a concessioner’s tray in 2017 and a full size flower cart in 2019 (that story is here)

Now I need a small portable flower stand that can sit on a table or a shelf and can accompany me to street fairs.

I love working with corrugated cardboard! I just dug through my recycle bin to find the right box to tear up. This flower stand has a little stage for vases and bouquets as well as a front area with blue foam for single flowers to be stuck into.

This time I decided to make nicer tiny vases, so I threw some on the wheel. These tiny forms were tough! That’s the first time I’ve thrown that small, for scale the cylinder to the right of the vases will be an espresso mug.

After making additional white flowers - porcelain flowers with wire stems get dipped in a powdery white solution with an acrylic medium - the fun part begins!

Each bunch of flowers gets wrapped up in scraps of colorful fabric with a bit of ribbon. Looks like this flower stand will be just right!

Merlin may be a studio cat, but he doesn’t like everything made in the studio. He hates these flowers. I have to store them far out of reach or he will destroy them. But I did let him sniff a bouquet. He was not impressed.

Bouquets will be available at street fairs and are also available on my web shop! They make a fun gift to send by mail, plus these flowers will last forever!

Storytelling

Jenny Dowd

Sometimes custom orders and funny stories turn into illustrated pottery. These are a few projects from recent months:

These mugs were custom ordered from an Aunt who wanted to celebrate and surprise her twin nieces, they grew up in Idaho and had just moved to New York to attend college on a hockey scholarship. Something to remind them of home but also where they were headed!

For these porcelain mugs I used an inlay technique to create the drawing in the damp clay. Each of the tiny black lines were drawn with an x-acto blade, filled in with black underglaze, and then wiped clean. The crisp black lines look like an ink drawing on the white porcelain clay. Two mugs, similar but different, just like the sisters.

Chainsaw mugs! A friend recently became certified to assist in disaster related tree removal as well as fire mitigation. WOW! To celebrate she commissioned mugs for her instructors.

This time I drew the chainsaws on bisque-fired clay with an underglaze pencil, this makes these awkward chainsaws just a little more comical. I filled in the drawing with red glaze and grey underglaze.

This one was unsolicited… I had an idea to turn a scary story into a sweet comforting gift. And it’s a long story, so let’s just hit the main points: house sitting + bomb cyclones & closed highways, mix in some tick infested dogs during a peak in lyme disease season and suddenly a tent pitched in the middle of the living room to sleep in at night doesn’t seem so weird.

This design was also drawn on the clay with underglaze pencils and filled in with layers of watered down underglaze. This time I used a clear glaze that I had not applied to this type of surface before and didn’t realize that some of the underglaze pencil lines would run. After waves of initial disappointment, I realized that the soft lines fit in more with my vision of a dark sky around the edge of the bowl, and perhaps the bunting on the outside is just wet from all that rain.

These are a few projects currently in progress, or in the case of the little 5-legged octopus (quintopus?) just starting to percolate. The octopus was my example made during the surface design class I am teaching at the Community Creative Center. While demonstrating sgraffito I started to draw a ghost and then mid-draw thought that might be boring and started adding legs. Of course there was not enough room! But this cute little mollusc came to life and now I’m considering adding it to my cast of characters.

The porcelain cups are in preparation for that quickly approaching February day. These lamps might be some of my favorite characters, especially when one finally leans in to admit a secret to the other. (Psst. I really like you.)

New Studios

Jenny Dowd

We knew we would be taking on a huge project with this plan of moving to a new state and building a studio. The thought of both being full time potters and artists has kept our spirits high though!

While each day feels as though not much has been accomplished, that’s not really the case. We started a big huge list / flow chart of what needs to be done, adding to it as we go. The visual helps - it helps to see tasks added - small and large - and to check them off. Tree removal, marking property lines, building design, business license… it’s a start!

While we work though the realities of building, and projects around the house, Sam and I have started using studio space in Fayetteville at the Community Creative Center. I’ve been making work for Workshop in Jackson, it does feel a bit strange to make mugs that say “Jackson Hole” when I’m nowhere near Jackson… but I do love making these mugs and I am happy to be part of stores that I absolutely love (and miss shopping in!) More on what Sam has been making later!

But what about Studio Cat Merlin? He still has a job, we have a room in the house that we are using for studio storage and sometimes do a little work in there too. He keeps a close eye on decorating (in this case - ring cones) and also oversees the packing of online orders.

We Moved!

Jenny Dowd

Oh wow, we did it. We packed up the studio, the house, the cat and drove across the country. There’s a reason there are not many photos - this was exhausting.

This is just a tiny announcement that I’ll be reviving my journal with regular(ish) posts - weaving together my life as a potter and artist - now in a new environment.

So what did we do? We decided it was time for a change, a big one. Sam and I are both now fully self-employed artists (yay!) and will be building a studio outside of our new home in NW Arkansas. After 14 years in Wyoming it’s a big change, even having a mailbox in front of our house is different!

Studio Cat Merlin seems to approve, he wasn’t a big fan of the actual travel, but since arrival has overseen all the unpacking and no longer hides inside the closets. The house photo was right before we moved in. There’s lots happening, stay tuned!

An Easter Egg Hunt

Jenny Dowd

This weekend a very special Easter Egg Hunt is happening at R Park hosted by the Jackson Hole Land Trust.

Visit R Park between April 2nd - 5th and you will find art installations created by 4 local artists. Within each a letter has been hidden and will spell out a word that unlocks a trunk full of Easter Eggs.

I’m super excited to be part of this project, and while my art is not specifically egg themed, you will still have to hunt for it.

I started out making several small elements: unfired porcelain mushrooms, tiny flowers, plus strands of fabric circles strung with buttons. My vague idea before installation day was mostly formed by the shadows cast on the white on white snowy landscape.

Installation day was a beautiful clear yet cold day, I tucked mushrooms and tiny flowers into the leaves, snow, and dirt below a grove of trees.

After spending a lot of time walking around and looking at this spot, strands of fabric were hung in an arch over the grove of mushrooms. Laying on the warm ground and looking up was the best view! The fabric seemed to mimic the fluffy clouds above.

This was hard to photograph, so if you are in the area I hope you stop by to find all the details.

Happy spring!

I’m sure we will have many more chilly days in Wyoming over the next few months, but spring is finally here!

Whodunnit??

Jenny Dowd

The Art Association’s annual anonymous art show kicked off a few days ago, did you guess which piece was mine? This year the pieces are all on display at the Art Association Gallery and Center for the Arts Gallery with purchasing and viewing online. Some pieces are still available and a heated silent auction is also in process, check it all out here: https://whodunnit.afrogs.org/#/index All sales benefit the art education programs at the Art Association.

I was asked to make a 12 x 12 canvas, and since I still don’t know how to deal with a canvas surface I made my own support. But first, a ladder…

For some reason I just wanted to make a small porcelain ladder and when it came out of the kiln I knew what my piece would look like. I was thinking of all the helpful but slightly awkward tools I like to draw on mugs, but what if I made them 3D? (See them here)

Ladder, hammer, scissors, staple gun, wrench, carpenters pencil, and tape measure. Each tool got its own pocket and I embroidered the pocket with clues or an outline of the object.

I also made sure to test the scissors.

So here it is, The Basics. Just enough to start any project! The piece ended up like a pillow for the wall with little pockets for the tools. It was pretty exciting to see my piece in the gallery with a red dot before it got picked up by the purchaser!

The sale & auction is open until March 4th at 6pm MST check it out here