
Class Examples
Jenny Dowd
The spring class schedule is out at the Community Creative Center and I’m pretty excited about some new classes I’ll be teaching! To get ready for each class I made an example piece:
First up, on Tuesday February 22nd, I’ll be teaching a short 2 hour handbuilding with clay session for Seniors. In this workshop we will be making hollow boxes. I like this technique because it is so different from all other forms of handbuilding. It’s also a very satisfying process.
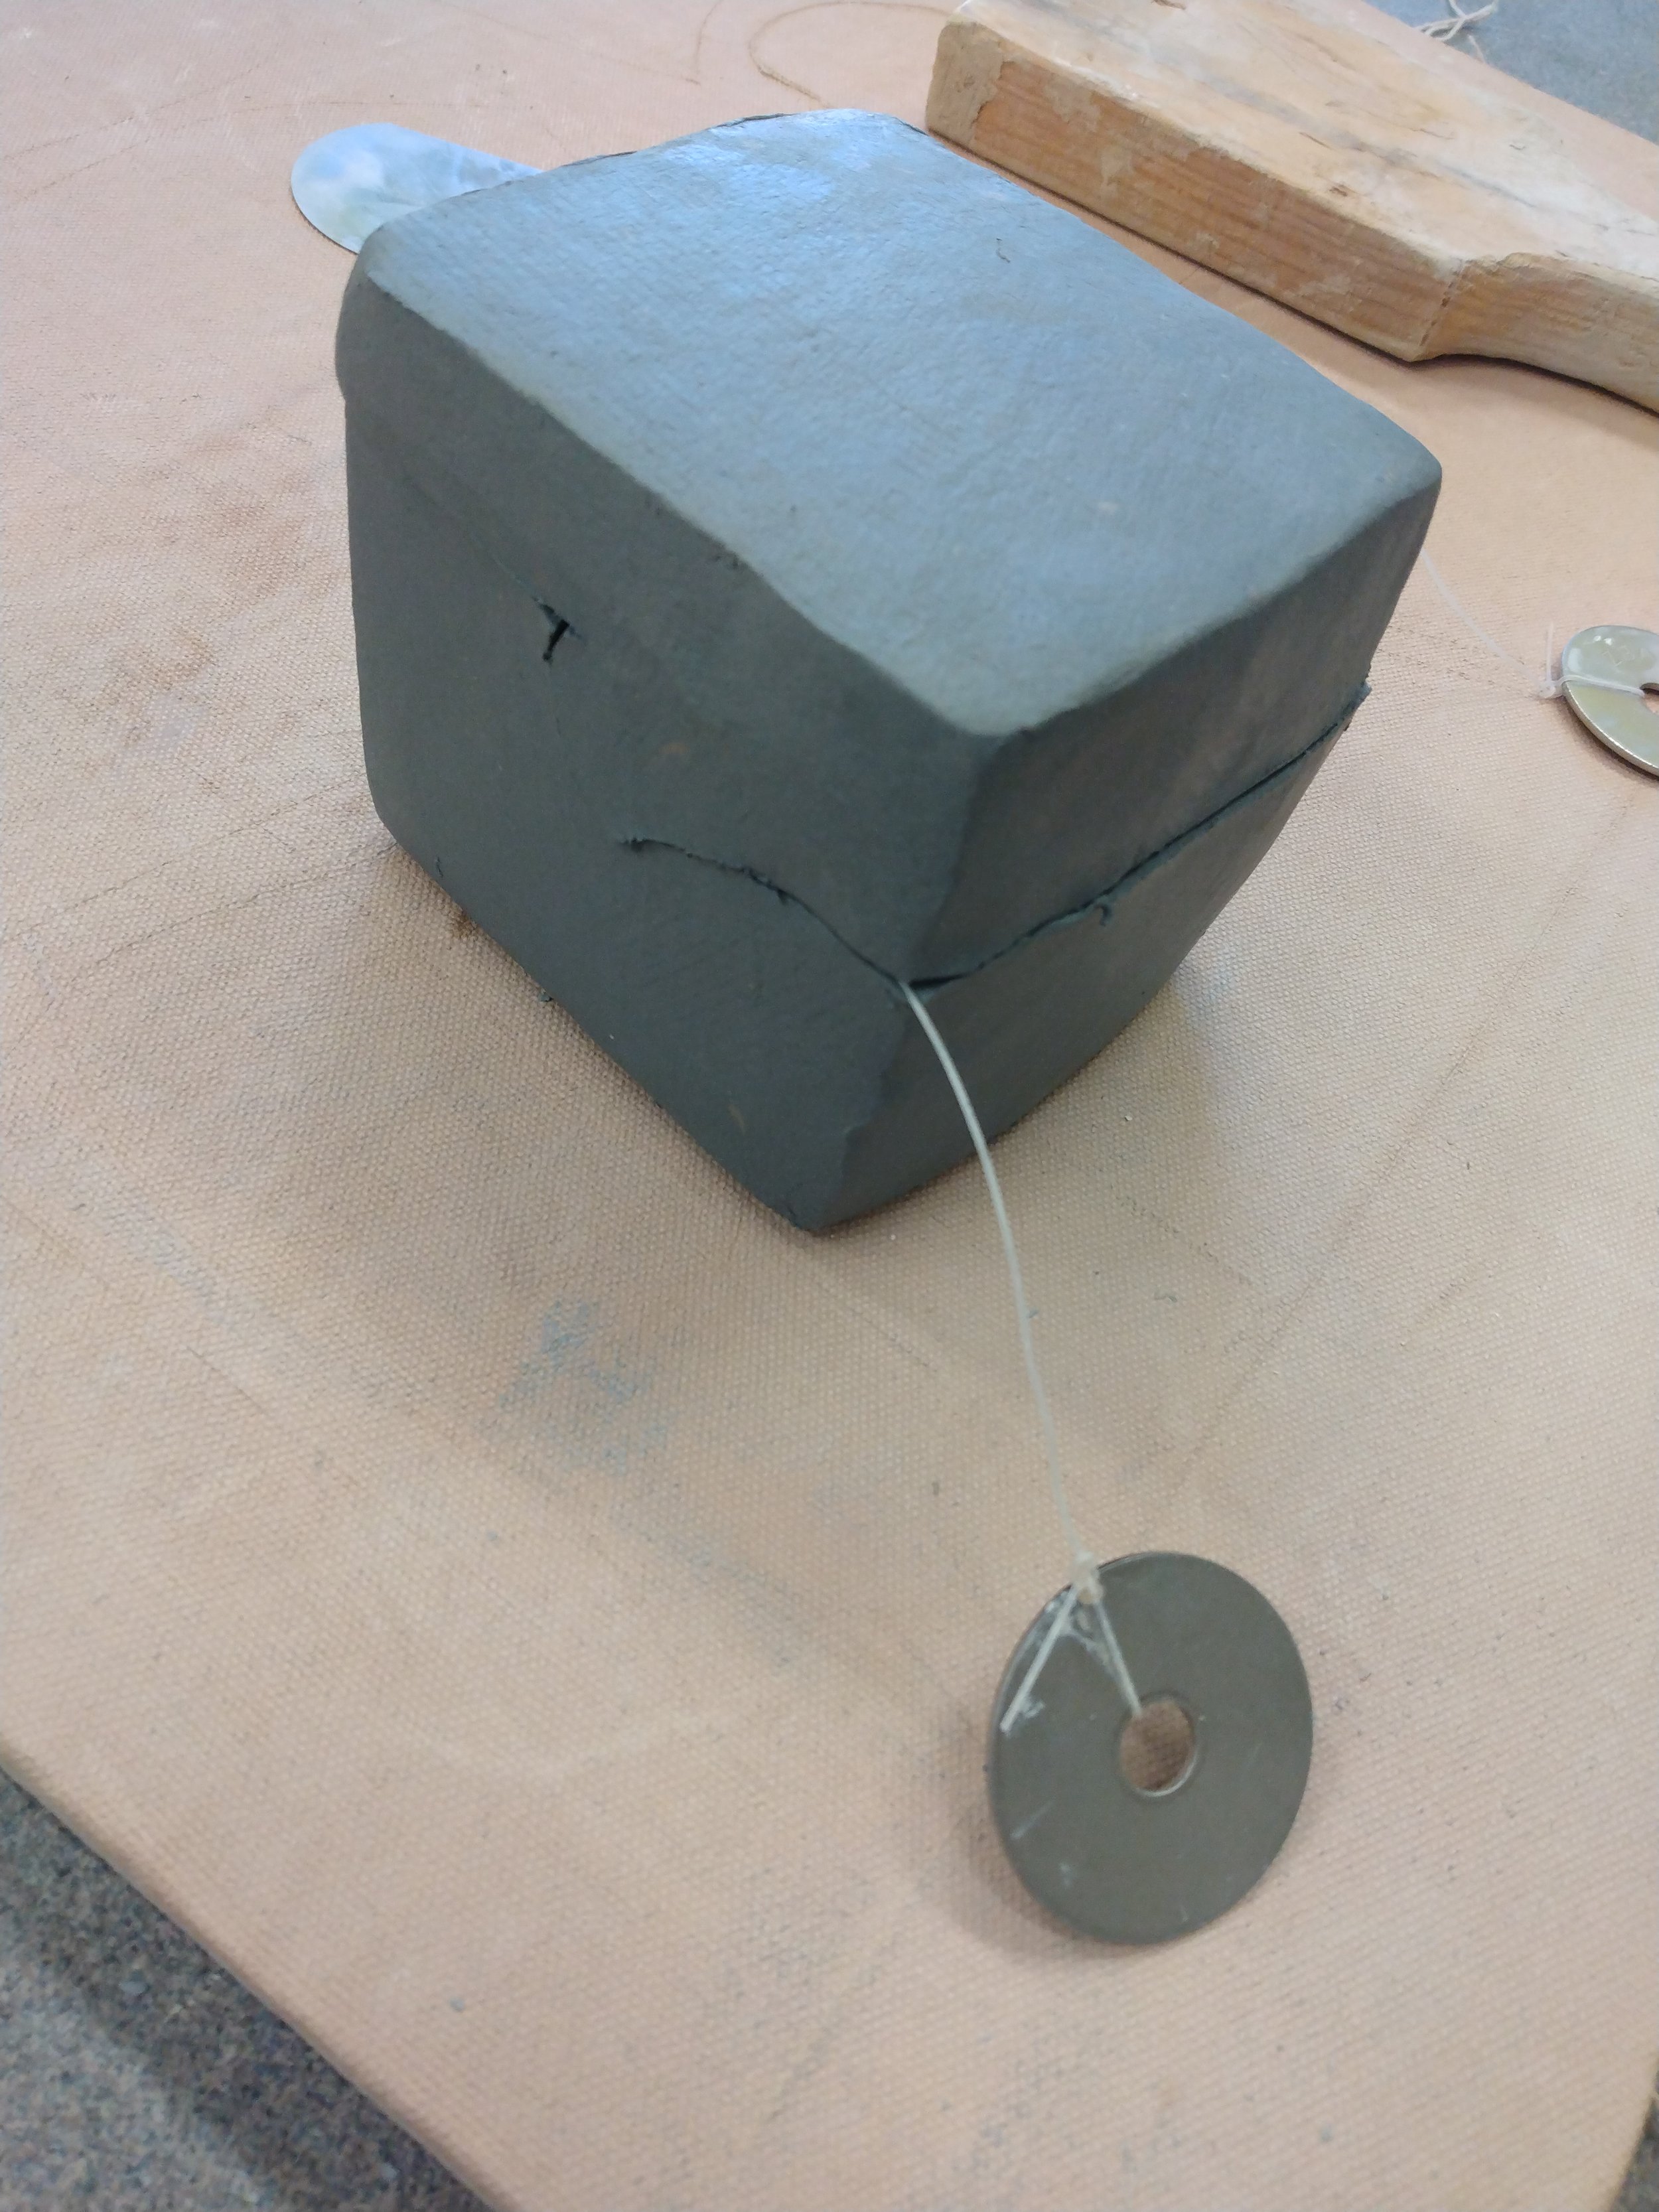
This project can be made in a variety of shapes, for this example I went with a box. After cutting a solid clay chunk out of the bag, I paddled and patted the clay into a cube.
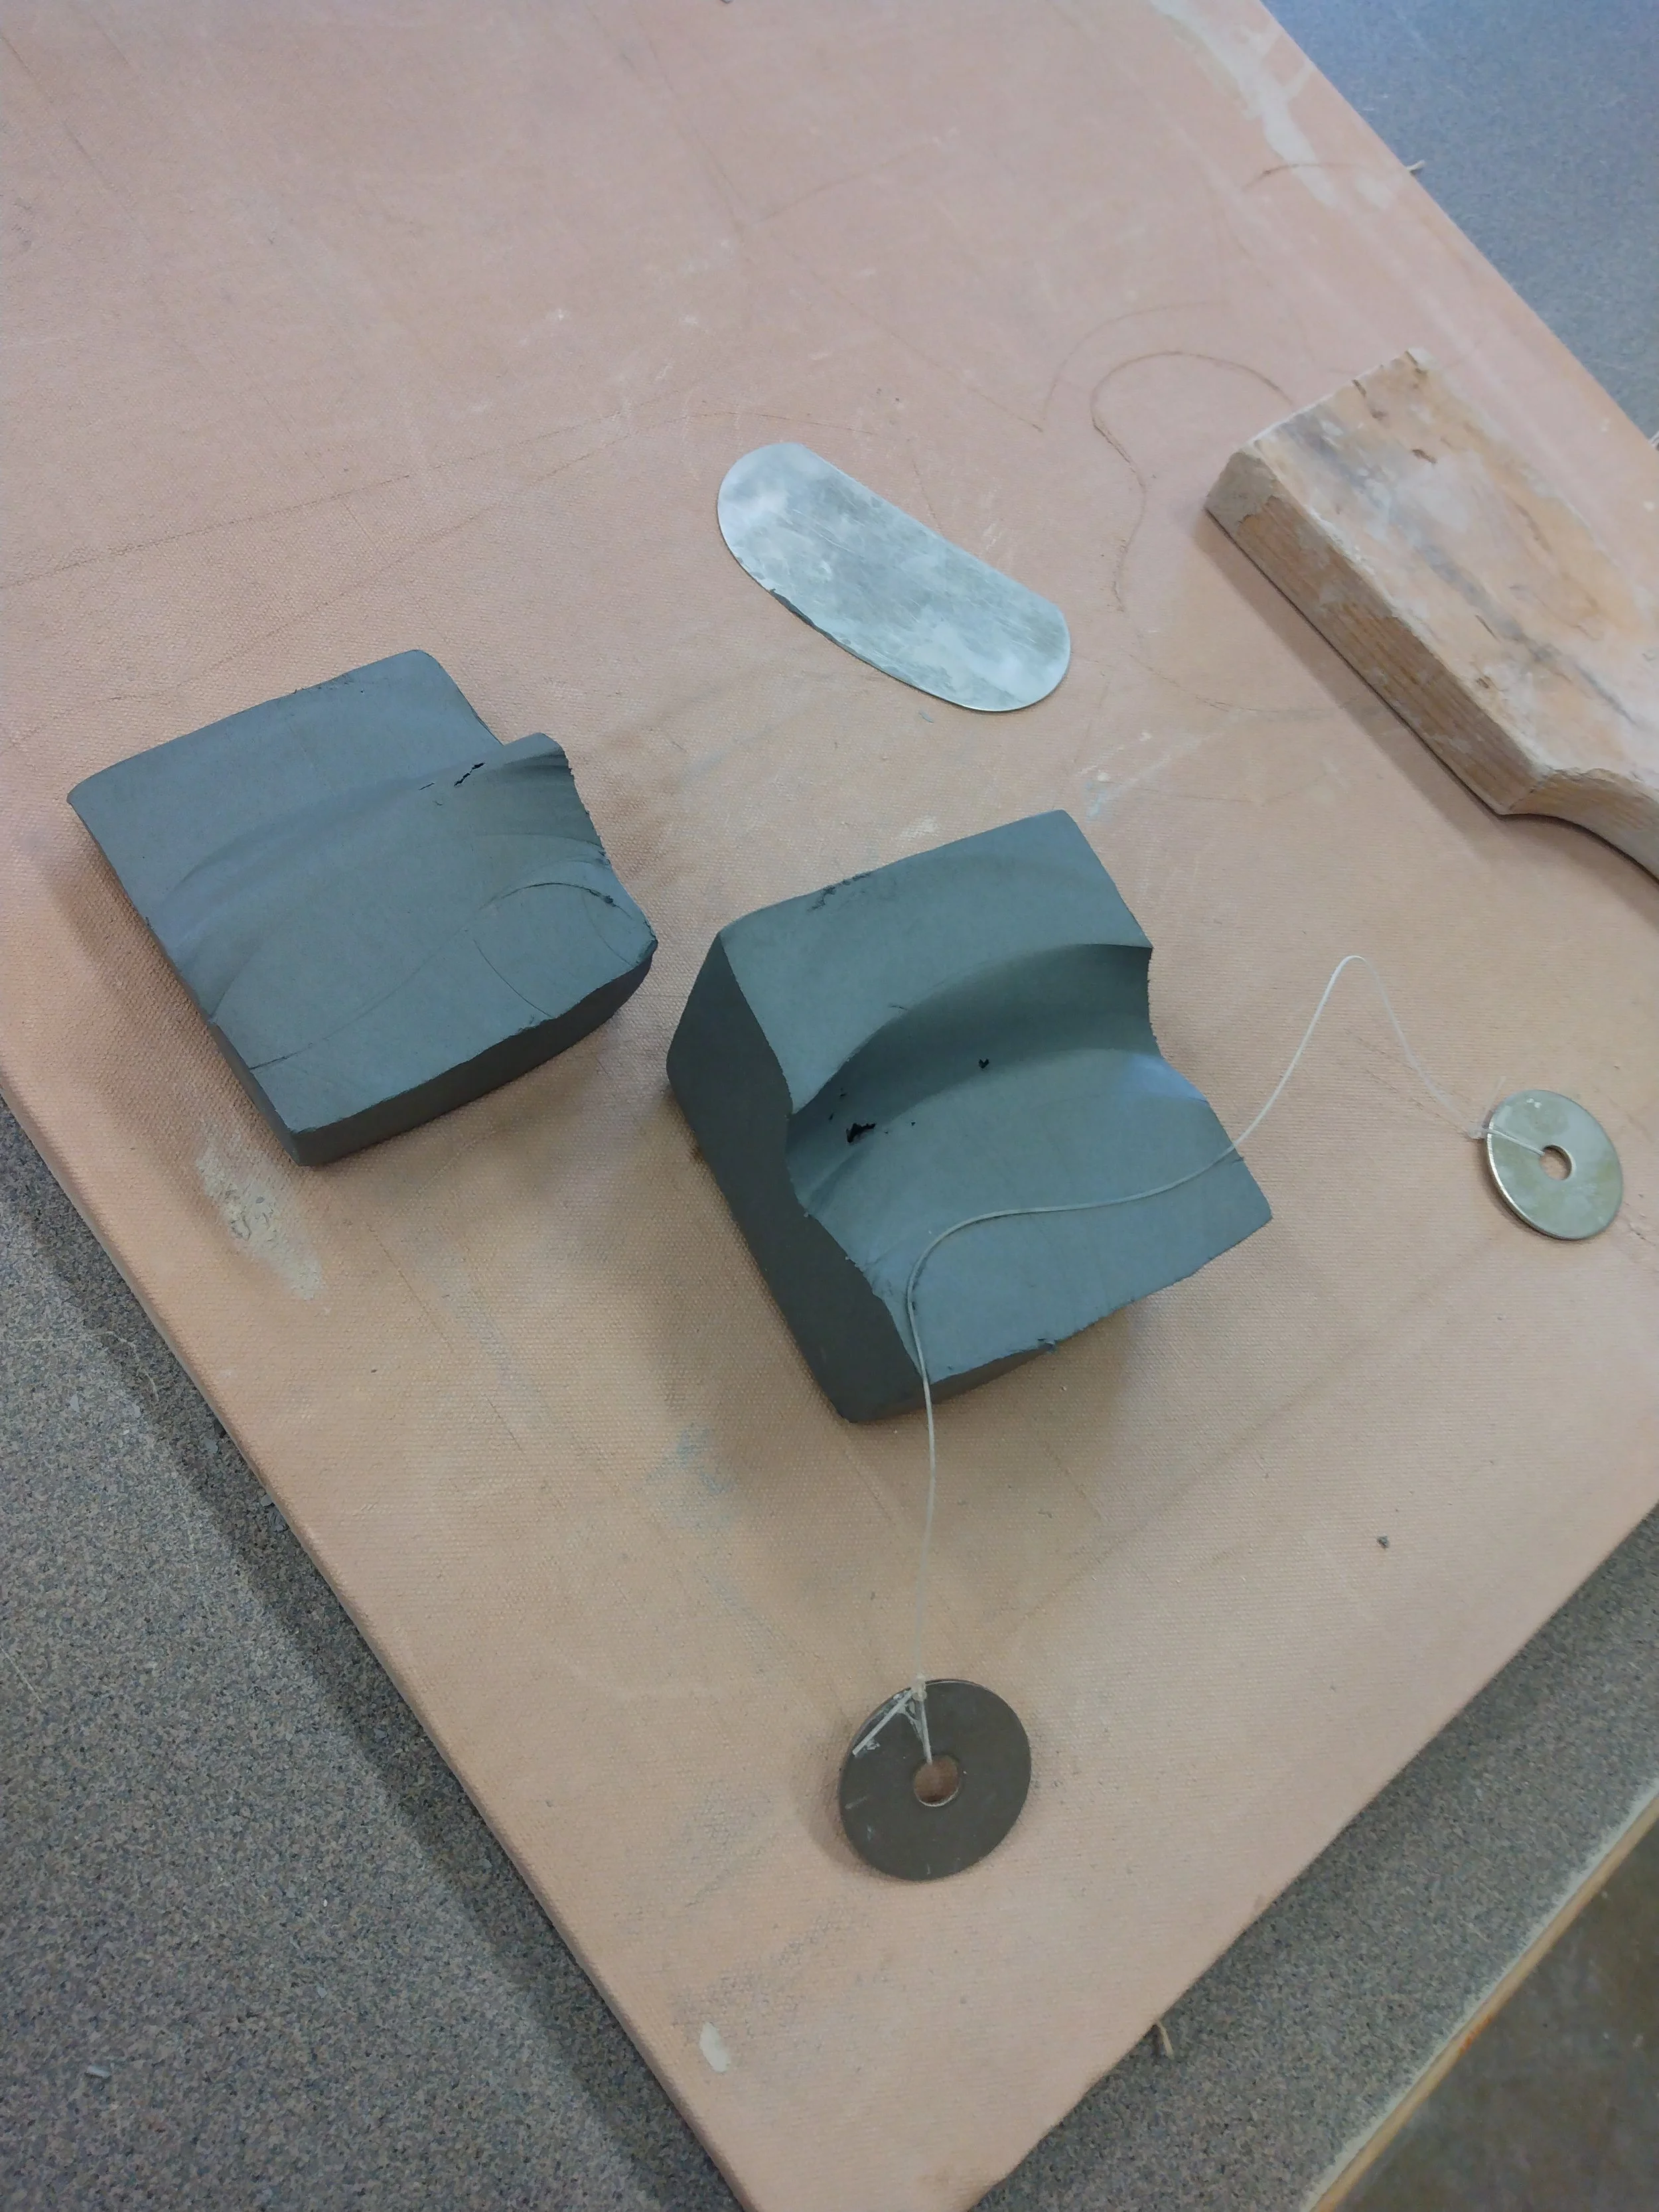
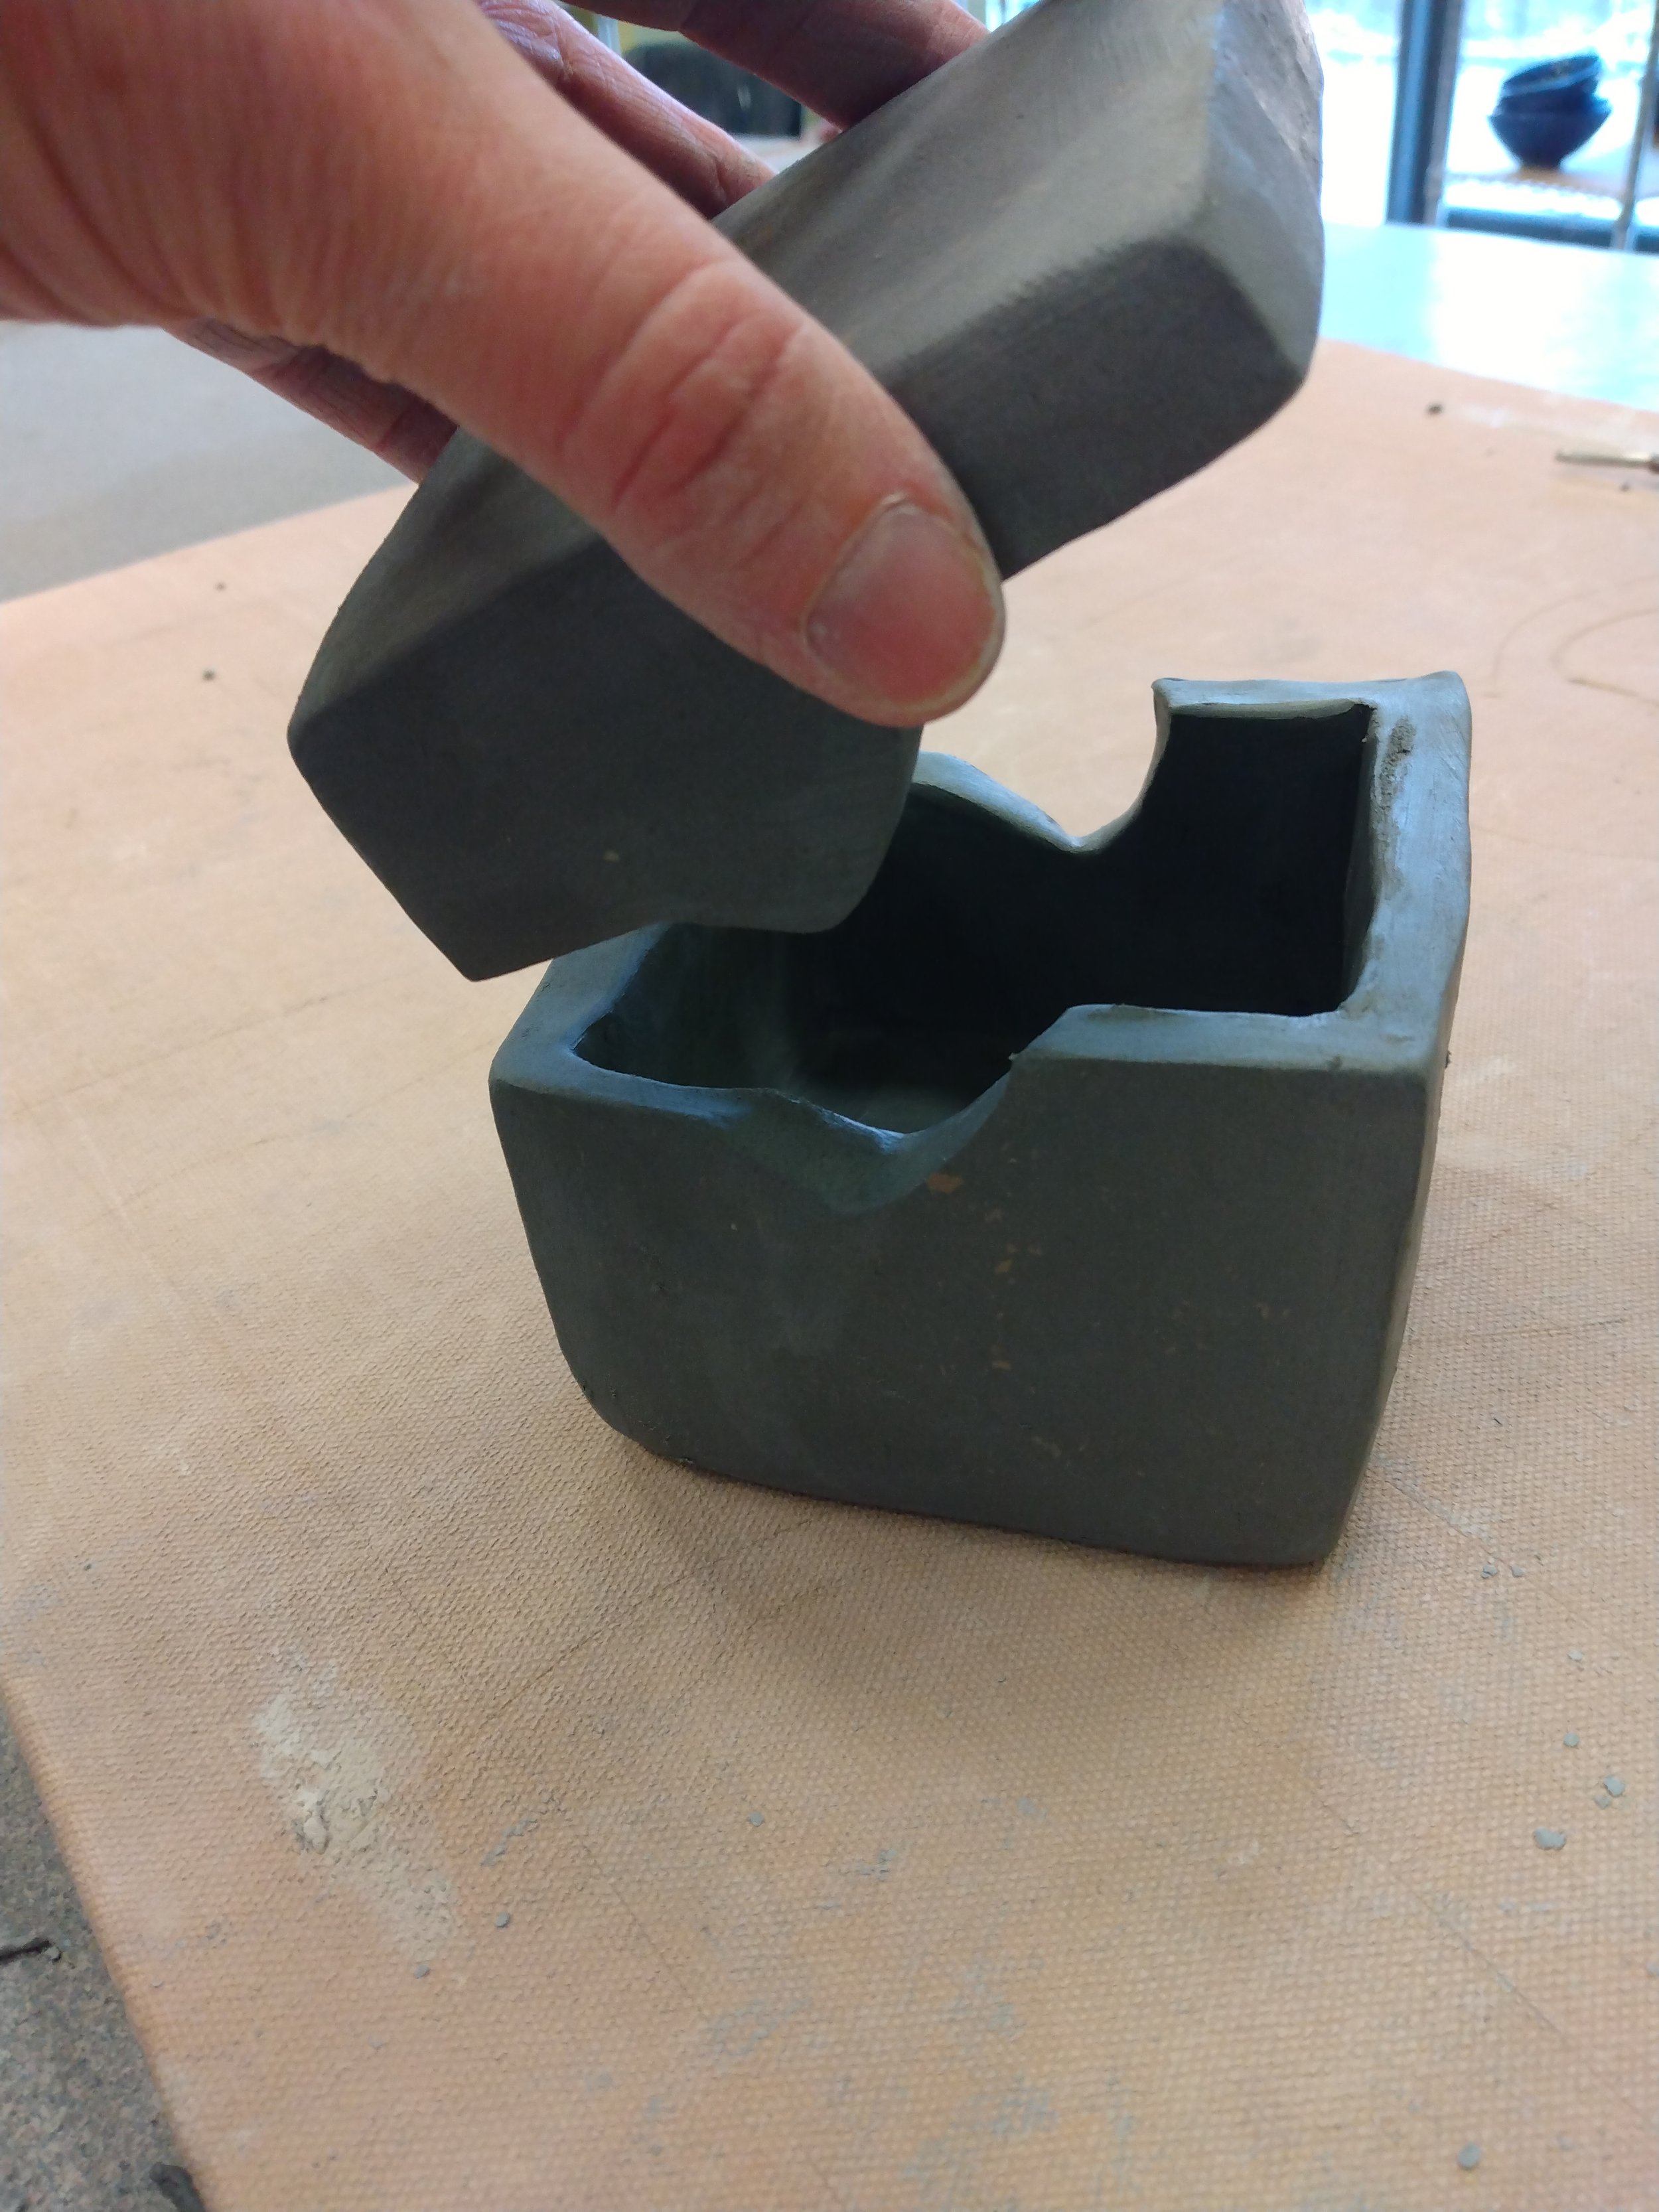
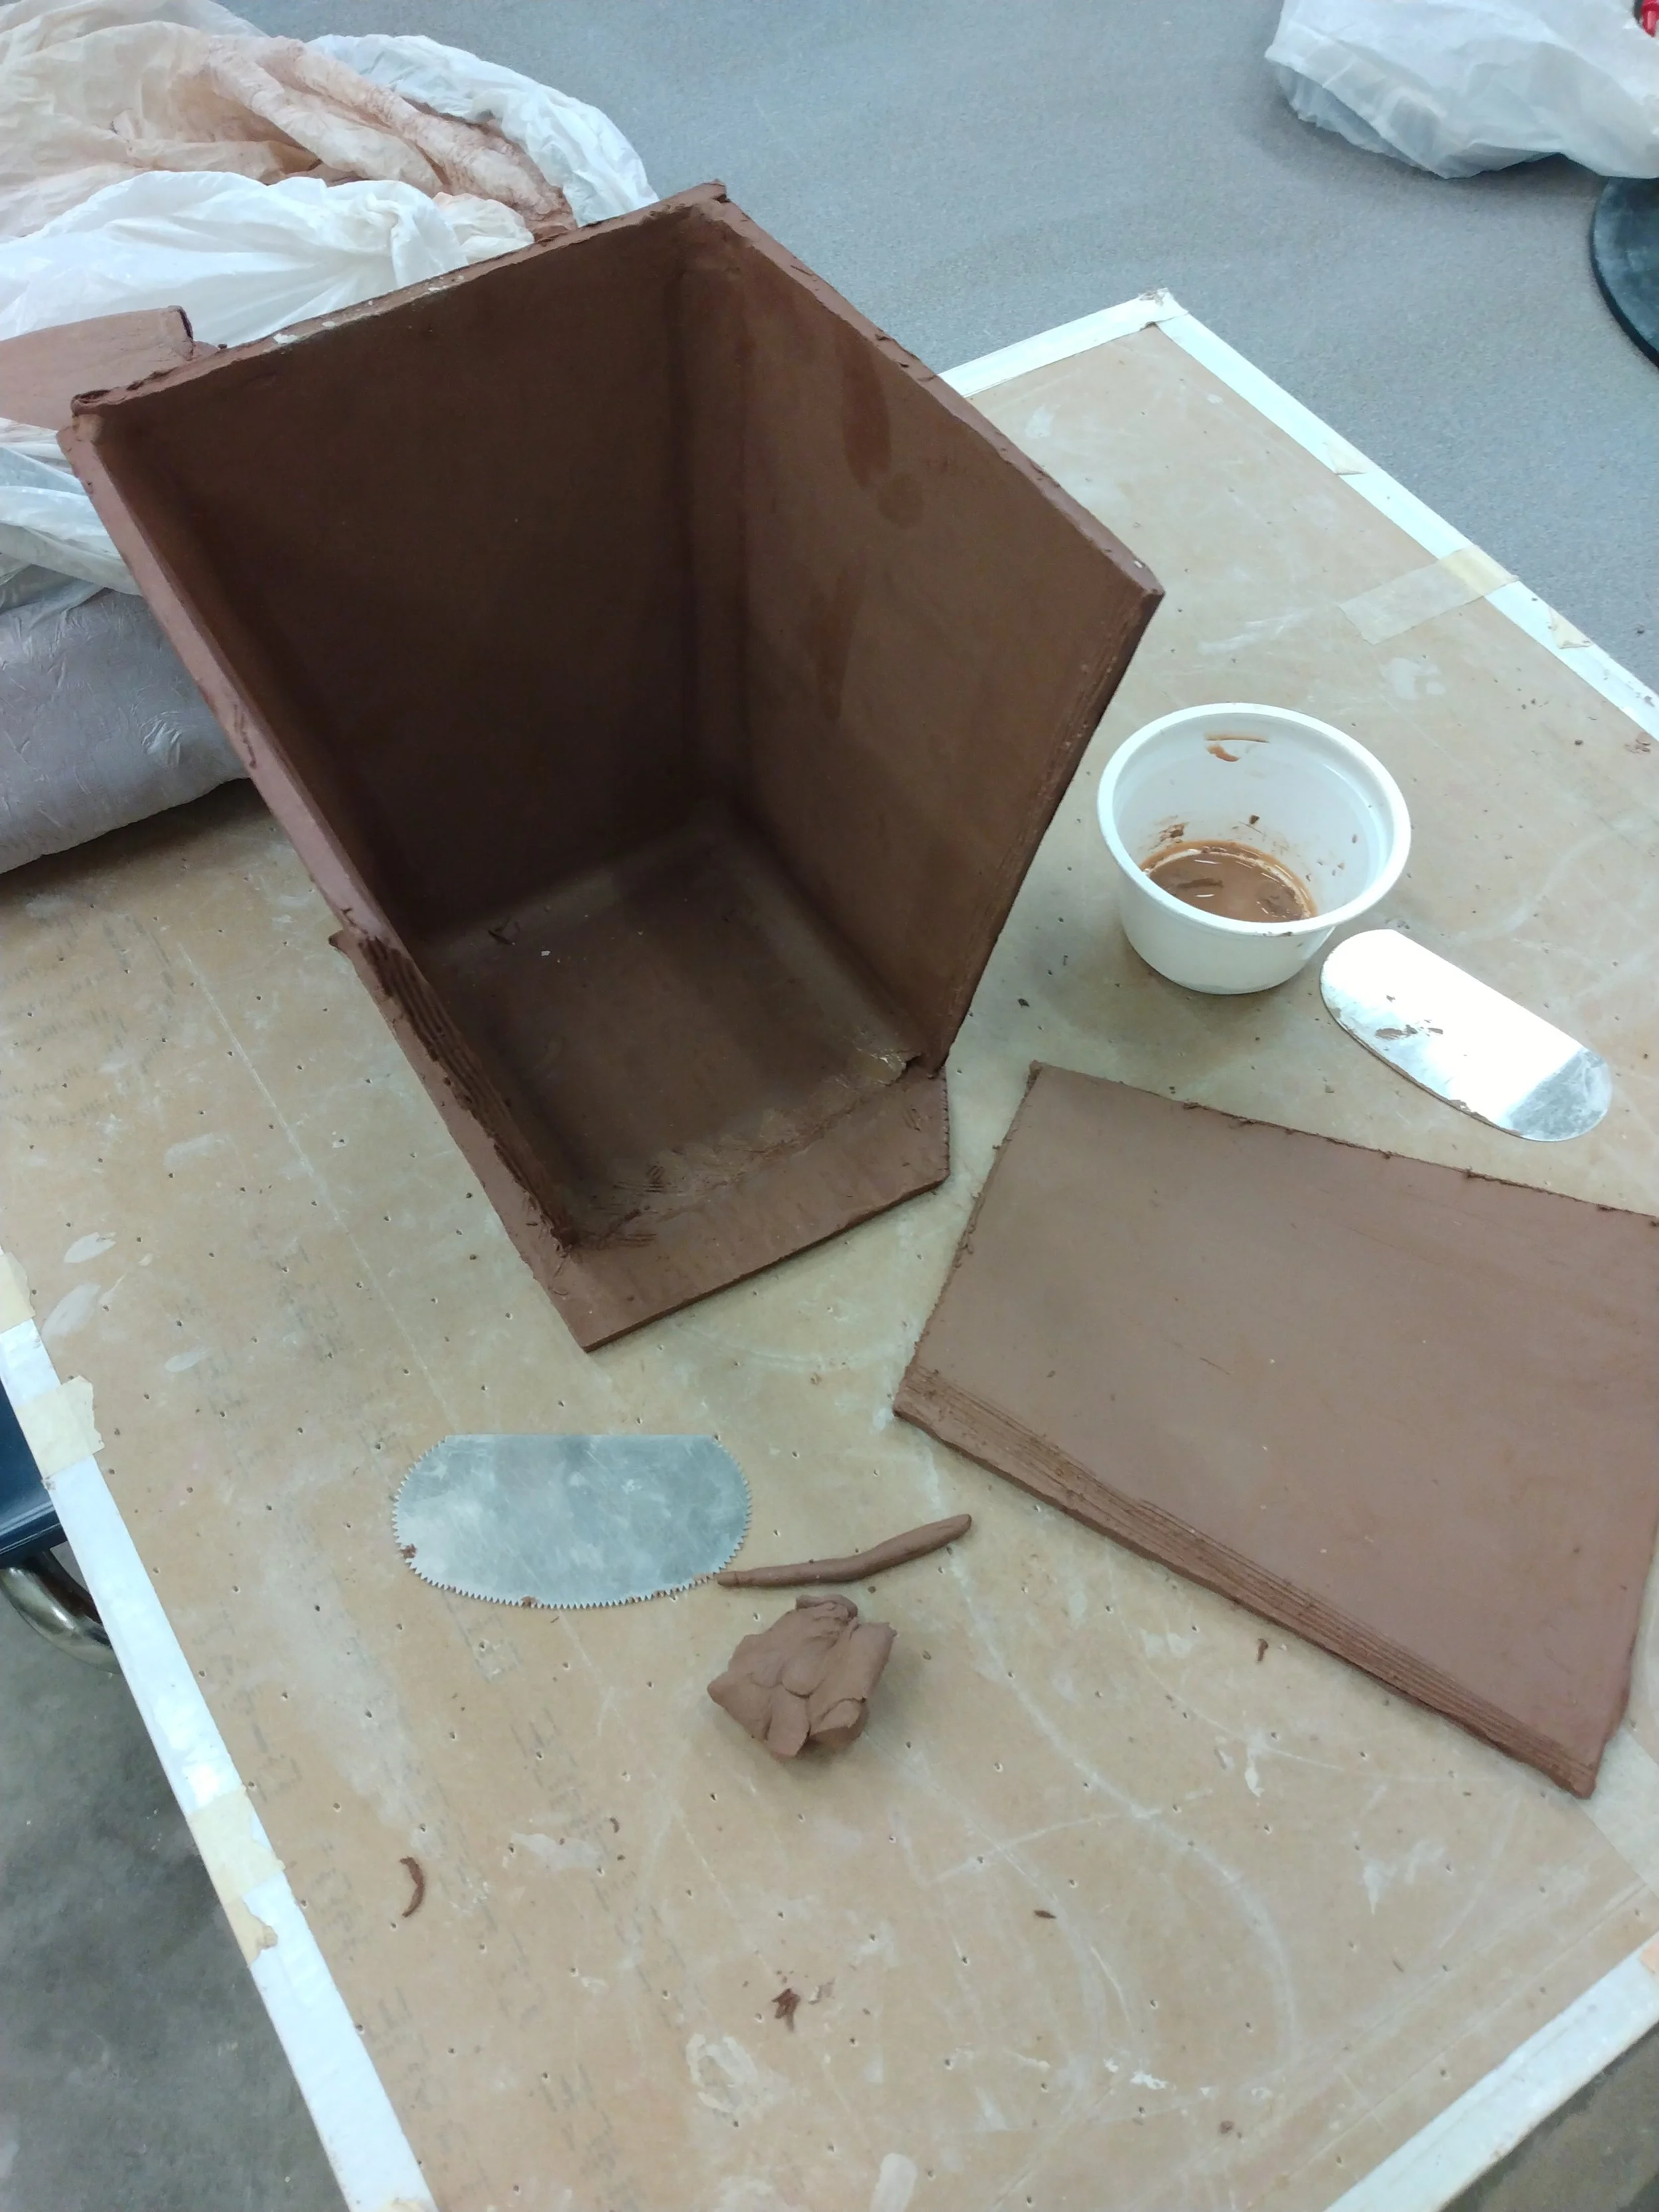
Next, I cut the top or lid off of the cube using a wire tool. When cutting I made a “key” or notch in the middle, this will help the lid to stay in place once the pieces are finished.
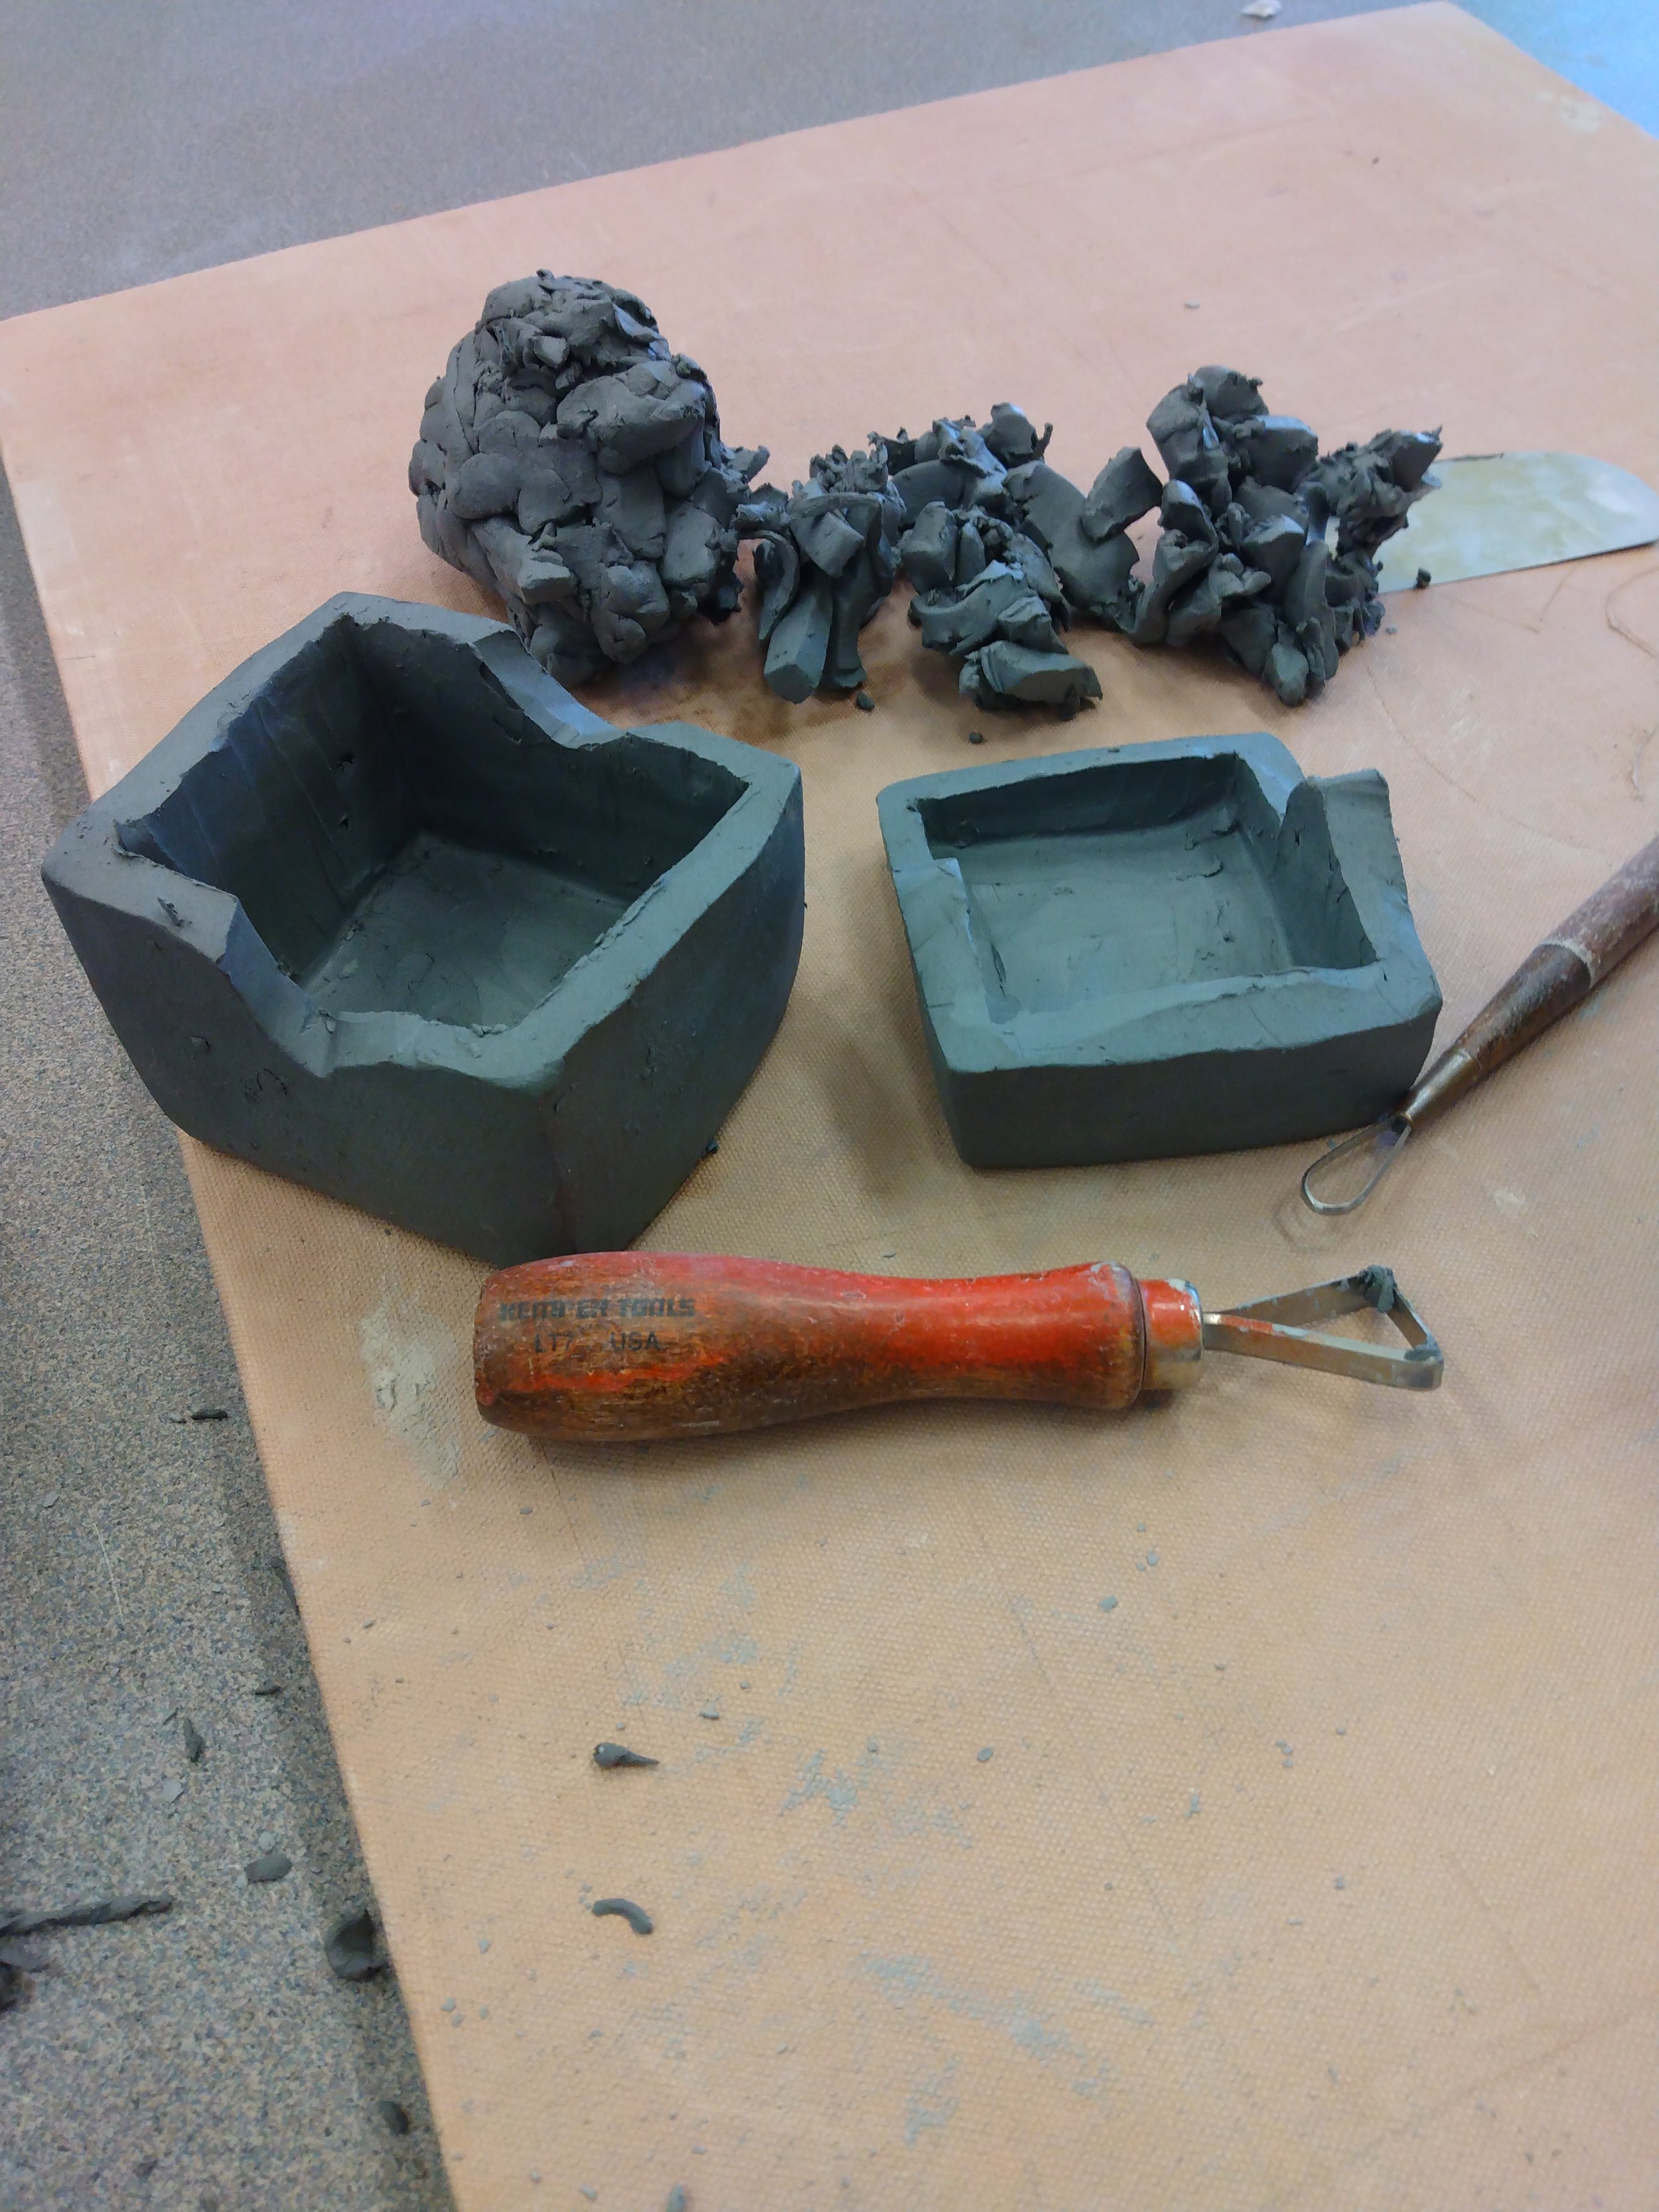
Now for the fun part - hollowing out the base and lid. I scooped out the clay using a loop trimming tool and was careful to not make the walls too thin.
Finally, I smoothed out the insides and went over the rim of the lid and base to make sure they had a good fit.
In class we will add texture by carving into the outside of the box and add color with underglaze.


Starting at the end of March, I’ll be teaching a 6-week slab building class. We will work with wet slabs to create cylinders and use stiff slabs to create boxes, or in this case - a flower pot. Slab building can be quick, so we will also use a bold quick decorating process.
To make my example flower pot, I first made a cardboard template and then rolled out several slabs of clay. I used the template to cut 4 sides and then let them dry until they were stiff enough to support themselves but not actually dry.
I attached each side to the base, smoothed the sides and top, added feet, and drilled some holes in the bottom for drainage.
To decorate the red stoneware, I placed torn ribbons of newsprint around the sides of the pot, then brushed over the whole thing with yellow slip. The fun part was peeling off the newsprint and revealing the clay below!
Just to play around I added some green, black, and red stamps using slip. I started thinking about how I didn’t really have a plan, which made me realize that I should spend a little time with my class sketching on paper with pencils to develop pattern and design.


And finally, I’m teaching a 6-week class specifically about applying glaze.
We will cover application processes, troubleshoot glaze flaws, explore ways to find your voice and style through decoration, and also answer the question - is glaze affected by the type of clay it is applied to? (Spoiler - Yes!)
Pictured here along with the studio glaze test tiles, are 4 cups made from 4 different types of clay (porcelain, buff stoneware, red stoneware, black stoneware) They have each been glazed with the same glaze, but not yet fired.
Find out the results in my glaze class, or on the Dowd House Studios Facebook page (I’ll post once they are out of the kiln)

Check out the whole schedule here!