contact us

Drop us a line!

Use the form on the right or email dowdhousestudios@gmail.com


Prairie Grove, AR, 72753
USA

JDowd_SucculentPots.jpg

Journal

News from Dowd House Studios: places to find our pottery, exhibitions, classes & workshops, new forms and exciting projects.

Filtering by Category: Problem Solving

Ways to Sign

Jenny Dowd

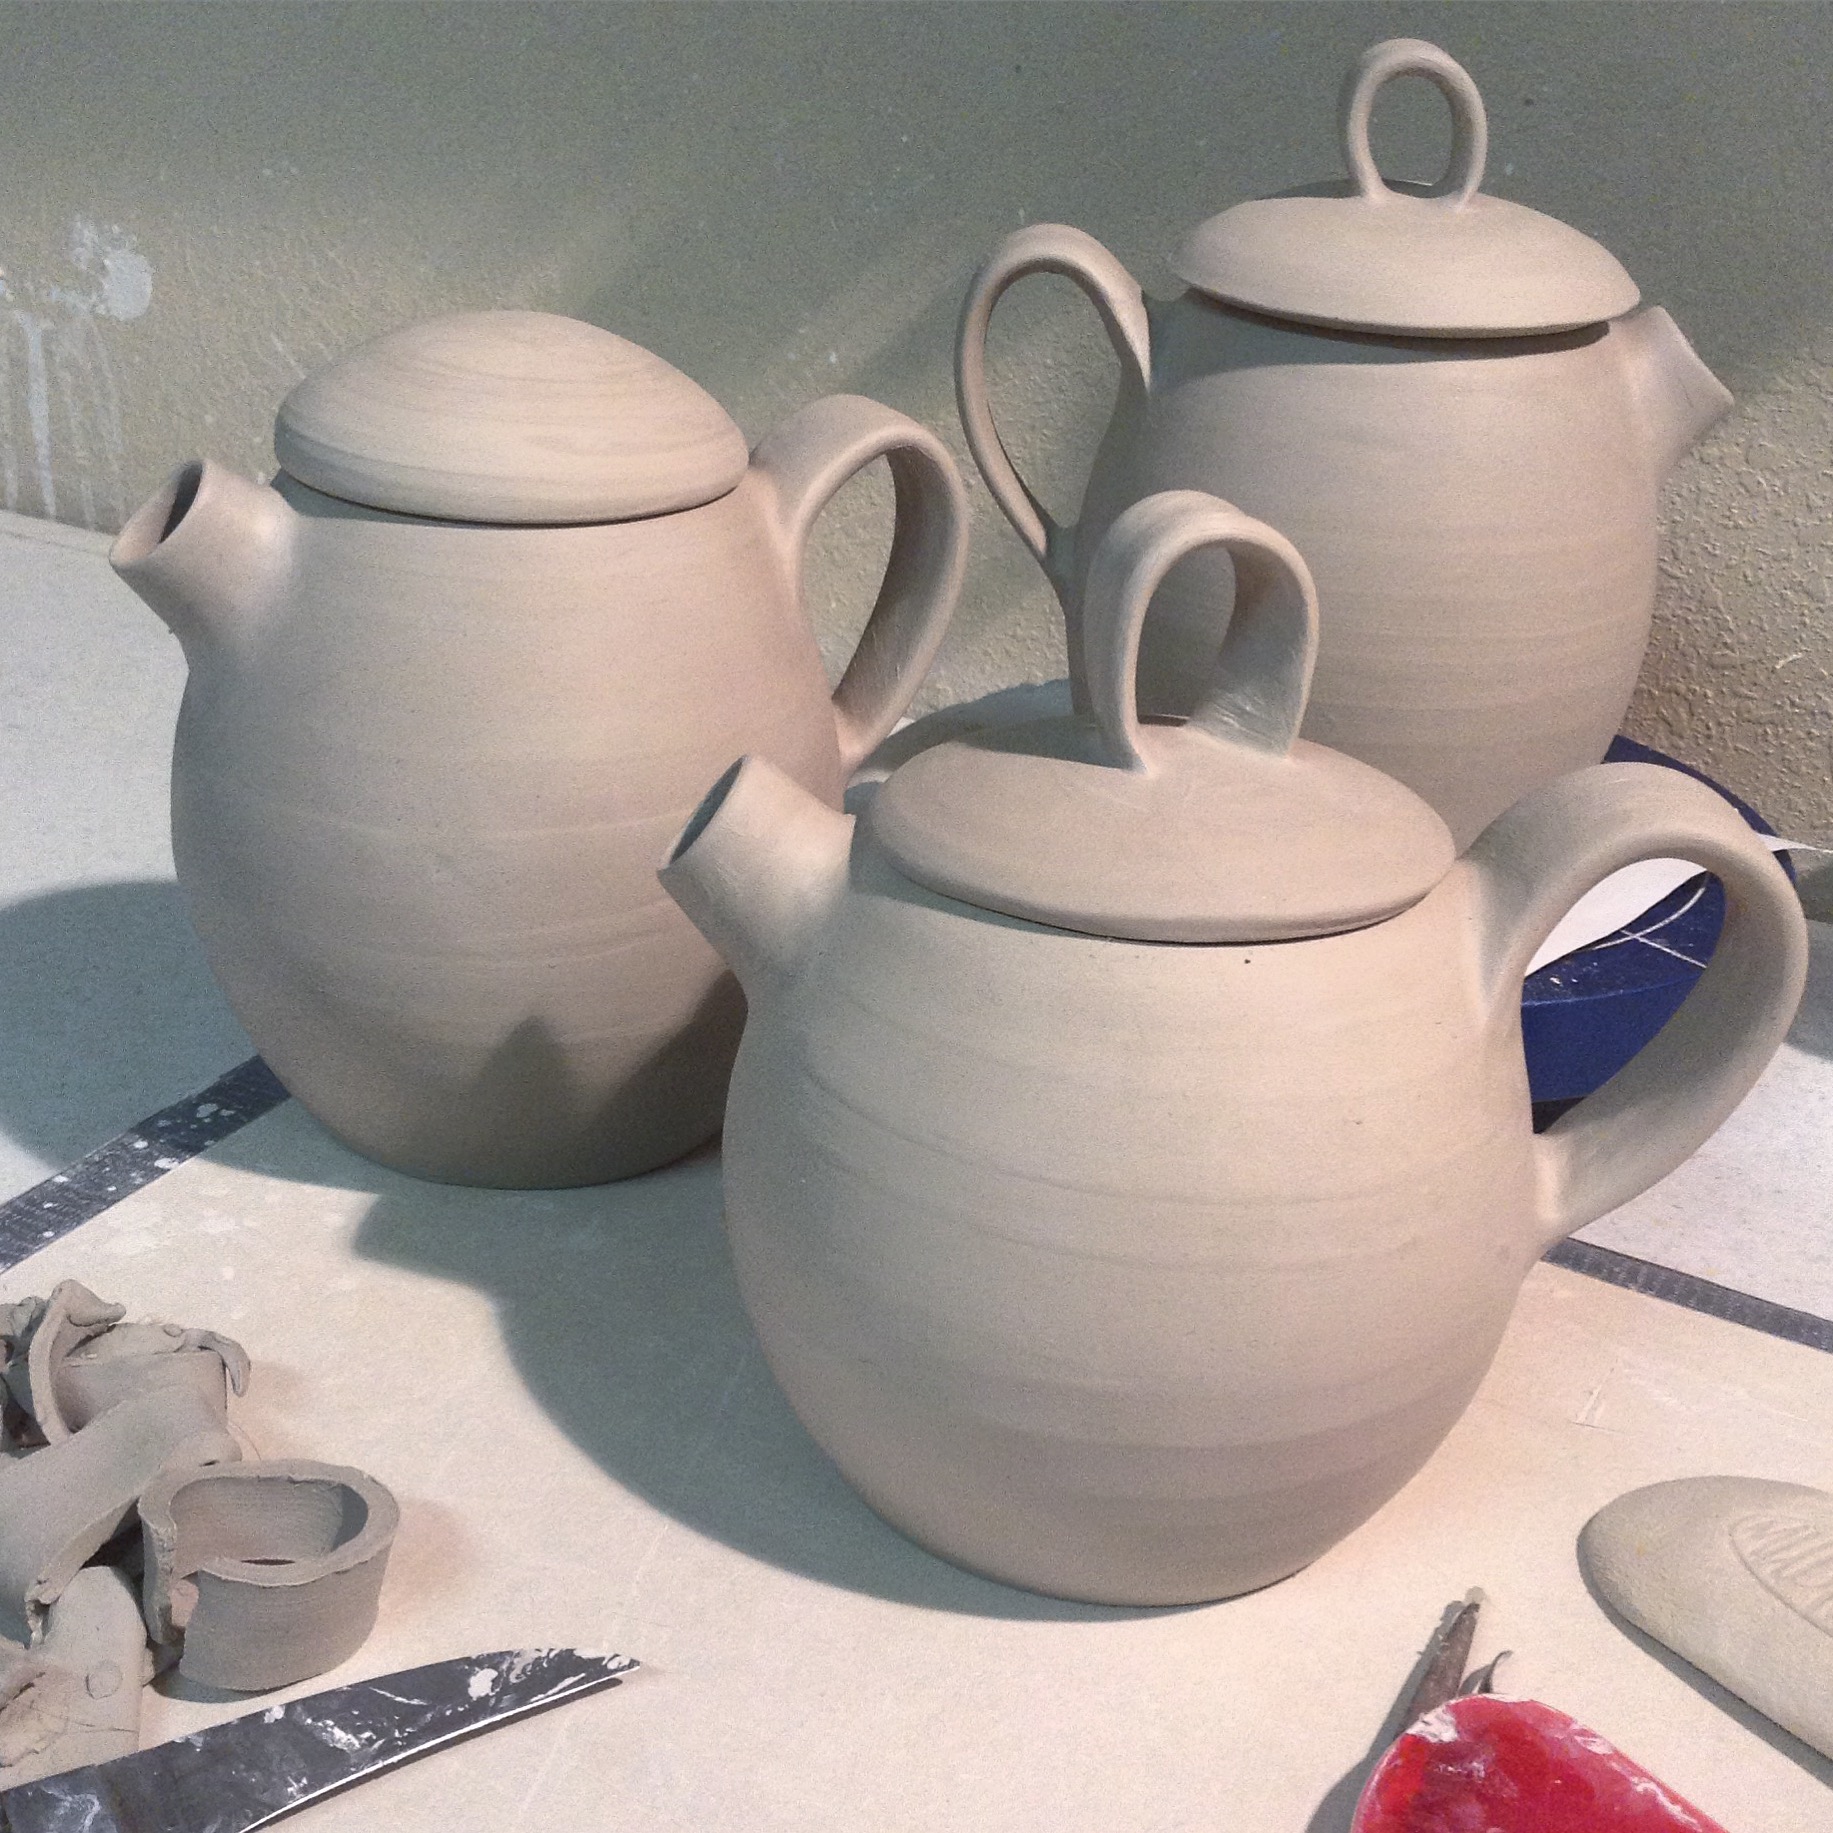
I make a variety of work, part of that variety is reflected in the details of my signature. This might seem an odd thing to highlight, but I had an exchange once that I still wonder about.

Several years ago, during an art fair, a person came into my booth which was filled with pottery made by me and Sam. Each piece that was picked up and turned over brought a shake of the head. Eventually they told me that I should be using a stamp to sign my name and informed me that they never purchased pottery unless the potter used a stamp as this was a sign of a true professional. After mentioning that they wanted to purchase my work but just couldn’t because I chose to sign my name, they huffed away and I stammered out a strangely cheery “Thanks for coming by!”

Since that exchange I have considered my signature a little more. I did actually try to make a stamp, but just couldn’t settle on what it should be.

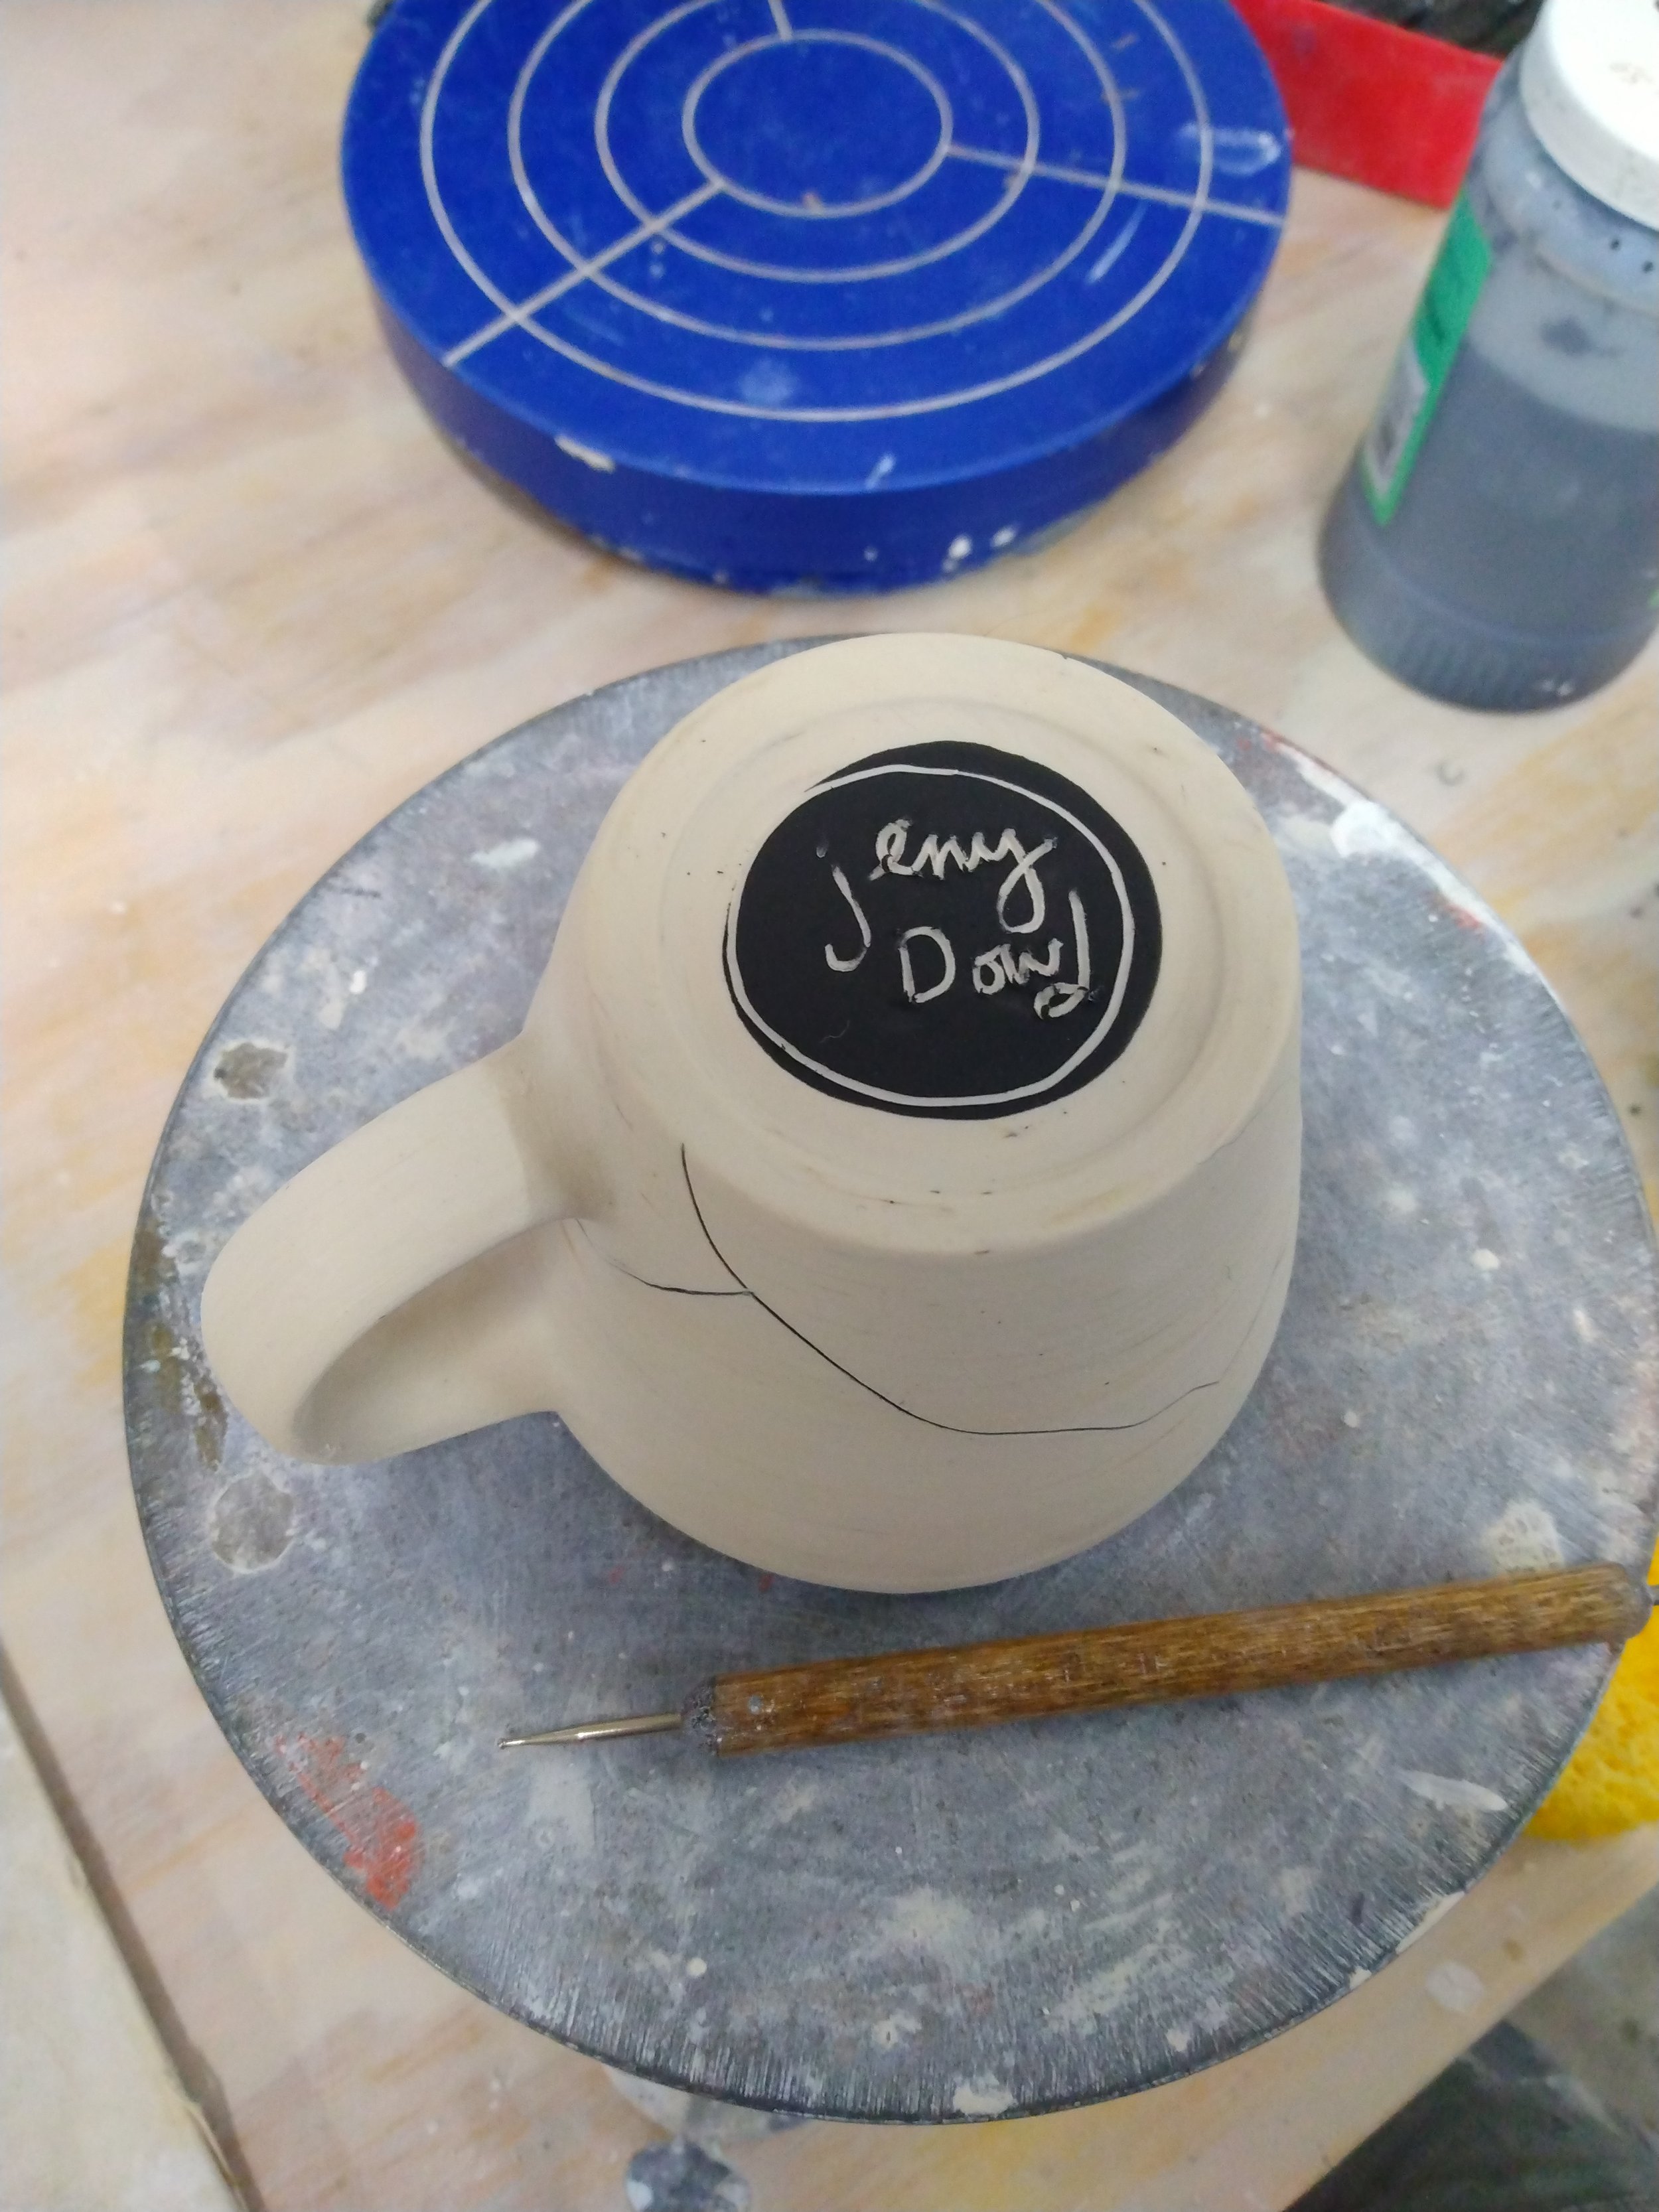
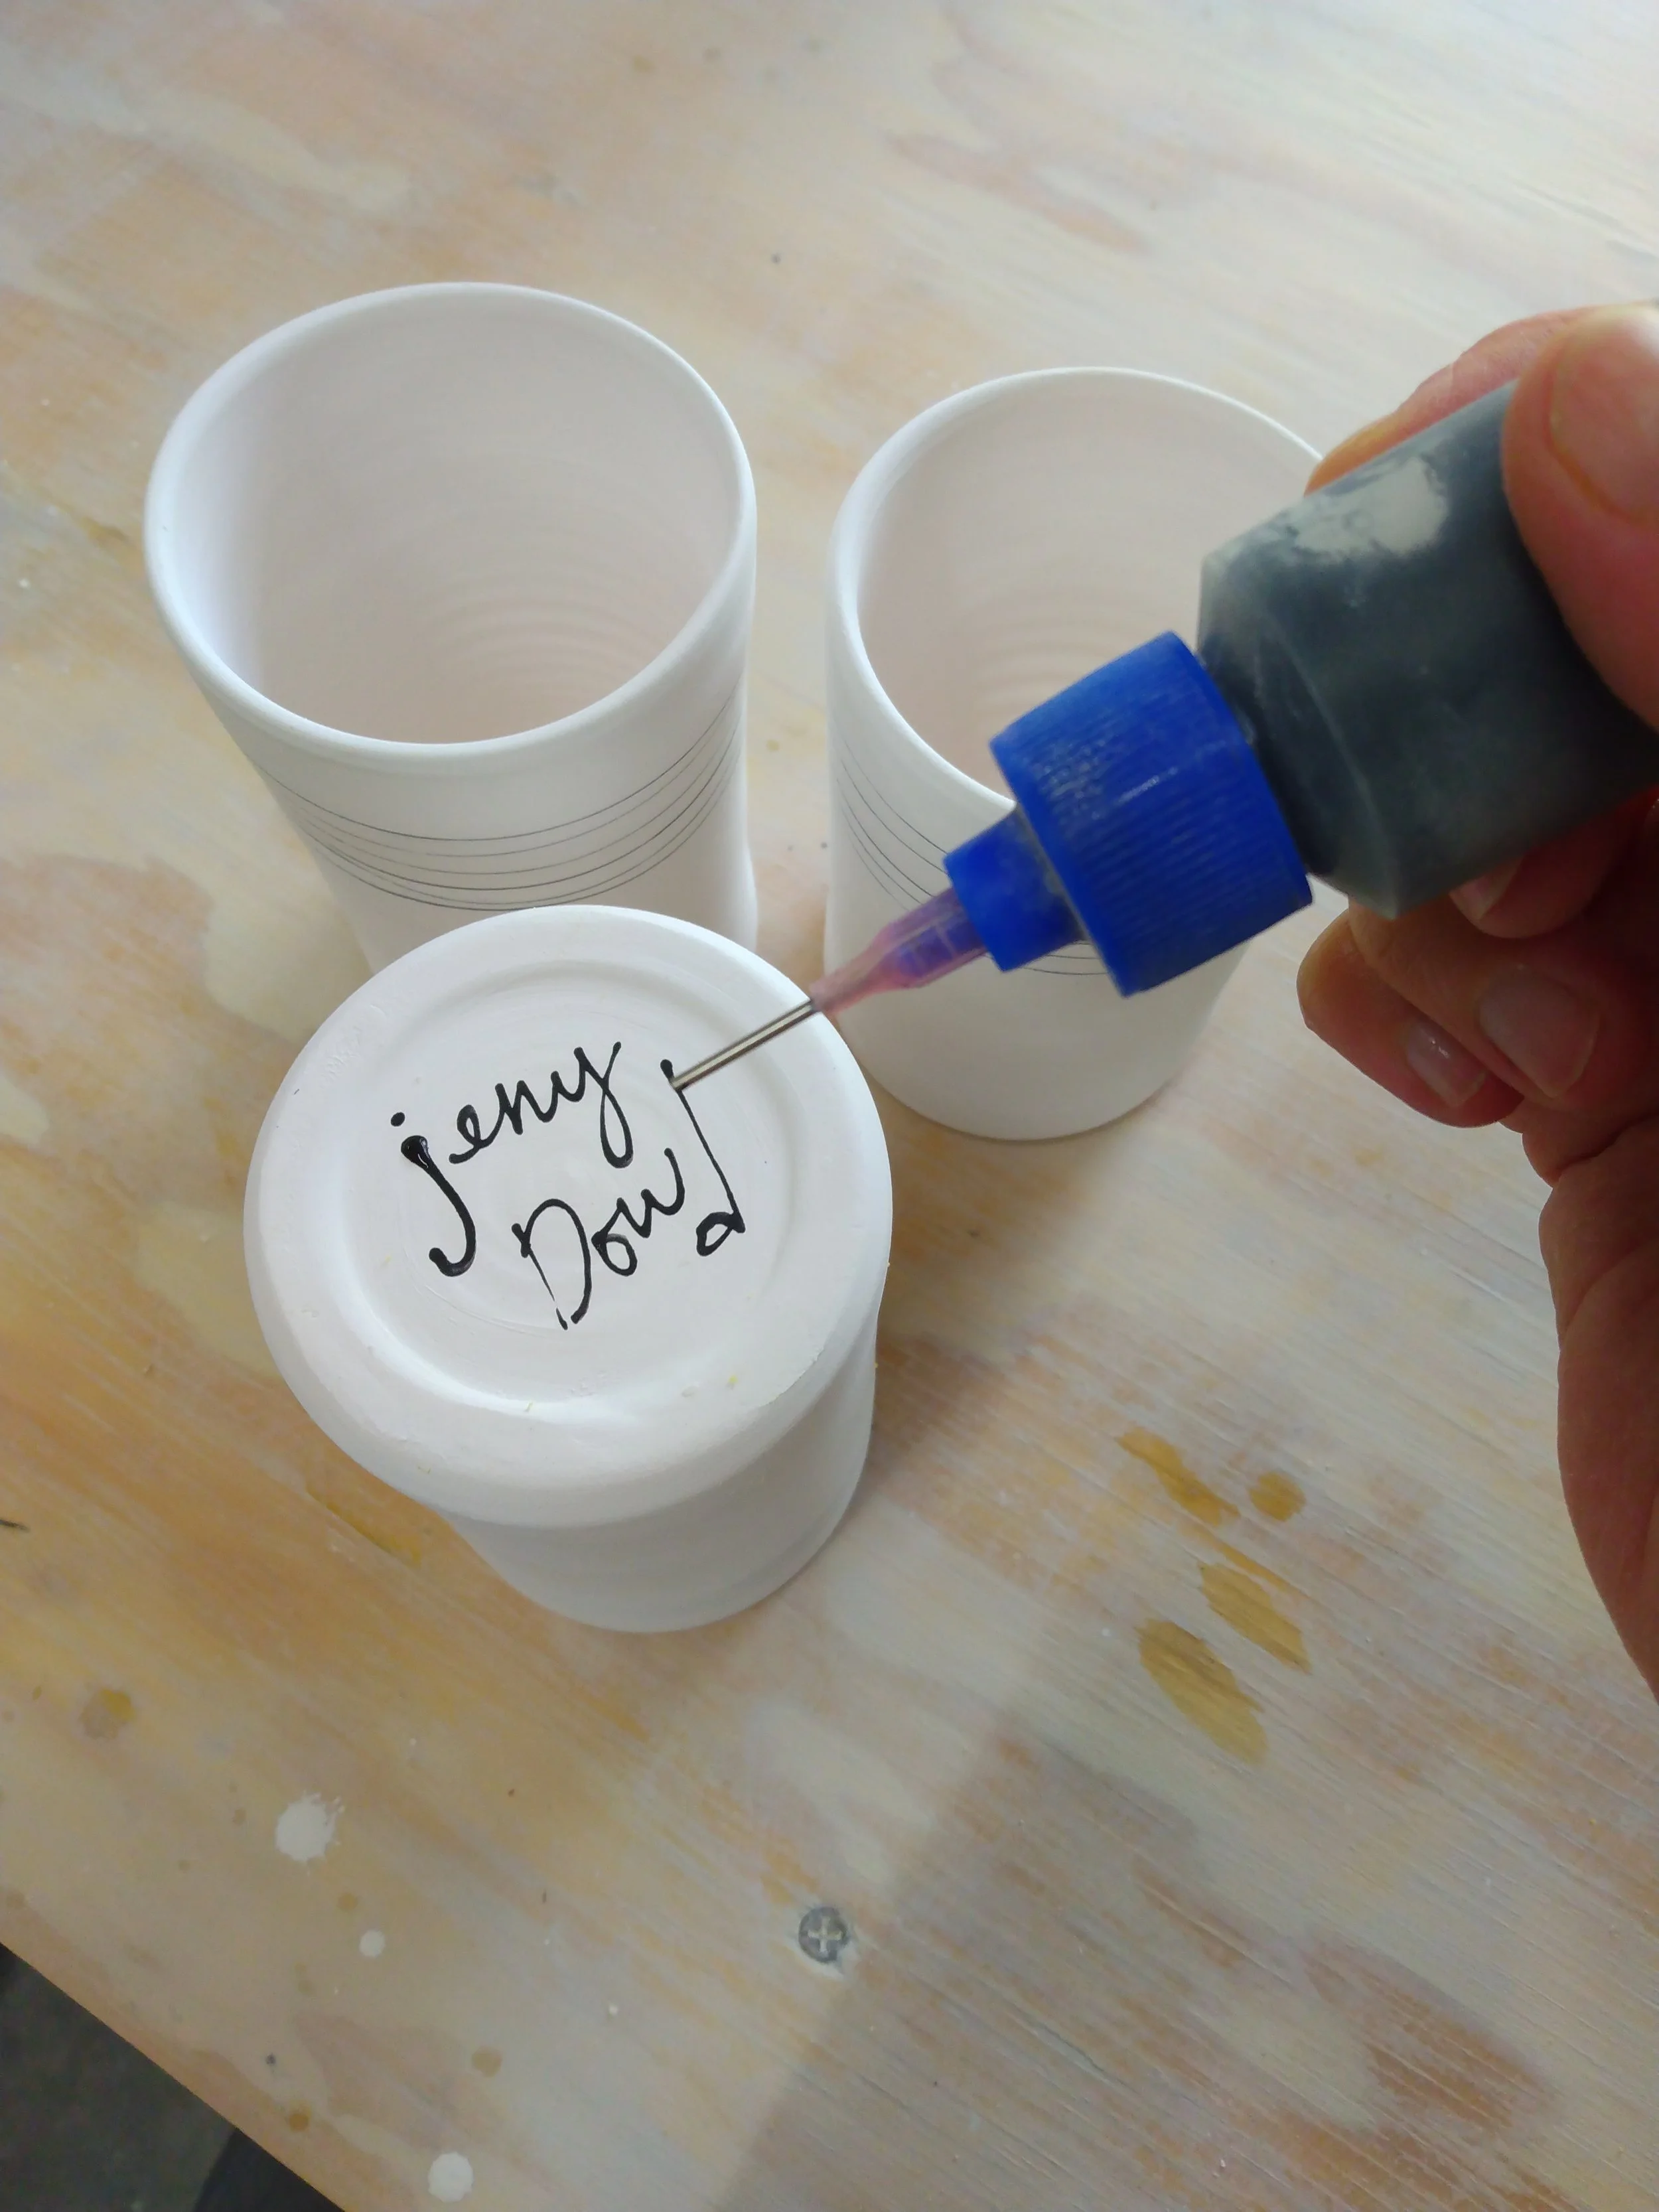
Many years ago Sam pointed out that I was misspelling my name on my pots. Sometimes the 2 n’s would run into each other and turn into a long m… so without my eyes noticing, I suppose my hand just adapted and Jenny turned into Jeny. (I just tell the n’s to work it out, as long as one is there to hold down the name the other is free to make mischief, take a nap, run errands…)

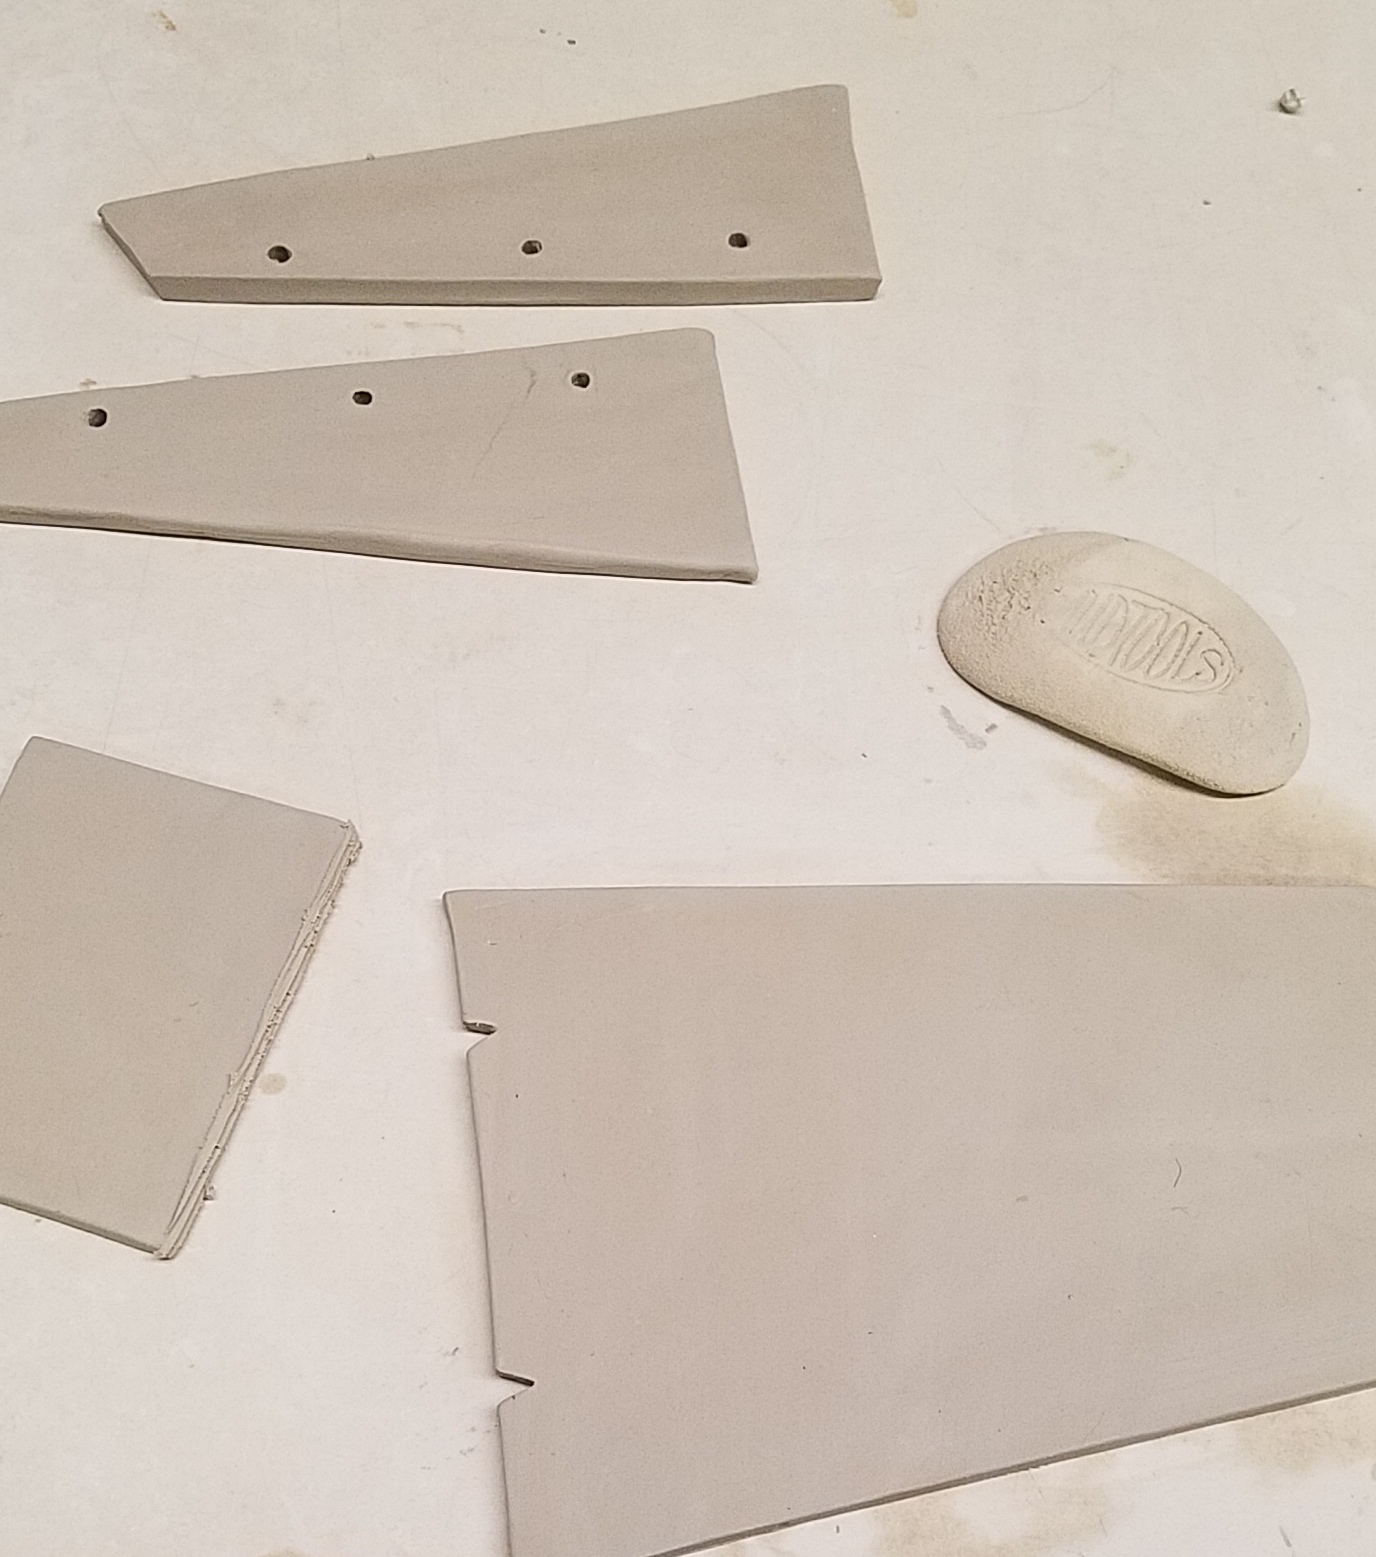
In the end I’ve dug in to signing my name, no mater the material. This is in line with what I teach to my students - a clear marking. Name, initials, drawing, whatever, just make it clear and consistent.

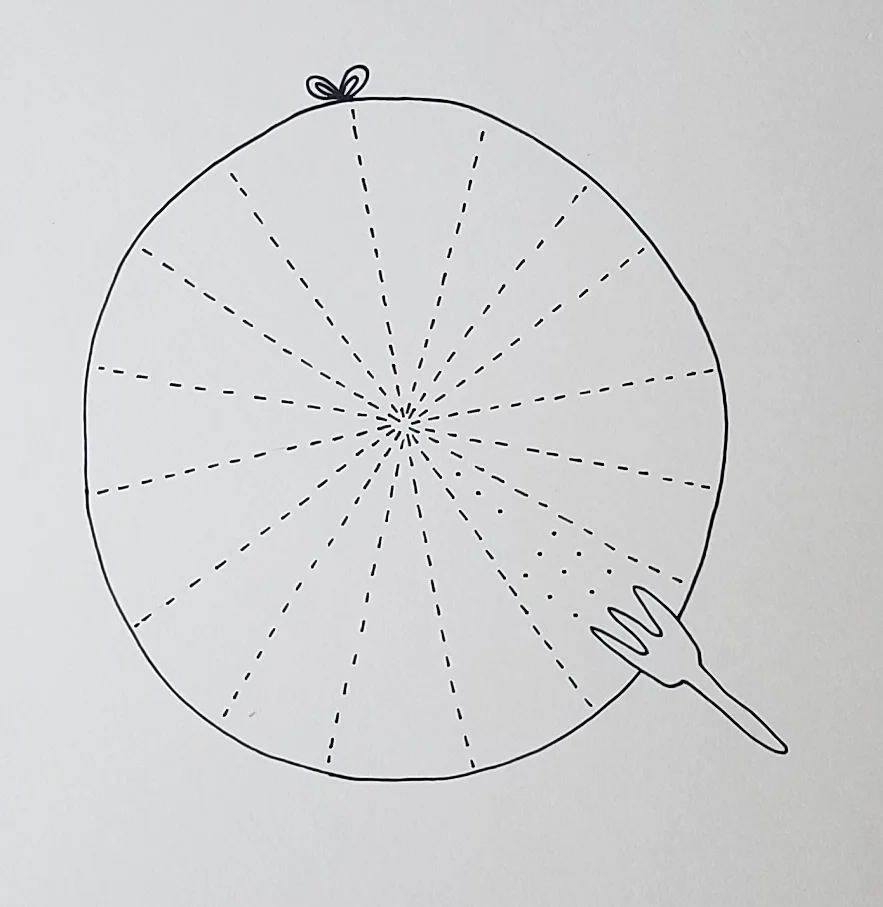
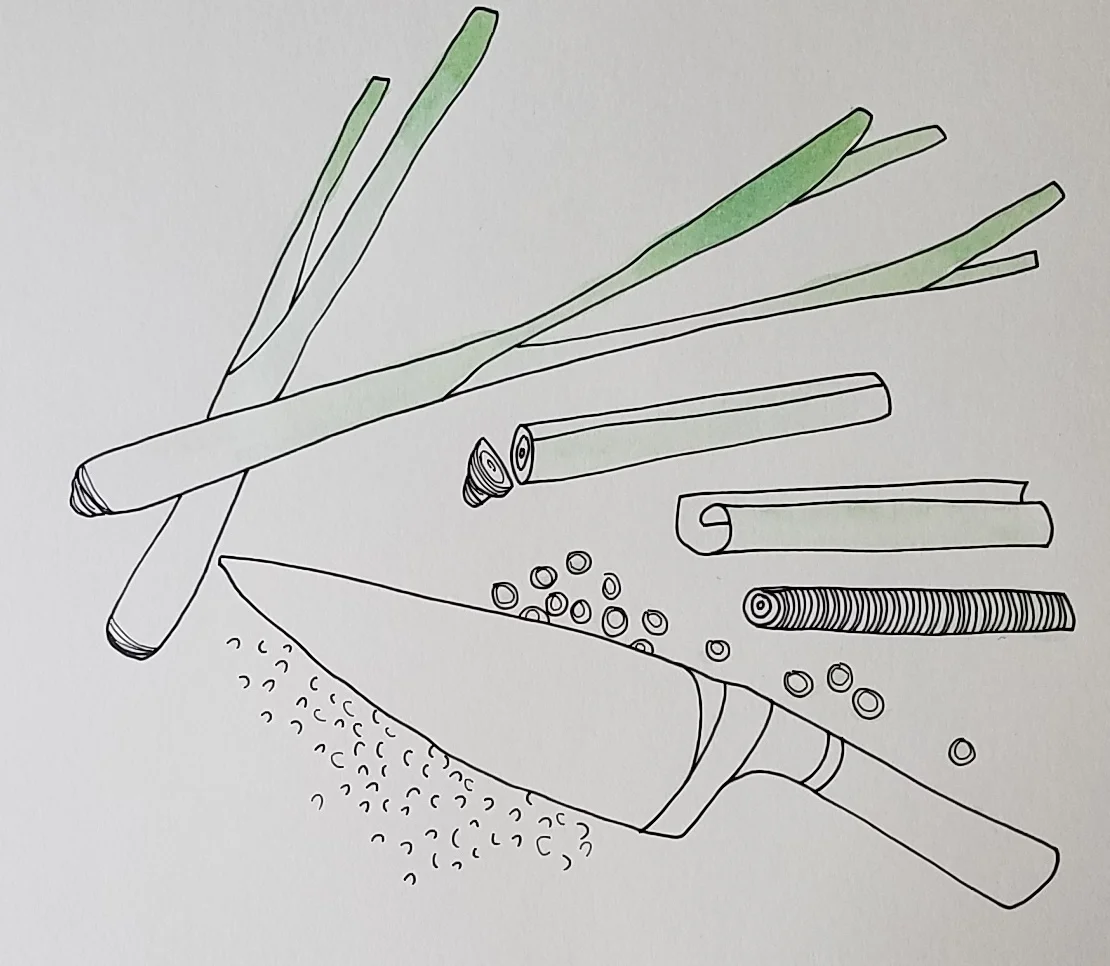
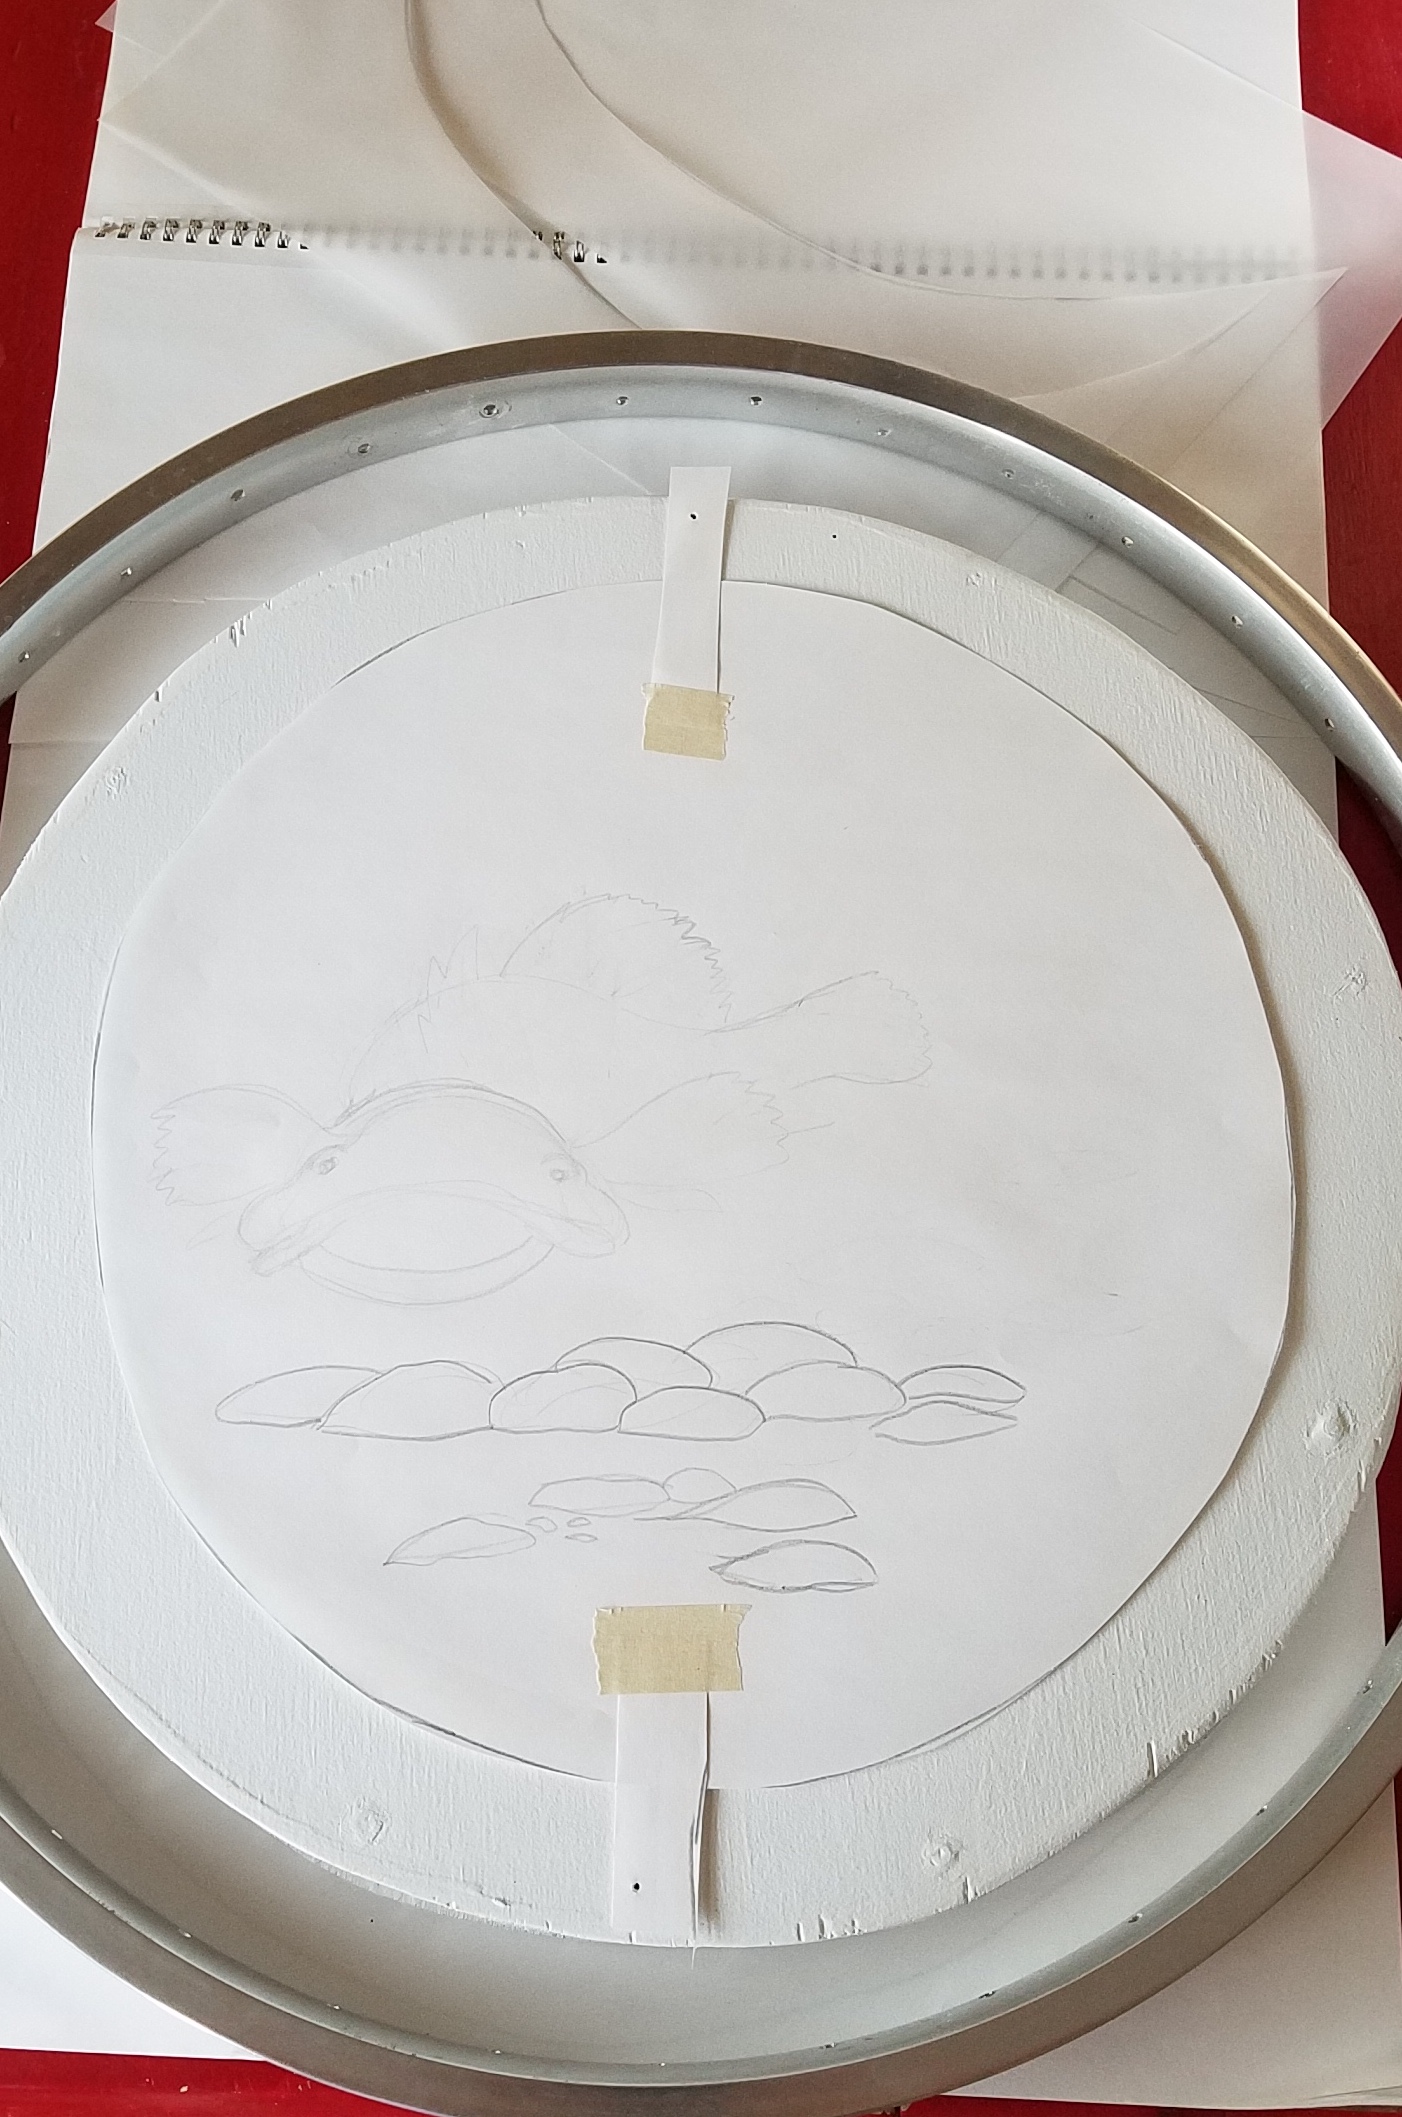
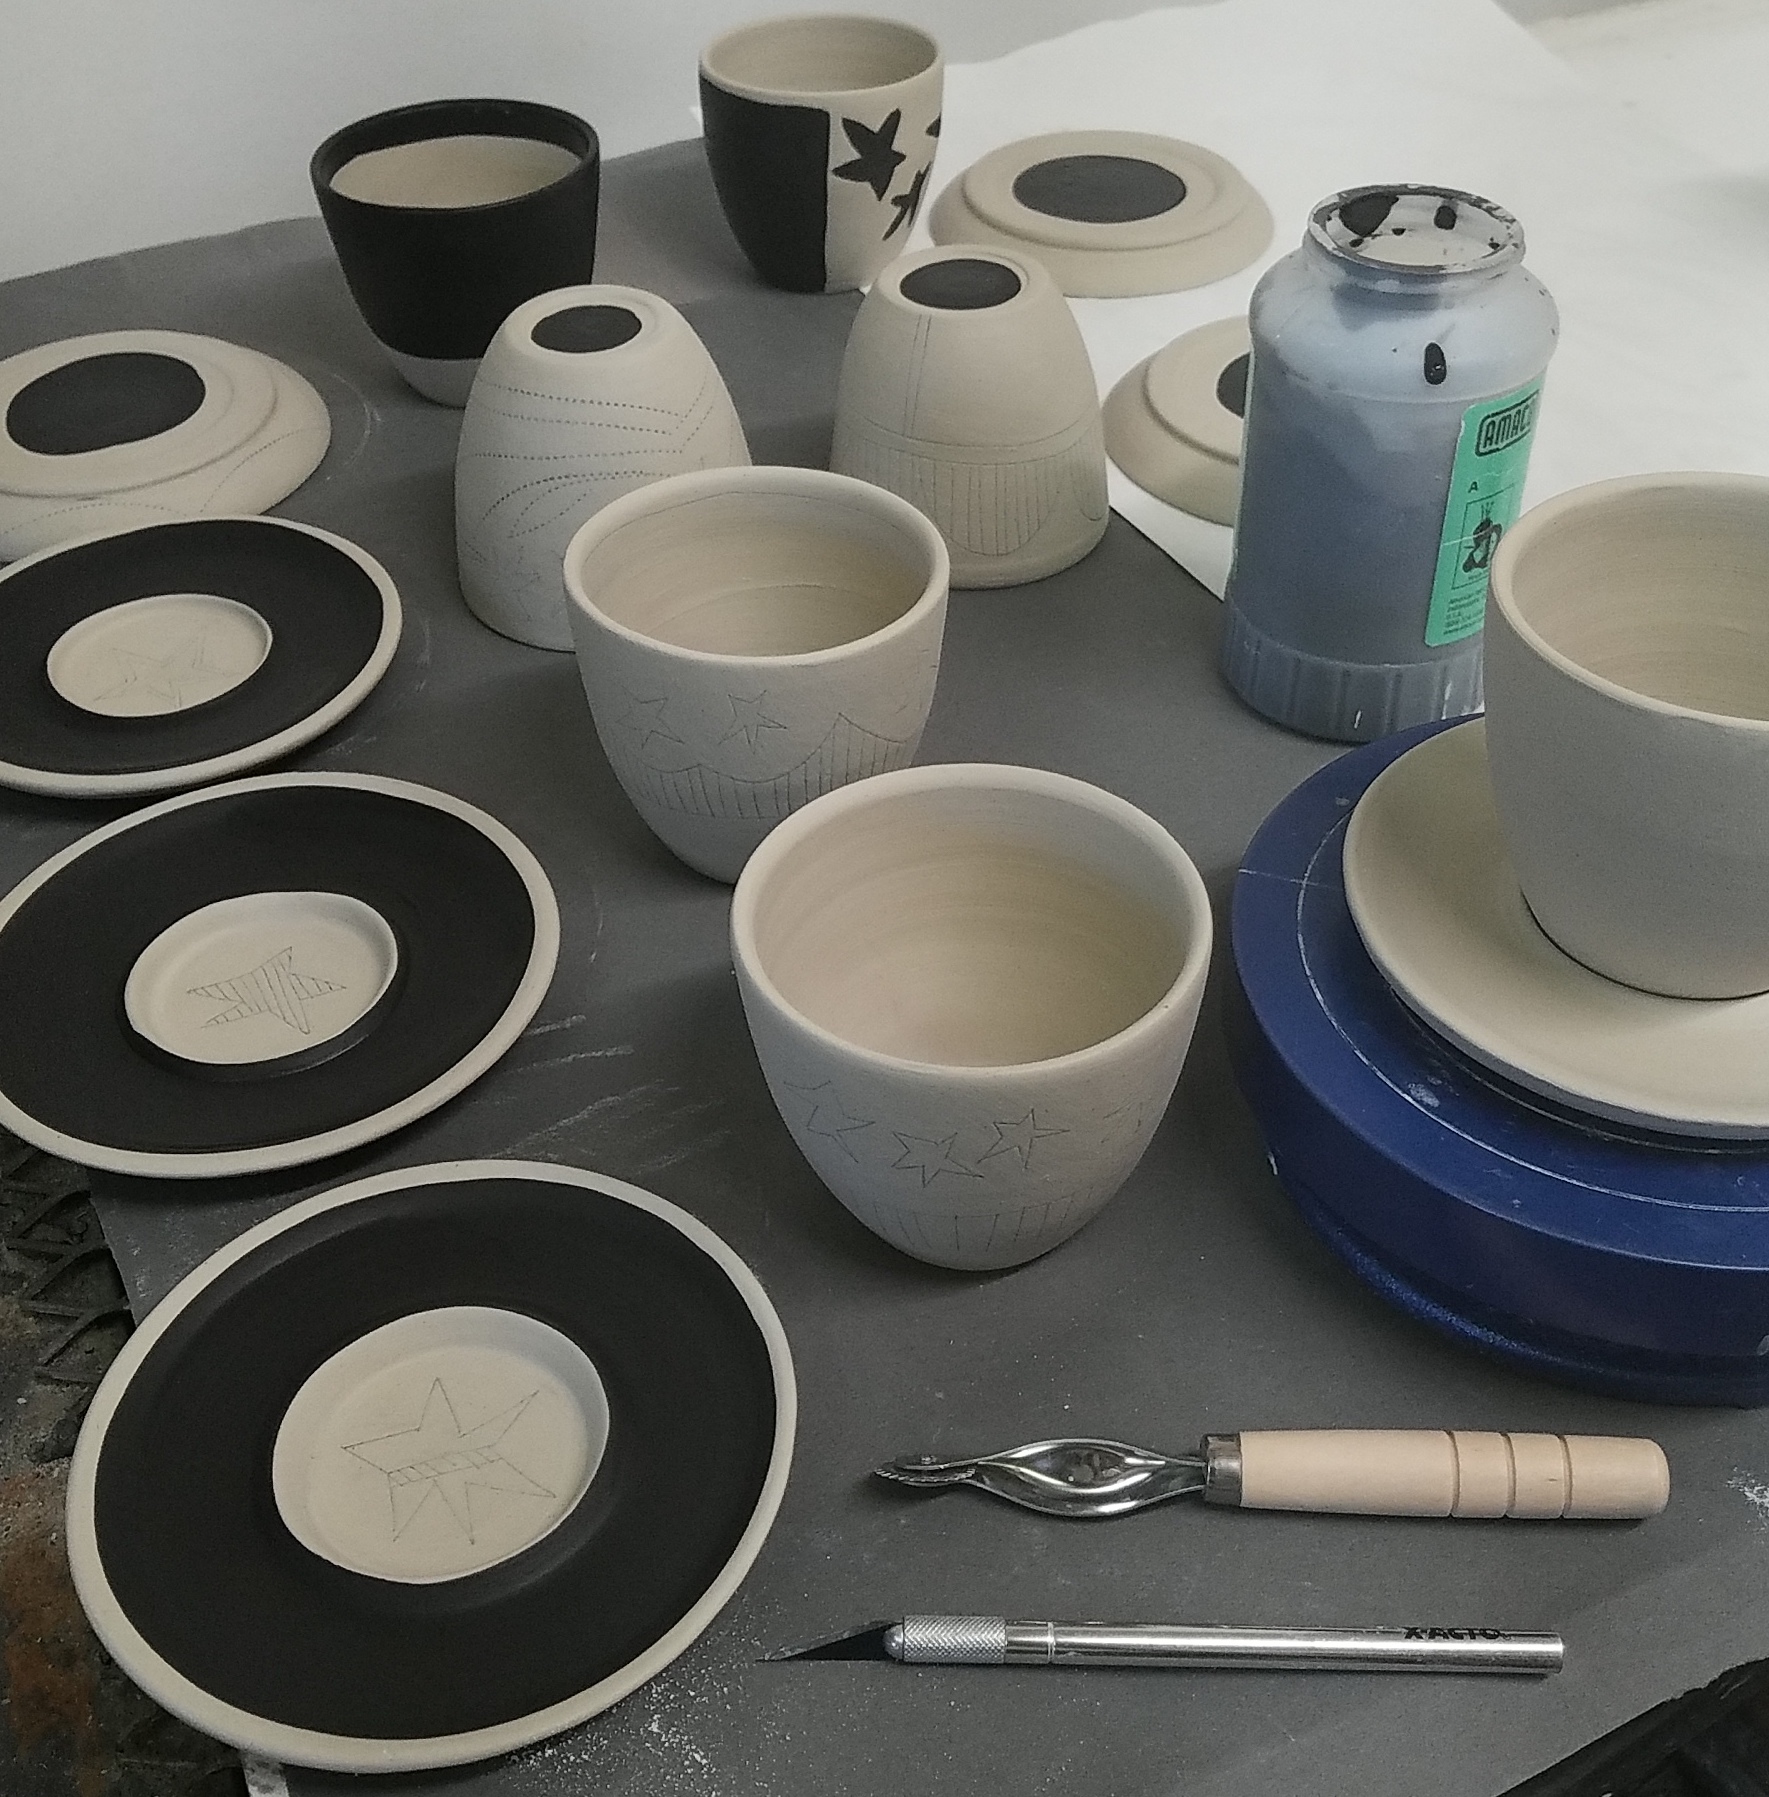
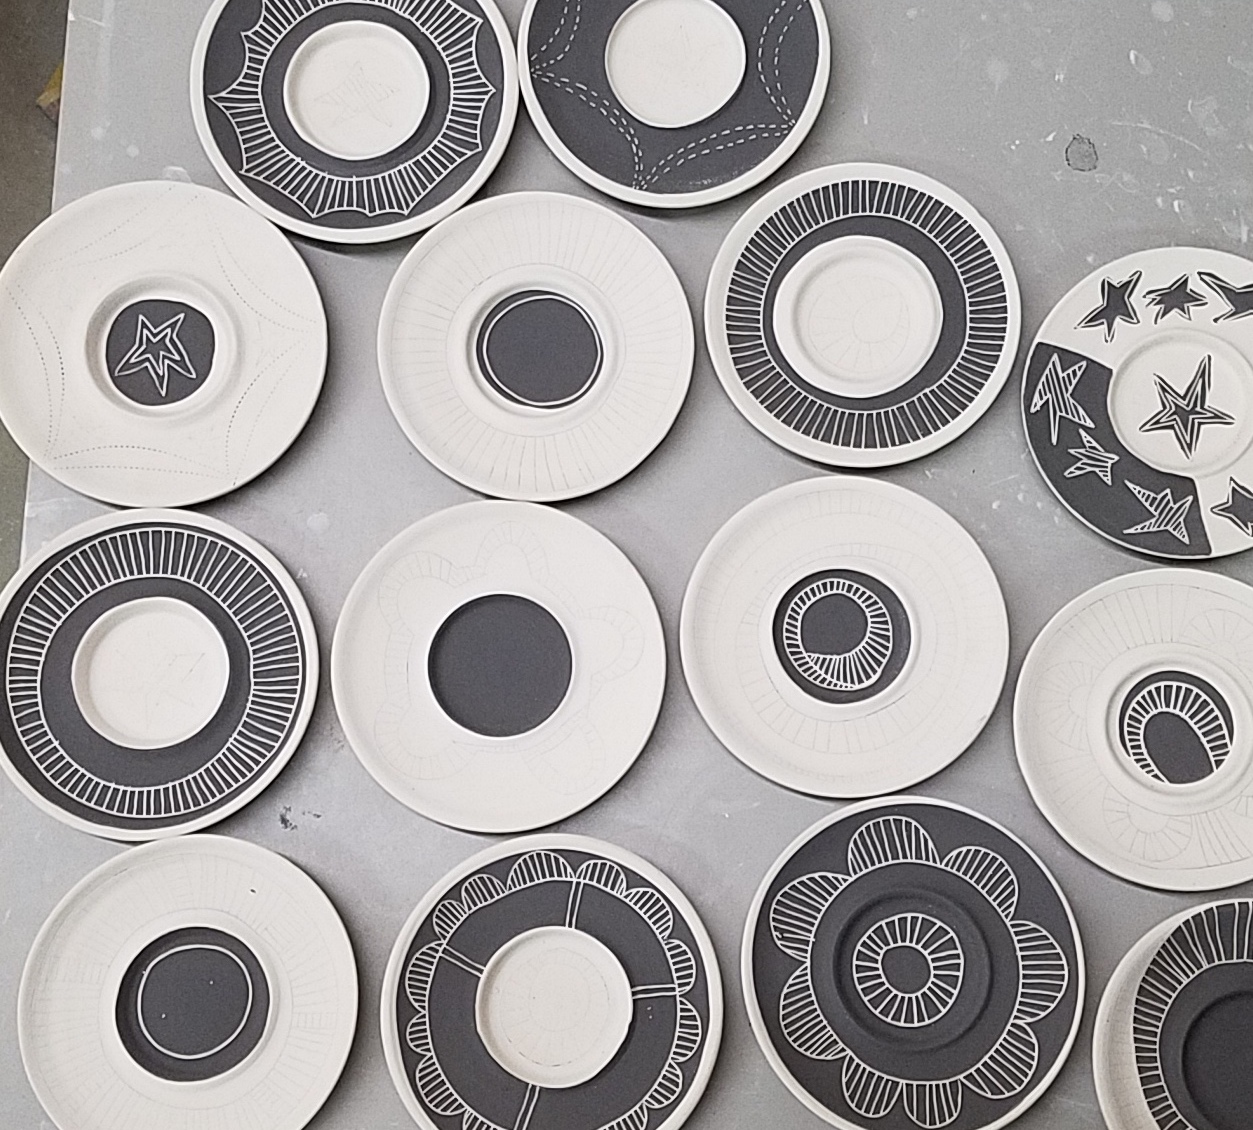
The signature that I have landed on is something that reflects the decoration on the form. I use several decoration techniques: sgraffito, inlay, carving, underglaze pencil, sometimes I add an extra little design or decal (the watermelon.) In the end I’m trying not to spend too much time on the bottom of the pot but also trying to give it a special feel.

The frustration from my potential customer did not shake me. It made me think but has added confidence to my style. (Obviously they didn’t like my work that much!)

Finishing Touches

Jenny Dowd

It’s been awhile since the last update, it’s been an overwhelming few months. Things seem to be smoothing out and suddenly the studio is making sense.

The electric is finished, no water yet, but it’ll happen. We added insulation to the walls and sure, we still need to finish the walls but it just feels crazy not to make pots and work in our new space. The projects (studio, house, yard, pottery orders) keep piling up, so the strategy has been to work on a little of each at a time.

And oh it feels so very good to enjoy a cup of coffee in the morning in the studio!

One thing we did a little too early was move our small kiln over to the kiln patio. It was fine, it was great to run a load of bisque and feel like we are starting to get something accomplished again. But it rained that night and without any weather proofing we knew the kiln was likely to get very wet. Right before the rain started we scrambled and put together this make-shift guard, which totally worked but wasn’t really the plan.

So here’s the real solution - a greenhouse plastic sheeting. Sam built a frame and we attached the sheets, then moved the other kiln over. I’m sure we will need to tweak things a bit after the next rain, but everything feels much more protected for now.

Notice there is a ton of room in this kiln patio / greenhouse? Well, we’ve got another electric kiln on the way and plans to build a gas kiln in this area too. Plus storage for shelves, kiln furniture, a grinding wheel… pretty soon this won’t seem like much space!

QuaraTea Party

Jenny Dowd

One of the first things I missed when we started social distancing in March, was meeting up with friends for tea. Something that I didn’t do that often, maybe only once or twice a month, suddenly turned into a massive void in my life.

While texting a friend, she mentioned the same thing, and asked how can we show togetherness while apart? We brainstormed ideas for cards, ways to send a little love by mail, and she coined the term QuaraTea. That night when I woke up full of worry, that conversation popped into my mind. The worry suddenly shifted to thinking about how to illustrate this idea of a safe distance tea party. (Because, you know, Safe-Tea First)

In the morning, I sketched it out, and sent her the photo:

This idea rattled around in my brain for the next week or so, was there some way I could offer a sweet gift for friends? I also kept thinking about people who were adjusting to working from home, were they reassessing their coffee / tea mug collection?

Meanwhile, I received a grant from Teton ArtLab designed to provide financial help to local artists. That was a big piece of the puzzle, and helped me to pursue QuaraTea Parties.

My next step was to contact Tea Hive. I felt that their line of Teton Teas would be the final piece in this puzzle. A mug is nice, but a mug with tea is an actual party! I wanted to support another small business and keep the origin of my project local while also offering handmade love from my little corner of Wyoming to people anywhere.

And so, the QuaraTea Parties came out of my dreams and onto the table.

A QuaraTea Party for 1 is a mug + 2 Teton Teas, or to really enhance the tea ritual - a teapot & cup. Perhaps a sweet self-care gift, or something to send to a friend who needs a little pick-me-up.

Also available are QuaraTea Parties for 2. This is 2 sets: 1 mug + 2 Teton Teas. I send 1 to you and 1 to your friend. Then you can meet up for a video chat / tea party!

Sam thought the bunting in my photos was extra fun and that they should be included in each set. So we spent a cloudy afternoon making colorful party buntings!

This project has been a happy one. The first connection I missed was tea with friends, and now I feel like I get to enable long-distance tea parties!

A variety of QuaraTea Parties is available at Wyoming Artists Collective and also my Etsy shop. Sets start at $48 and all include the cost of shipping - although, if you live in the Jackson, WY area, I’m happy to leave a box on your porch!

More Flowers

Jenny Dowd

Well, this year really took a turn.

I also haven’t updated my journal since December. It’s not like I haven’t been doing anything, there are actually a lot of interesting things going on in the studio, but it just didn’t seem appropriate.

It’s been tough to stay motivated in the middle of the COVID-19 Pandemic, but it’s also forced me to really focus and dig into studio work. Suddenly I’m surrounded with virtual collaborations and am connecting with friends more than ever.

So, I’m going to start regular-ish posts again. And as my last post (from December which seems so so so far away) was about my tiny flowers, I think it is only appropriate to check in on what is going on with these flowers now.

On a rather gloomy day a few weeks ago, I pulled out all the little bins of flowers in my studio and made a bunch of bouquets. That turned into such a happy afternoon! Surrounded with scraps of pretty fabric and ribbons, I trimmed stems and wrapped up bunches of flowers.

My work is now featured at Wyoming Artists Collective and it’s the only place where the flowers are available online. Each bouquet is $30, which includes shipping. It seems the perfect way to send a little love to friends and family.

Of course if it’s local I’m always happy to drop the package on the porch and run away…

And I love seeing the bouquets in their new homes. They add little bits of color and smiles to our days of quarantine!

A Gingerbread Challenge

Jenny Dowd

Sam and I accepted the challenge of making a gingerbread house for an exhibition and competition. The challenge includes 6 teams and the houses will be on display at the Old Wilson Schoolhouse during this Saturday’s Holiday Show and Sale from 10am - 3pm.

Sam immediately wanted a train station, and I just couldn’t visualize anything until we started. So, as usual, a week before the due date we started to plan. Sam had the idea to include some small businesses and that was where I got excited. And also made things more complicated.

First we drew out the plan. The rules stated that the house could not be any wider than 18” (good thing too - this could have taken over our house.) We made patterns for each building and started dreaming up what business our town should have next to the train station.

I have not worked with gingerbread in a long time, and when the recipe said “knead” I looked down and saw that I was actually wedging the dough. (That was the first and last time I compared this material to clay.) Before each tray went into the oven I photographed the shapes with their pattern so I could keep the buildings straight.

I tried to get fancy with melted candy in some windows. And found that some of the gingerbreads needed to be sanded to fit. At the point of sticking everything together with royal icing I was actually really glad not to be working with clay.

Sam made fondant animals for the small farm yard and our table filled up with sweets. I didn’t really think it was possible but I am so sick of the smell of sugar. When it came to really assembling the village things got too sticky to photograph. So here’s how it turned out:

Welcome to Flufftown (the locals pronounce it Fluf-ton)

Flufftown has a train that regularly delivers goods to the shops: The Pillows & Fluff Store is the proud founder of this town and does a brisk business alongside The Goldfish Monger, The Barber & Mustache Shop, and The 24-Hour Shoelace Store. If you head around to the back of the shops you can enjoy pizza or watermelon at the Slice Shops.

The train cars are full of fluff, pillows, shoelaces, and mustaches as these shops are stocking up for the holidays.

20191205_120811.jpg

We planned to have a farmhouse and barn, but ran out of room. So if you need a barn we’ve got one.

In case you wondered, this is what happens when artists design a town. There were other things we ran out of room for - the Pillows & Fluff Store was supposed to have a conveyer belt taking fluff from the train to the stack on top. And a fence to keep the animals from getting too close to the train, but since they are all calmly laying down we figured they weren’t too daring.

We found a lot of fun candy at Mursell’s Sweet Shop, including cotton candy!

So if you are in the area, stop by the Old Wilson Schoolhouse on December 7th from 10am - 3pm to check these houses out in person!

Park(ing) Day 2019

Jenny Dowd

PARK(ing) Day happened on September 20th in Jackson. This is a day (all over the country) where artists reimagine parking spaces into places of possibility. This was the 5th year Jackson has been involved, organized by Jackson Hole Public Art, and my first year participating.

Map.jpg

Check out last week’s Journal entry to see how I built my cart…

Once the cart was finished, I could focus on the final touches. A fabric canopy was made to provide shade, I kept this simple by sewing a piece of fabric then drawing a little embellishment on the edge. It’s rather rickety - so at this point I started hoping for a day without wind.

I’ve been making flowers for the cart all summer, some even came from past projects. I put my dad to work cutting stems (wire) for the clay flowers. Each type of flower made from porcelain.

After bisque firing the flower, the stem is attached, then it gets bathed with color… I used a mix of acrylic and whiting (calcium carbonate) and then layers of watercolor.

The finished flowers were poked into the styrofoam inserts that line the cart, and after a test of the awning, plus the addition of signs, it was ready for a parking space!

On a wet, cold, rainy Friday morning Jeny’s Flower Cart opened! I had to set up a tent over my parking space so it wouldn’t melt. I was located in front of Hand Fire Pizza on a very busy Cache Street.

The gloomy, cold day was made cheerful as I invited people walking by to make flower bouquets for free! I have no idea how many flowers I made, and no idea how many I gave away, but I probably went home with less than half of what was started with.

For a little history on the flower cart…

In 2016 I was invited to create an artwork for a Tiny Art Show curated by JH Public Art. Since the show was featured at the People’s Market (a farm & art market in Jackson) I thought a tiny flower stand would be welcome. I made a little cardboard shelf that would hang on the wall and filled it with clay flowers, bouquets, and vases.

A year later after Penny Lane Cooperative opened on Scott Lane, the businesses on that block had a “Midtown Throw-Down” and invited artists to sell their work during the evening event. Since I was already selling my pottery in Penny Lane, I decided to make a concessioner’s tray full of flowers, and walked around during the event selling flowers.

It seemed that the next logical step would be a flower cart, it took me a few years to find the right venue and to plan and build the cart.

Not sure what’s next, but I’m looking forward to a break from making flowers!

Making a Puppet: Part 2

Jenny Dowd

More from behind the scenes of making a giant pole puppet, plus the puppet in action!

(Check out my past journal entry Making a puppet to see how this all started)

Trying to reduce added weight, we decided to make the scales for the armadillo-ish beast out of cardboard. Strategically painting the scales with silver, black, and white helped mimic metal. I also made some special scales that were covered in shiny, scaly looking fabrics.

The scales were stitched on with wire, directly onto the fabric covering the armature. After connecting the neck, head, and tail to the body, the shiny scales went on as a transition. I ran out of time while attaching the big sequins, or more accurately, underestimated how long everything would take. However, in this case I think less is more. It was good to constantly remind myself that this very large creature would be seen from a distance, a little sparkle was better than none.

I had a little help… my parents arrived for a visit and were promptly put to work on the final details of the beast. (Thanks!)

And finally! The beast all put together. We designed it to be operated by 3 people: 1 person at the head, 1 at the body, 1 at the tail. In the end only 2 people were needed, the tail was stuffed so it would flop around with the movement of the body.

The performance happened on the lawn at the Center for the Arts where dancers from Dancers’ Workshop were joined by visiting artists from David Dorfman Dance.

There were 5 beasts featuring the Chinese elements: Water, Wood, Fire, Earth, and Metal. I regret that I did not get great photos of them in action.

In a beautiful and touching performance, the beasts were compelled to work together in order to solve a problem.

20190816_183119.jpg

What a process and what a performance! I’m honored to have been part of this, I learned a lot and hope this is not my first & last puppet. But next time I might go a tad smaller…

20190816_184313.jpg

Making a puppet

Jenny Dowd

It can be difficult to share process photos and explain projects that are still mostly living in my head. However, I’m finding that this is a helpful part of my process, plus I’m excited to share this project.

Sam and I are currently working on a huge project - we are making a pole puppet! In June we had the opportunity to work with Eric and Ines Bass from Sandglass Theater in a collaboration with Dancers’ Workshop. This project will culminate with a parade and performance on August 16. (Stay tuned!) Our puppet is 1 of 5 beasts, each based on one of the Chinese Five Elements: Earth, Water, Metal, Wood, Fire. Our beast is Metal, and is loosely based on an armadillo.

The Chinese Five Elements contain a lot of interesting layers; Metal also refers to the emotion: sadness, color: white, and flavor: pungent.

We spent 4 days working on the body structure, the tail and head will be added later.

The base of the creature was made out of cardboard, with the double layers helping to keep the reed armature in place. After shaping the vertical hoops, I attached the horizontal reeds with tightly tied bike tubes. I really wanted the puppet body to articulate in two directions - up and down and side to side. However, after attaching a fabric hinge and trying to move the creature, I discovered that it was too bulky to have that much movement. Up and down was more important, so the hinges were remade to easily shift the mass up and down - as seen in the bottom right image.

Poles were installed under the base - they are fitted to the backpack worn by the puppeteer. A pole was inserted into the front half so the body will articulate up and down. Both me and Sam tried on the backpack to make these adjustments.

So, now that the structure is nearly complete, it’s time for the details! Although, these are still complicated and require a bit of engineering and careful thought. This is just the body of the puppet - the head and tail are still seperate at this point and will each have their own pole and puppeteer. Our beast will be operated by 3 people!

I’ve started covering the armature with fabric, including the soft underbelly of the beast, in silver and metallic blue. Next, the scaly armor will be attached, plus a neck, head, and tail.

Remember that the Chinese element Metal also includes the color white? My plan is for the colors to fade from deep metallic blue on the inside to silver and white as they progress from the body.

A few of the details here - Sam is gluing nostrils onto the head and I’ve started sewing the tip of the tail. I think we are over halfway finished, but there is still lots to be done.

Stay tuned for more updates and information on the performance and parade on August 16th in Jackson!

Market Update

Jenny Dowd

Last week I showed a bit of the process behind the pottery I’m making exclusively for Market. I opened the kiln on Monday to find that for once, everything in the kiln looked great! (See last week’s post here)

Garden themed pots: Swiss chard cups, cherry tomato salad bowls, plus a salt cellar and garlic keeper.

Before this load could be fired, I had to solve another problem. The shelves were in serious need of care, the bottoms of the pots had been sticking - leaving behind tiny shards of fired clay. Not only is it annoying to constantly clean the kiln shelves, but it meant that a lot of my pots had bits of clay missing from the feet and it just looked bad.

Fixing this means another step, but one that is worth it. I’m now coating the foot of each pot with a mixture of brushable wax and alumina. This ensures that nothing will stick to the kiln shelf and the foot of each pot will look how it should! I also scraped each shelf, and coated it with fresh kiln wash - which dried out in front of the space heater with a little help from Merlin’s studio water dish.

I’m also making ornaments specifically for Market, with the Vertical Harvest logo on one side, and a ripe juicy tomato on the other. The logo is hand drawn onto the porcelain disk using an underglaze pencil. I found that I can go over the lines with a little water on a brush to make it look more painterly.

It’s a few months away, but now I can’t wait until I can grow Swiss Chard and cherry tomatoes in my own garden, right outside of my studio!

Sketch to Life

Jenny Dowd

My sketching process is really messy, sketchbooks get torn up and little scraps of paper usually hold the best ideas. Often I can’t figure out how to define the idea on paper and the sketch becomes 3D - clay or wire, and then gets recycled.

The past few weeks I’ve been cleaning and organizing my studio space as well as attempting to wrangle art images into files and onto my websites. This is a good way to find odd things and reminders of past projects. Here are 2 of the most vague sketches I found and their resulting sculptures…

Believe it or not this was the final sketch for a ceramic and steel chandelier made for a project in 2016. It was just enough information on paper for me to move on to clay. I remember showing this drawing to a few people who seemed to understand it and were really excited… maybe my verbal description was more coherent, or maybe they were just being polite. Either way, this is what the sketch turned into:

Wyoming Sky Lantern was commissioned by Agnes Bourne for the foyer of the Designer Show House at the 2016 Western Design Conference. Read all about this project in this past Journal entry. The chandelier is now permanently living in a private home, the owner shared these images and I absolutely love them. I never would have guessed how the porcelain would change color with the lighting and environment. Maybe that is why my sketches are so vague?

This sketch was from a project last summer, I collaborated with Matt Daly to make 12 thaumatropes that were installed around Emily Steven’s Pond. This project was part of FoundSpace, a project designed by Jackson Hole Public Art and the Jackson Hole Land Trust. Once again, a very simple sketch became something quite complicated.

Read more about this project and see images of all the thaumatropes on my website.

Jackson Hole History

Jenny Dowd

Recently the Jackson Hole Historical Museum asked me to create an illustration that would embellish the text accompanying their new exhibition: the History Co-op Corner. This exhibition asks the community as well as visitors to share their Jackson Hole History.

The final illustration is 11 feet long, definitely quite a bit larger than I’m used to working!

This was a challenge to wrap my mind around. A small and very, very rough draft helped me visualize the scale and subject. The drawings needed to add to the text, yet not distract.

I started by thinking in terms of seasons and easily recognizable land formations - from left to right: Winter / Saddle Butte, Spring / Tetons, Summer / Sleeping Indian Mountain, Fall / Snow King.

Since history is past, present, and future I knew it would be important to mix together the contemporary and historical nature of Jackson Hole. After making a list of landmarks, activities, and a few interesting historical objects I translated each into a small cut-out drawing. This gave me something to move around under the text so I could play with relationship and readability.

The scale was a challenge, but since the final image would be scanned, printed onto vinyl and then applied to the wall - I did not need to make the drawing 11 feet long. Instead I made the drawing in 4 sections, at half the size of the final product. The text was printed out and pieced together - so I would roughly know how much space was available around it for the drawings.

After moving around my little cut out drawings I was able to edit and figure out which images made the cut. This was tough - there are so many recognizable images that can be used to illustrate Jackson, plus many activities that people travel to this area for. In the end I had to choose images that would read well from a distance and that could be drawn in silhouette.

I really love this photograph of Jackson’s original school bus, it was one of the first images that I knew needed to be included. It may not be easily recognized as a school bus, however it doesn’t take much research at the Historical Museum to find out what it is!

A few challenges included keeping the line of images from becoming static - I wanted some of the images to break into the space around the letters. Also, there were plenty of items that I had to look up for reference, such as the bus used in Yellowstone National Park.

This is the final drawing with lettering laid over top. And the final version in the museum…

This exhibition invites interaction by asking the community and visitors to participate through answering the question “What is your Jackson Hole History?”

Local Elementary students were asked to draw and write about their Jackson histories and High School students researched and shared an oral history of their families. Postcards are also available for visitors and locals to include their histories in this evolving exhibition.

There is much to explore in this exhibition and it is best experienced in person. I’m honored to have my artwork be part of this display! If you are in the area be sure to stop by and participate.

Jackson Hole Historical Society & Museum

225 N Cache, Jackson, WY

Tuesday - Saturday 10am - 5pm

Illustration project sneak peek

Jenny Dowd

I’m excited to share a peek into a project that has been in the works since late last year…

In collaboration with the Culinary Arts Program at Central Wyoming College, located at the Jackson campus and illustrators Jocelyn Slack and Cal Brackin, I’ve been working on a cookbook! The three of us have been illustrating a collection of recipes developed by the culinary arts students.

The end result will be a published cookbook and an exhibition with some of the original illustrations as well as actual recipes made and served during the opening by the students.

Wrapping my head around how to create illustrations for the recipes was a challenge. It didn’t take long to realize that composing the image right there on a piece of paper was causing me to stall out and I would be more confident if working dimensionally.

I thought about the story each recipe told and how to best give visual instructions, then drew the components. After cutting the pieces out I was able to play with the composition and relationship of each object. Some images came from memory, while some- the 1950’s pink convertible- needed a source image.

After the initial composition on scrap paper, I moved onto ink on drawing paper. The next part seemed the most scary- I don’t usually use much color and rarely use watercolor. I had a few drawing drafts that didn’t work out, so they became confidence building practice pieces.

Pictured here- how to chop lemongrass for Thai Masala Squash Soup, Taco Soup, and Asparagus Soup with Cream- for that one I imagined a budding romance between asparagus and a pitcher of cream. (I got sick of my brushes rolling around on the table and making a wet mess, so I made a quick brush holder with foam and push pins. I made a sea monster brush holder out of clay earlier in the summer, but haven’t glazed it yet.)

For some recipes, I picked out a few key ingredients, like a shallot and mint for the Cucumber Mint Salad. Some are more visual how-to’s, like the middle illustration- Winter Vegetable Hash (Scrub veggies before peeling, do not rinse after!) and some are about telling a story- Thai Coconut Rice- gateway to the taste of another country.

The Cuban Chicken recipe was influenced by the grandmother of the chef… so I couldn’t resist a 1950’s pink caddy being driven by a chicken on a mission! The Singapore Fruit Salad made me think of a market full of exotic fruits which led to fruit eager to travel the world. Mixing pasta dough like a volcano of flour filled with eggs… well, that’s my visual definition anyway.

Some recipes got more color than others, I still love the simple black line of pen on paper, so I highlighted that in a few of these drawings. Especially the Meatball Sub- the meatballs are waiting for the toast to be perfect.

I still have several more illustrations to finish, so stay tuned for an update! And if you are in Jackson, be sure to stop by the Theater Gallery in the Center for the Arts to see the exhibition. The work will be on display from October 20 - November 5. The opening reception will be November 2 from 5:30 - 7:30pm. And the cookbook will be available at that time too!

Display Ideas

Jenny Dowd

One thing I love about making things out of clay, besides ease of use and overall helpfulness, is the challenge of finding solutions for display. I'm always rethinking how to make objects that are helpful and highly functional, plus looking for good ways to display them- I like it when a story can simply be told through the juxtaposition of a few objects. 

A few weeks ago at the August Art Fair Jackson Hole I was across the isle from Sita Sabina. She saw a helpful potential in my "stuff holders." By using these little dishes to display her rings for people to choose from, she also created a beautiful and simple display that offers good ideas for storage (or home display) of precious objects.

Recently metal artist, Jen McNaughton, asked me to make necklace display stands and I got pretty excited about this project. I'd never thought of making ceramic display stands!

I started out by making a cardboard pattern. This template helped me think through the angle which it would sit at as well as size. It also gave me a good visual before cutting into the clay- the necklace needs to stay put on the top and hook somehow into the back, so I came up with a few ideas before getting too far into clay work.

After lots of smoothing and assembling I added a little decoration- like a frame around Jen's pendants. This needed to be simple and not distracting, underglaze inlay seemed to be a good fit. I drew a design into the clay with an xacto, coated it with underglaze, then wiped the excess away.

And the results! The notches at the top hold the necklace in place, while holes in the back supports give options for chain length, plus a little anti-theft. 

JDowd_CeramicStands_JenMcNaughtonNecklace.jpg

Come to the Takin it to the Streets fair on September 9th on the Jackson Town Square to see these in person. Well, come to see Jen's jewelry, really- you won't even notice the stands! And I'll be a few booth away with my pottery still thinking about new ways to display things.

FoundSpace: Update

Jenny Dowd

I'm used to projects offering more challenges than initially expected. Most things are not as simple as they seem, and making working thaumatropes proved that statement true over and over this summer.

Despite, or perhaps because of the difficulties, these are the projects I love the most. In frustration I'll leave my studio to take a walk, returning with another idea that I'm eager to try. I'll turn a difficult project around in my mind while working on something that makes sense- then when that project turns on me I'll go back to the other one.

To read about the first installment check out this past post and to read about the whole FoundSpace project check out this past post.

Thanks to installation by Matt Daly all 12 thaumatropes are now on display until the middle of August at Emily Steven's Park!

I got really serious about making the thaumatropes sturdy and functional, so for this final version each disk spins on an axle. The wood disks are glued and screwed together (learned from another early mistake.) The screws are counter-sunk on the last 4 disks so the drawing surface is smoother.

Each illustration was completed on paper, then transferred to the wooden disk using carbon paper and drawn/painted with acrylic paint pens. The illustration for the mottled sculpin was made on paper as well as vellum so I could check the overlap. When the disk spins both images are visible at once- for this image the mottled sculpin needed to look like he was under water- or more precisely, in a riffle.

After the logistics of creating spinning thaumatropes was figured out, the illustrations came easily as accompaniments to Matt's poems. 

One of the coolest things about working with Matt on this project was learning about these little critters. When I looked up images of the Bushy-tailed Woodrat I also learned that they will drop whatever edible thing they are carrying back to their stash in favor of a shiny object- like a spoon or coins!

I had no idea what a Mottled Sculpin was- and that they are tiny- end of a finger tiny! 

Plus the humor- while it may seem funny and light-hearted to authropormophise animals, it might also be serious. They might actually find each other obnoxious.

And cicadas might actually be pretty excited to graduate from nymph-hood!

The best part is that this project has made me look differently at this area I've lived in for over 10 years... there is always something to learn and something to see.

Stop by Emily Steven's Park to see all 12 before August 20th!

FoundSpace 2018: Part 1

Jenny Dowd

FoundSpace 2018 is ready to be explored! 

Now in its Fourth year, this project is a collaboration between the JH Land Trust and JH Public Art. FoundSpace offers the opportunity and challenge of interpreting conserved public land in creative and interactive ways. This year FoundSpace is at Emily Steven's Park just outside of Wilson, WY.

Last year I collaborated with Matt Daly, (see our project here) we had such fun that we decided to work together again. Inspired by the optical combination of words and images in thaumatropes, Matt wrote 12 short poems, one for each month, that highlight the overlooked (and often introverted) mini-fauna found in this area. 

I illustrated each poem, which has been challenging since the magic behind the thaumatrope is 3 drawings- one on each side, plus a combination of the 2 when the disk spins.

The image had to be clear enough to read, yet the multiple parts allowed for slightly more information. I was so excited about telling the stories that I missed an important step- the image has to be perfectly registered on each side so that when the disk flips the image is not blurry. Oops.

I drew the image on paper, transferred it to plywood with carbon paper, then registered the image using holes in the side of the disk. (As seen by the highly technical use of drill bits...) 

Each little critter has such personality and imagery created through Matt's words, it was easy to imagine the story and what I wanted to visualize. I am so excited to be part of this project and to work in collaboration with another creative who sees the world from a different angle. I'm already learning a lot about some of the mini-fauna that I was not aware of! 

The thaumatrope is made cut disks from plywood in a diameter to fit discarded bike wheels that Matt scavenged. I drew and painted on the primed surfaces and made cranks so they can be turned by hand. The stands were made by Matt from discarded fence posts, and all stand at different heights.

We've started with 4 thaumatropes, and will install all 12 within the next month. So stay tuned for updates, and if Emily Steven's Park is part of your normal routine be sure to check back periodically.

There are 3 more artists who have installed artwork in the park: Bronwyn Minton, Bland Hoke, and Brittany Hill. Check back for my post on Saturday June 9th for a full update!

And if you are in the area, stop by Thursday June 7th from 5-8pm for the opening event. (You'll be able to make your very own small thaumatrope!)

Pottery in Action: The White Buffalo Club

Jenny Dowd

I have been working on custom pottery for The Restaurant at The White Buffalo Club in Jackson for over a year. This is the first in a series of big orders and even though it still seems like it takes me a long time to finish anything- I can tell that I've gotten faster and more consistent thanks to this project!

At the start I met with Chef Joel Hammond to discuss plate forms and glaze colors. We started out with 1 bowl and 3 plate forms with 3 different glazes. Since completing these, we've started adding specialized plates and ramekins.

For the pieces shown here, I used stoneware with satin glazes that highlight speckles from the iron rich clay. All of these pieces were made in the clay studio at the Art Association, so in snatches of time between classes I often took over a few tables with stacks and stacks of pottery. (Check out my past blog post The Studios for more on how I balance work spaces.)

The speckles and satin earth tone glazes really fit the theme that Chef Joel has created at the White Buffalo Club. He sources local and regional products that highlight small ranches and farms. This extends to local handmade products- not just pottery, also the tables in the restaurant!

One plate form was totally new for me, a shallow flat plate with straight sides. While making the form was simple, I wanted to also ensure that the plates stacked well- imagining a busy kitchen. I came up with a simple solution to bevel the bottom edge- so each plate fits slightly inside of the plate it is on top of.

Working with chefs to create custom dishes to support their vision has quickly become one of my favorite parts of being a potter. Joel came by the studio one day to try out an idea- I made a deep wide bowl and he pressed in and shaped the side... now I'm replicating this form and I can't wait to see what will go in it! I am also currently working on a specialized steak plate. So stay tuned, there is much more to come.

Visit the White Buffalo Club's Facebook page to see more images of my pottery in action, with yummy things on them. (All food photos on this post are from this page.)

Better yet, make time for dinner- The Restaurant at The White Buffalo Club re-opened May 11 for the season, so stop by to see what's new!

Make & Reuse

Jenny Dowd

I'm always looking for ways pottery can be helpful. 

Bronwyn, Director of Programs & Events at the Art Association, was looking for a way to provide reusable cups at gallery openings and events. Pottery ended up being part of the solution.

Jam jars solve the problem of trash (and cost) generated by throw-away drink cups, despite the extra work of washing, they feel great to hold and at the end of the night the trash cans are light. (If you are in Jackson and have jam or small jars that are not going to get filled with more deliciousness- bring them by the Art Association and put them to work!)

The another reusable option is something you can use and take home with you! I've been making small ceramic cups specifically for the gallery programs. During events the gallery offers the cups for $10- which we split, I see it as a small way I can help support the Art Association, and give a shout out to the ceramics program.

Since the clay studio is right next to the gallery it is always easy to find serving options for the snacks!

Food.jpg

I was focused on seeing this idea put into action Friday night, I also enjoyed the artwork, but you'll have to stop by to see the annual Member's Show on your own as I didn't take any photos!

Pottery in Action: The Wild Sage

Jenny Dowd

Here's a behind the scenes look into a project I've been working on for the past few months. I'm currently working on pottery for several Jackson area restaurants (more updates to come!) the latest one is the Wild Sage located in the Rusty Parrot

I've not been great about photographing the work, I was so excited to deliver these pieces that they went straight from the kiln into boxes. That just means that now I have an even better excuse for dinner out! (Besides, pottery always looks better with food.)

Last fall, Chef Travis Catanzaro contacted me to discuss new pottery designs for the restaurant. Since then I've been making sauce bowls, pitchers, ramekins and bread baskets with a stoneware, earth-tone inspired palette. 

One of these forms, the bread basket, is intended to replace the metal woven baskets they have been using. After measuring the existing baskets, my first thought was to find a form that I could slump the clay over. I wasn't terribly excited about the simple oval form that would be created, so I took some time to think.

Eventually, I wondered if the clay could be folded into the squared oval shape that I was seeking. After a few paper test pieces, I was able to make a pattern. Rolling the slab of clay onto burlap gave the outside texture. The walls were folded up and since the baskets are the same size, they also stack. (The first few were pretty wonky, I learned that the template was really important.)

Amazingly, when I sent Travis a photo of the prototype basket, he told me about a bread dough that is wrapped in fabric with texture similar to burlap, the process then transfers the texture to the bread!

These ramekins are a new form for me as well. As an extra challenge I had to find an oven safe clay that could survive the thermal shock delivered from the oven. The dishes are wheel thrown and then slightly pressed on the sides to create the oval shape. When glazing I used 6 glazes in a variety of combinations- you can see by my notes (on the left) how I had to make a plan to keep things organized.

So if you are in Jackson, be sure to stop by the Wild Sage for dinner. I know I can't wait to see these pieces in action!

The Studios

Jenny Dowd

It seems I've got a lot of projects going on.

To keep things somewhat orderly, I have been spliting my time between two studios. I work in the ceramics studio at the Art Association in Jackson to produce stoneware projects, and my home studio in Alpine for porcelain. (That way I don't have to worry about splattering the porcelain with brown stoneware... and I don't have to clean my home wheel as much.)

The studio at the Art Association is public, so I spread out when I can and condense when there are more people using the space.

The stoneware plates and bowls here are part of the dishes I have been producing for the White Buffalo Club in Jackson (more on that soon!) I use the wheels at the Art Association for these stoneware dishes and also fire the work in the gas kiln. Some of my porcelain work is also glazed and fired in Jackson. These black and white teapots & cups are available for sale at Healthy Being Juicery and the large salad bowls are used in their cafe.

On the days I'm not in Jackson, I'm in my home studio. Most of this work is fired in my electric kiln, and decorated with sgraffito or inlay techniques. (Home is also where I work on non-pottery projects: sculpture, drawing, and soon... a printmaking studio!)

At home I'm shadowed by Merlin, the studio cat / Dowd House Studios Quality Control Overseer. Merlin is not very helpful, but he does let me know when I've been working for too long / ignoring him. So when he starts staring at me or attacking my work I know it's time to take a break.

I feel a bit spread out, but this seems to work! Mid-week I get to switch gears and work on different projects while I consider problems I've left behind in the other studio. 

Time for Tea(pots)

Jenny Dowd

I can no longer deny that the weather in Western Wyoming has turned. While I'm sure there will still be plenty of warmish fall days, these cool cloudy mornings have found me and Merlin hanging out close to the fireplace.

Last year when a friend asked me to make her a teapot I started by asking myself why I hadn't been making teapots.

Teapots are complicated and highly specific forms. The tradition is strong, with a million beautiful little details. I enjoy these details yet felt that I should make the teapot that I would use.

I also felt a little ashamed that my favorite teapot is this cute little red commercial teapot. I love this teapot, it reminds me of my first apartment. I'm pretty sure that's when my mom let me pick it out at my favorite tea shop.

This little teapot is just that, simple and highly functional with a removable tea strainer perfect for loose teas. 

With all this in mind, I started making teapots with these characteristics; round and simple, easy to clean, cute. They do not have a strainer inside the spout or a mesh strainer that sits down inside of the lid, instead I use a tea ball infuser. 

I was really excited about designing the cups & saucers. Some inspiration came from using a teacup in a cafe that I felt was too big to hold with one hand.

These cups are small and fit easily in my hand. The saucers provide an interesting canvas for design, I have a lot of fun mixing and matching saucers with cups.

The cup and saucer patterns inspire decoration for the teapots. 

Mmmm... I feel warmer already!

IMG_20170811_150119_310.jpg